| View previous topic :: View next topic |
| Author |
Message |
ChiGuy82
Member

Joined: May 03, 2009
Posts: 41
|
 Posted: Sat Dec 03, 2011 8:00 pm Post subject: 1952 M38A1 tranny/clutch/eng Pic Heavy-Does this look right? Posted: Sat Dec 03, 2011 8:00 pm Post subject: 1952 M38A1 tranny/clutch/eng Pic Heavy-Does this look right? |
 |
|
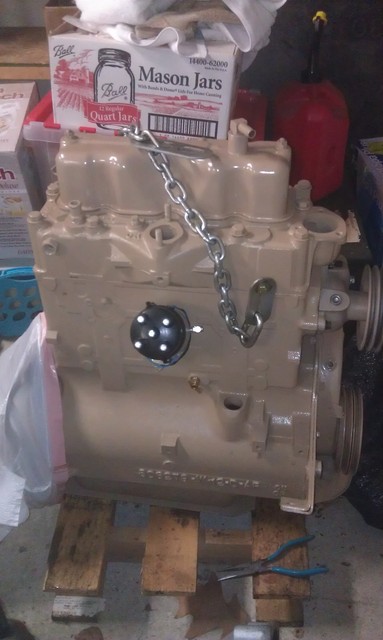
Hey guys,
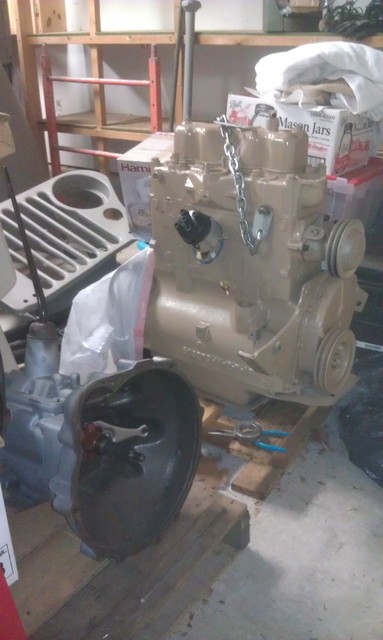
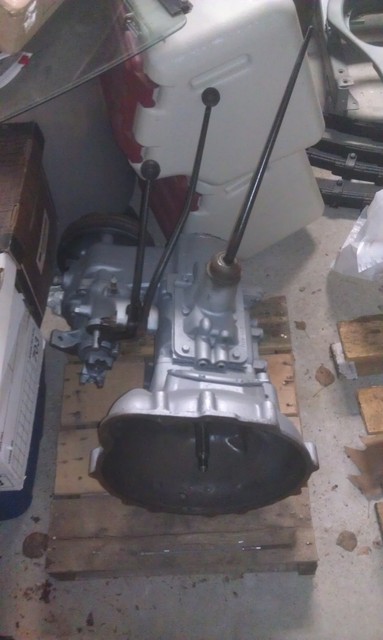
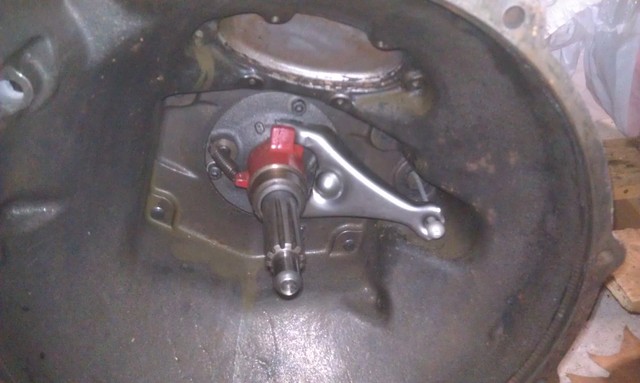
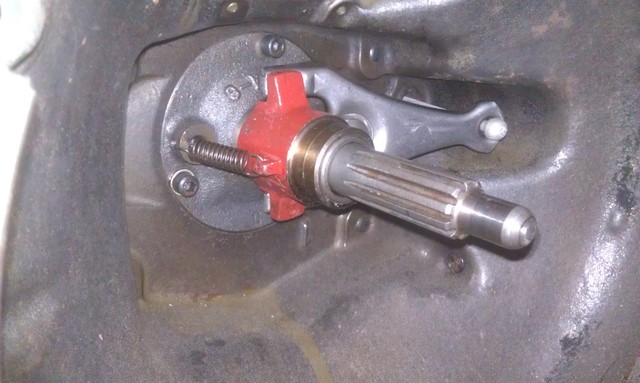
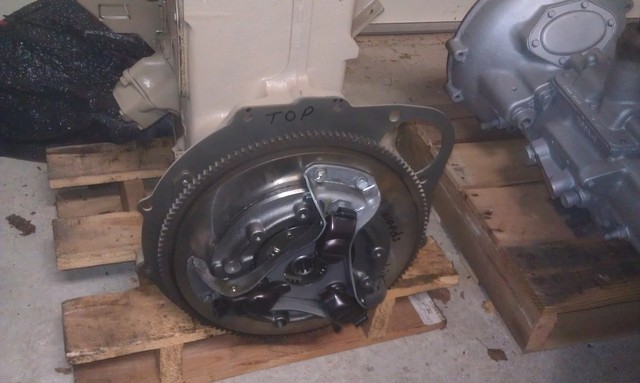
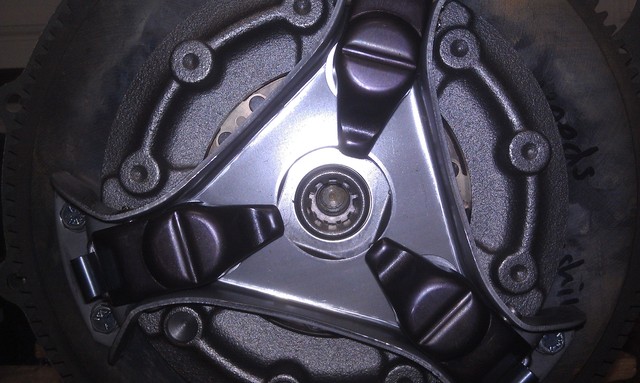
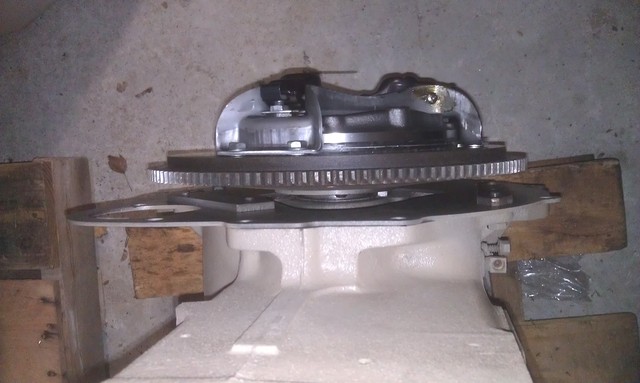
I asked a few days ago about my bellhousing and clutch. I just wanted to know what you guys think of how I did and if I have to do anythng else before I can attach the engine to the transmission and put it on my frame? If you can't see something, just let me know and I will take a picture of it.
Any help is much appreciated.
Thanks,
Mike


 |
|
| Back to top |
|
 |
hill
Member

Joined: Jun 06, 2009
Posts: 73
Location: Corbin, Ky.
|
| Posted: Sat Dec 03, 2011 9:13 pm Post subject: 1952 M38A1 tranny/clutch/eng Pic Heavy-Does this look right? |
|
|
The one main thing that I can see is that even though you have what looks like a plastic bag on the engine it is still a very good idea to have all of the holes such as the intake ,thermostat housing ,spark plug holes distributor housing and any other holes ether taped shut or rags or other means of closing up every thing because it is very easy to drop a nut or bolt or something else that could be very harmful to your engines health and also mice and other critters like to make homes in such places as intakes and exhaust ports and the like. I only say this out of personal experience from years of working on vehicles.  |
|
| Back to top |
|
|
wesk
Site Administrator


Joined: Apr 04, 2005
Posts: 16265
Location: Wisconsin
|
|
| Back to top |
|
|
Yarder
Member

Joined: Feb 18, 2009
Posts: 43
Location: Seattle, WA USA
|
| Posted: Sat Dec 03, 2011 9:58 pm Post subject: |
|
|
PUt the rubber protector on the clutch release cable before you install it too. The rubber will also help stabilize the cable during the installation process.
I put the rubber on AFTER it was installed and the cable dislodged from the fork, and then that was a totally involved project when the fork dropped. The FIRST time I had it out, we also put a loose string loop over the clutch cable and the fork to prevent the two from coming apart. |
|
| Back to top |
|
|
53a1
Member

Joined: Jun 25, 2008
Posts: 583
Location: Kern Co.
|
| Posted: Sun Dec 04, 2011 7:48 am Post subject: |
|
|
Looks nice.
X2 on covering the ports on the engine ASAP.
Your civvy distributor may not clock the same as a military one so if you plan on switching plan on pulling the oil pump to get it to time. Much easier to do with the engine out.
Did you get a new felt seal for the input shaft on the tranny? Very cheap and simple investment while the tranny is out.
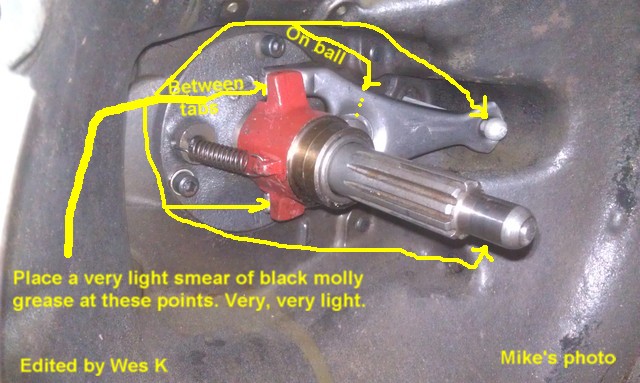
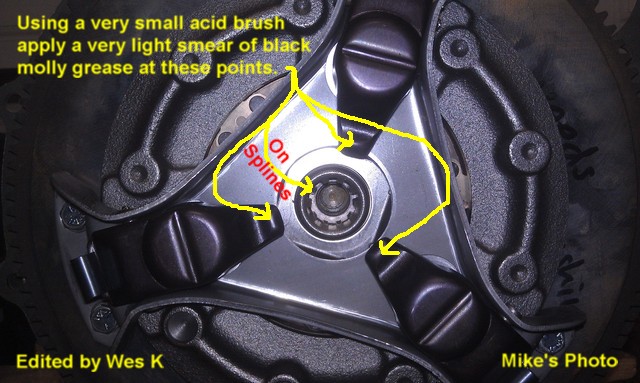
Make sure you change your pilot bearing and check the fit with an extra input shaft. Properly prep your pilot bearing as Wes has described many times.
Chase all threads on remaining bolt holes (if required) with tap before installation.
_________________
'53 M38A1 X2 |
|
| Back to top |
|
|
ChiGuy82
Member
Joined: May 03, 2009
Posts: 41
|
| Posted: Sun Dec 04, 2011 9:22 am Post subject: |
|
|
Awesome!! Thanks Guys! Thanks Wes for the pictures! Hey, 53A1, where do you get those felt seals from and where do you put it since I cant find it in the M38A1 manual...? Yarder, the rubber clutch seal is the black rubber boot that goes on the outside of the bellhousing, right?
Thanks again,
Mike |
|
| Back to top |
|
|
Bretto
Member
Joined: Nov 24, 2010
Posts: 1390
Location: Orem, UT
|
|
| Back to top |
|
|
rdsar2k
Member

Joined: Nov 13, 2007
Posts: 289
Location: Fort Smith Arkansas
|
| Posted: Sun Dec 04, 2011 10:12 am Post subject: flywheel bushing |
|
|
Did you install a new flywheel bushing? Dont see it in the pics.
_________________
1955 M170
1980 JD 450C
1948 Ford 8N
2008 Rubicon Unlimited MyGig |
|
| Back to top |
|
|
wesk
Site Administrator
Joined: Apr 04, 2005
Posts: 16265
Location: Wisconsin
|
|
| Back to top |
|
|
Yarder
Member
Joined: Feb 18, 2009
Posts: 43
Location: Seattle, WA USA
|
| Posted: Sun Dec 04, 2011 10:12 pm Post subject: |
|
|
| ChiGuy82 wrote: | Yarder, the rubber clutch seal is the black rubber boot that goes on the outside of the bellhousing, right?
Thanks again,
Mike |
Yes, that's the one. I tried to put that on the last time after I had the engine in the vehicle. In trying to scoot the rubber down the cable, the cable came loose from the fork, and then the folk came off, and then.......
Had I had the rubber protective boot installed out of the jeep, things would have been better secured. |
|
| Back to top |
|
|
skyjeep50
Member

Joined: Feb 20, 2007
Posts: 606
Location: Illinois
|
| Posted: Mon Dec 05, 2011 10:46 am Post subject: |
|
|
Ditto everything that has been mentioned so far, especially Wes's comment on the proper lift bracket - makes it easy to install the engine and trans as a unit.
I would also add any item that is attached to the engine such as carb and crosstube, starter, generator, fan and belts, engine mounts, radiator and hoses, vent and fuel lines, spark plug wires and plugs. Get the distributor rough timed using the timing indicators (mark on 5 before TDC and points just opening). It is so much easier to work on adding accessories and fixtures when the engine is on a benchtop or the floor than when it is in the jeep. The engine, trans and all accessories were made to pull out and install as an entire assembly. One thing you will have to remove first is the shifters unless you are going to be dropping the body on the jeep after the engine.
To save a little weight you could add lubricants and coolant after you have the engine installed.
Good luck with your install!
_________________
1951 M38 |
|
| Back to top |
|
|
|