| View previous topic :: View next topic |
| Author |
Message |
ACRay
Member
![]()
Joined: Jul 24, 2014
Posts: 80
Location: Fort Bliss Texas
|
 Posted: Wed Oct 29, 2014 9:43 pm Post subject: Combat Medic budget 1952 M38 Posted: Wed Oct 29, 2014 9:43 pm Post subject: Combat Medic budget 1952 M38 |
 |
|
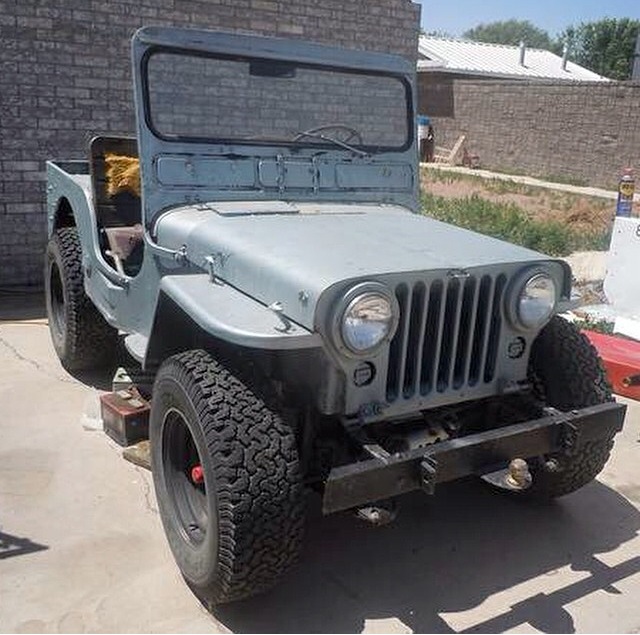
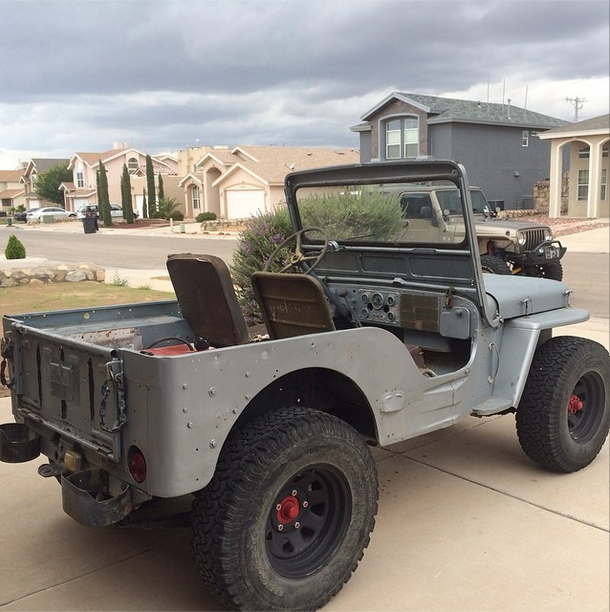
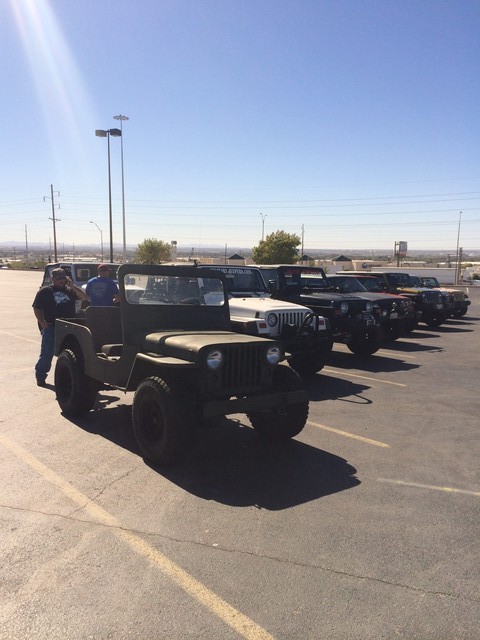
Here's MC71767! I've wanted an MV "flattie" for as long as I can remember. I had a CJ3B and a Jeep buddy talked me into selling it to him. SO, I decided it wast time to get an MB, GPW or M38. Considering the only other Military vic close to me was an MB that was bubba restored and the guy wanted 27,500 for it. I passed. FINALLY I found this M38 on Craigslist 5 hours away. I hopped in my TJ and went to pick it up. First pic is when I went to get it. It's still 24v. Great running 134L and smooth shifting trans and T-case so she came home with me.
Next thing I did for a little motivation was decide that it wasn't in my budget to restore it to 100% correct mil-spec because I'm not rich hahaha. SO I got some rattle can green and some eBay parts to get her running and working a little better. I'll post some real pics later with under hood and all the serial number plates I have on it later. I just wanted to start a thread since I've been on the forum for nearly 3 months without adding at least a photo of my little treasure
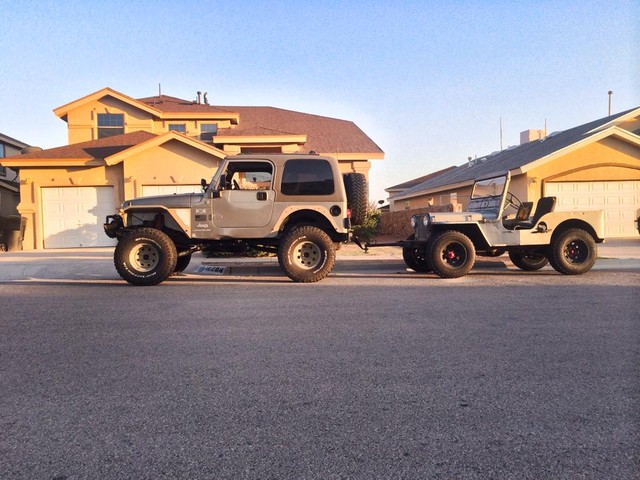
here's the day I got here home with my TJ
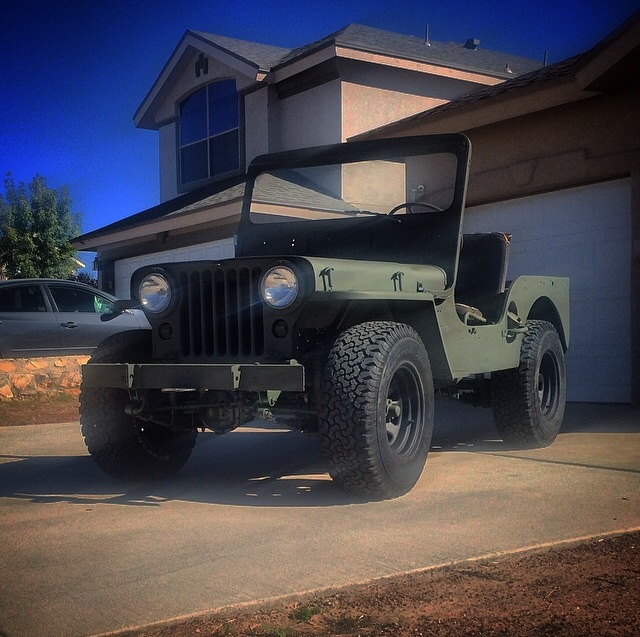
and after my rattle can job to get it green and me all hooah about getting it drive-able
 |
|
| Back to top |
|
 |
wesk
Site Administrator


Joined: Apr 04, 2005
Posts: 16241
Location: Wisconsin
|
|
| Back to top |
|
|
RICKG
Member
Joined: Aug 31, 2010
Posts: 1740
Location: SO IDAHO
|
| Posted: Thu Oct 30, 2014 3:13 pm Post subject: |
|
|
You're gonna have FUN with that!!
_________________
keep 'em rollin'
RICKG MC 51986 DOD 01-52, '50 CJ3a |
|
| Back to top |
|
|
jimm
Member

Joined: Nov 01, 2011
Posts: 199
Location: Escondido, CA
|
| Posted: Thu Oct 30, 2014 9:45 pm Post subject: |
|
|
Man, that looks like a great starting point. I know there are always "surprises" to be found as you get into a project, and vehicles always look better in photos than up close in person, but it looks darn good from here. Have fun and keep us posted.
_________________
Jim McKim
1952 M38 son-father project
Slowly turning rusty parts into OD parts |
|
| Back to top |
|
|
ACRay
Member
![]()
Joined: Jul 24, 2014
Posts: 80
Location: Fort Bliss Texas
|
| Posted: Fri Oct 31, 2014 7:11 am Post subject: |
|
|
| jimm wrote: | | Man, that looks like a great starting point. I know there are always "surprises" to be found as you get into a project, and vehicles always look better in photos than up close in person, but it looks darn good from here. Have fun and keep us posted. |
Thanks for the kind words fellas!
There have been a few suprises, I bought it and was told it was "all original" which was half true. Except for some little stuff like tail lights. Main thing is it needs me to basically rewire the whole thing. Luckily I actually like electrical, jokes on them hahaha. BUT I'm praying and crossing my fingers about this gas tank. It had 3 holes in it and I decided that buying a new tank was out of the question. SO, I got some JB Weld and QuickSteel and went to work day before yesterday. More to follow after I get some good pics this weekend |
|
| Back to top |
|
|
ACRay
Member
![]()
Joined: Jul 24, 2014
Posts: 80
Location: Fort Bliss Texas
|
| Posted: Sat Nov 01, 2014 3:57 pm Post subject: |
|
|
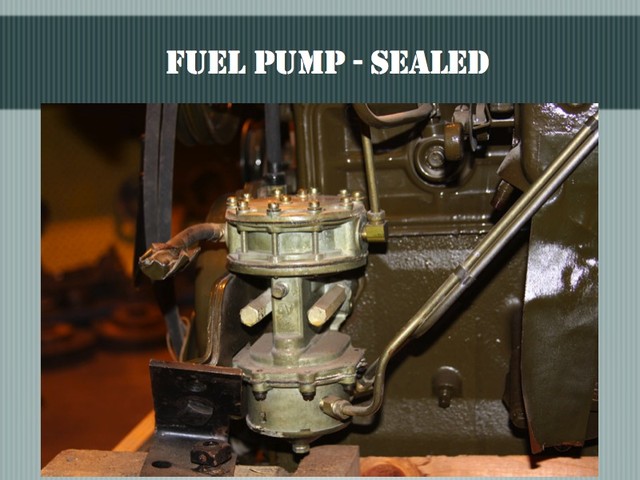
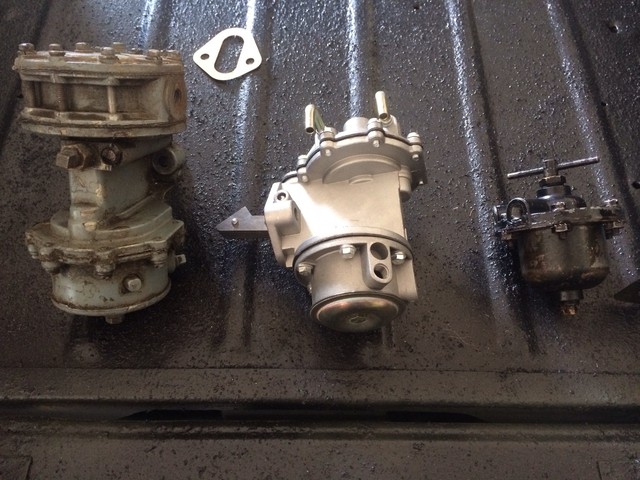
More pics to follow, but I got my new dual action fuel / vacuum pump in the mail today. SO, in the pic is the fuel pump that came in a box with my M38. Middle is the dual action I paid $50 for new so I couldn't complain and on the right is the cuno filter I eBayed. I'll post a picture in a second of why I went with an incorrect fuel pump and explain next
 |
|
| Back to top |
|
|
ACRay
Member
![]()
Joined: Jul 24, 2014
Posts: 80
Location: Fort Bliss Texas
|
| Posted: Sat Nov 01, 2014 4:09 pm Post subject: |
|
|
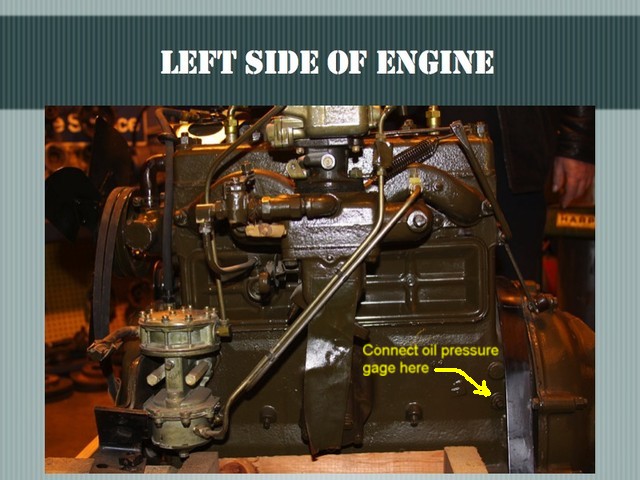
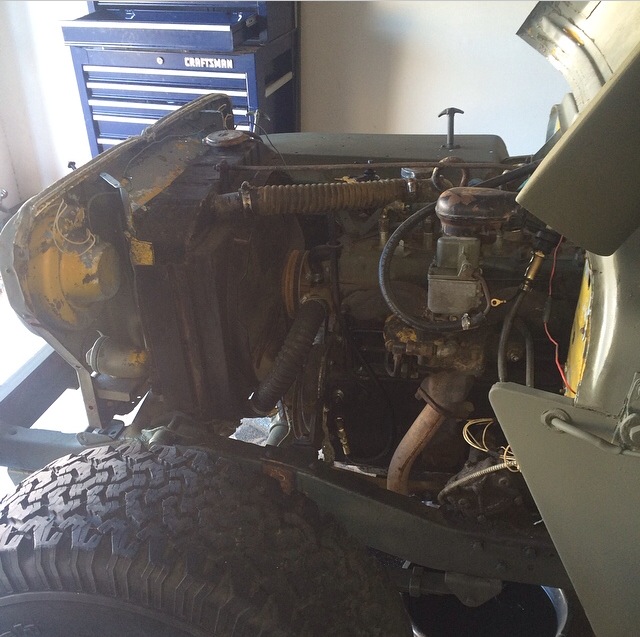
I went with the cheapo dual function fuel pump because I got the M38 with the instructions "flip this switch on to turn the pump on before you crank it" and then saw this electric fuel pump mounted on the fender.
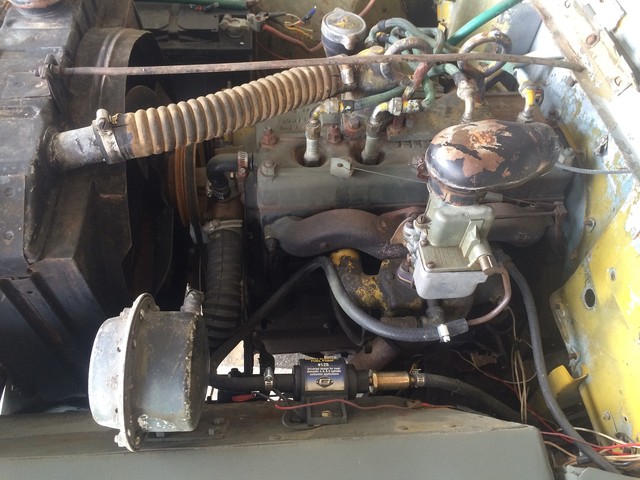
Also wanted to say that the oil bath isn't missing it's being cleaned and yes I know that's the wrong carb, but the WO works (after I tore it apart and put new parts in it) and came with it hahaha. I'm not gonig to go back with 100% resto correct because I just don't have the income to dump money in a M38 and a rock crawling TJ, but I'm not going to jack it all up either, I promise. LOL I'm from Mississippi, but I'm not THAT redneck.
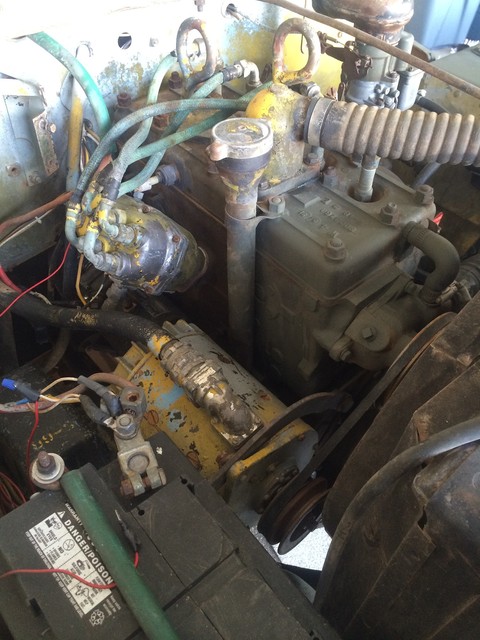
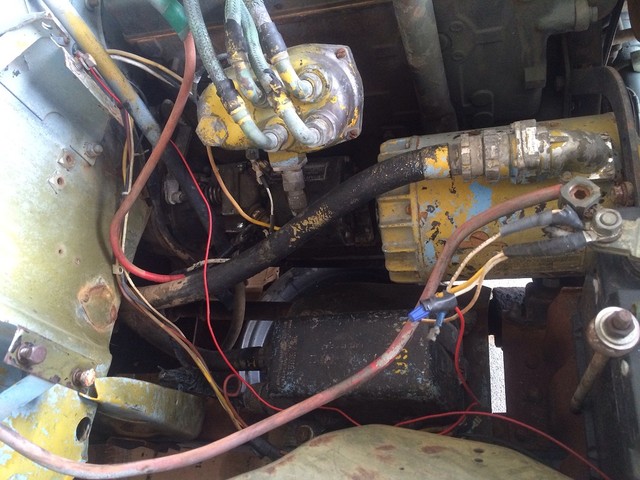
Here's some more hacking that was done before I got it ... no clue why there's so many un terminated wires hanging off the battery, but one hooks to the headlights apparently because the master switch is bad.
 |
|
| Back to top |
|
|
ACRay
Member
![]()
Joined: Jul 24, 2014
Posts: 80
Location: Fort Bliss Texas
|
| Posted: Sun Nov 02, 2014 5:20 pm Post subject: |
|
|
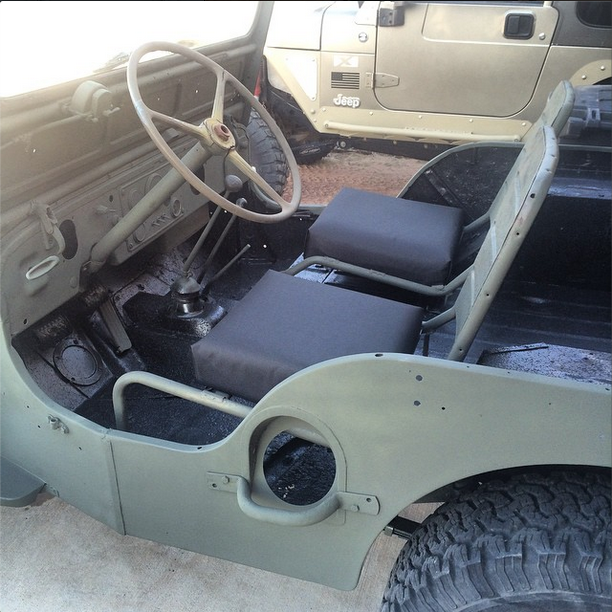
Still crossing my fingers the vinegar cleans out the gas tank and It's looking better so, while I'm goofing off I did a temp cheap fix for the seats, I got outdoor heavy duty fabric and wrapped some seat cushion material with them over the plywood that came with my M38. Didn't turn out too bad, but it won't win car shows for sure
 |
|
| Back to top |
|
|
ACRay
Member
![]()
Joined: Jul 24, 2014
Posts: 80
Location: Fort Bliss Texas
|
| Posted: Thu Nov 06, 2014 7:22 pm Post subject: |
|
|
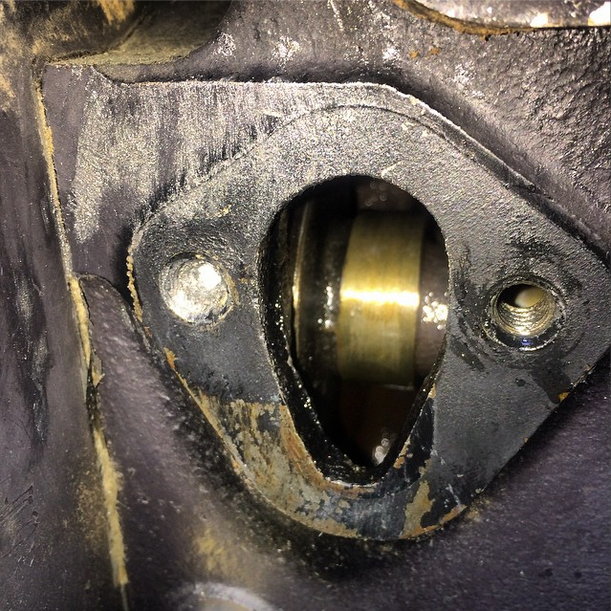
So, I didn't think about how dumb it was to use the original bots on my new fuel pump ... I was using a quarter inch ratchet and doing a pretty good job at being gentle when I had that sinking feeling. That feeling you get when you break a bolt off in the engine block rendering your Willys useless
 |
|
| Back to top |
|
|
wesk
Site Administrator
Joined: Apr 04, 2005
Posts: 16241
Location: Wisconsin
|
|
| Back to top |
|
|
ACRay
Member
![]()
Joined: Jul 24, 2014
Posts: 80
Location: Fort Bliss Texas
|
| Posted: Thu Nov 06, 2014 9:18 pm Post subject: |
|
|
| wesk wrote: | That was one strong 1/4" drive ratchet! 
After you drill and remove the stub a word of caution. You do not use the spacer that was between the military pump and the block with the civvy pump you now have. |
I did double check on that one and wasn't going to use the spacer, I was using the bolts with washers (looked dumb, but it was going to be very temp) This is a lesson that I've learned before when I re-used ring gear bolts when installing the locker in my TJ, but I guess I forgot about the fact that grade 8 bolts are cheap and readily available. At least I have a nice bolt extractor in the tool box ha ha ha |
|
| Back to top |
|
|
4x4M38
Member

Joined: May 30, 2014
Posts: 3444
Location: Texas Hill Country
|
|
| Back to top |
|
|
keats
Member

Joined: Apr 14, 2005
Posts: 332
Location: Middletown Ct
|
| Posted: Thu Nov 06, 2014 11:59 pm Post subject: one of the best broken bolt extractor systems i have used |
|
|
http://www.quikcenter.com
Last edited by keats on Sun Nov 09, 2014 12:28 am; edited 1 time in total |
|
| Back to top |
|
|
ACRay
Member
![]()
Joined: Jul 24, 2014
Posts: 80
Location: Fort Bliss Texas
|
| Posted: Sat Nov 08, 2014 8:39 pm Post subject: |
|
|
So I got the bolt drilled and tapped, put the block off plate back on for now because there was a food drive / meet and greet at 4WheelParts here. Not pictured, but I got the cuno filter mounted. First time taking off the fender, I was super excited about how easy it is to get off and how much easier it is to work on it after.
 |
|
| Back to top |
|
|
wesk
Site Administrator
Joined: Apr 04, 2005
Posts: 16241
Location: Wisconsin
|
|
| Back to top |
|
|
|