Finally started working on my M38
-
wesk

- Site Administrator

- Posts: 16462
- Joined: Sun Apr 03, 2005 6:00 pm
- Location: Wisconsin
- Contact:
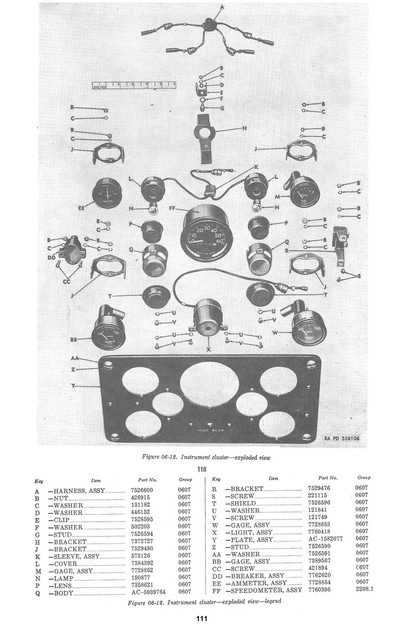
Brian, Which item # are you referring to?
Wes K
45 MB, 51 M38, 54 M37, 66 M101A1, 60 CJ5, 76 DJ5D, 47Bantam T3-C & 5? M100
Mjeeps photo album: http://www.willysmjeeps.com/v2/modules. ... _album.php
45 MB, 51 M38, 54 M37, 66 M101A1, 60 CJ5, 76 DJ5D, 47Bantam T3-C & 5? M100
Mjeeps photo album: http://www.willysmjeeps.com/v2/modules. ... _album.php
-
4x4M38

- Jeep Legend

- Posts: 3487
- Joined: Thu May 29, 2014 6:00 pm
- Location: Texas Hill Country
Hi Wes,
Part of item M. But it is pointing to the bulb. That is the lamp assembly. I guess the pair is listed under one number. Anyway there is a rubber grommet/sleeve on the back that transitions from the wire to the housing, maybe an inch long? Mine were dry and crumbled.
I’ll try and find a photo
Part of item M. But it is pointing to the bulb. That is the lamp assembly. I guess the pair is listed under one number. Anyway there is a rubber grommet/sleeve on the back that transitions from the wire to the housing, maybe an inch long? Mine were dry and crumbled.
I’ll try and find a photo
-
ocwd
- Jeep Enthusiast

- Posts: 721
- Joined: Sun May 13, 2007 6:00 pm
- Location: Placentia, CA
Lights
I kinda thought you meant that. But, isn't that just part of the light? I have two lights with roached out wiring and those rubber parts are crumbling.
Looking at the illustration posted by Wes, do those lights come apart for rebuild? The illustration shows them in parts. I'll have to look at them when I get home.
Looking at the illustration posted by Wes, do those lights come apart for rebuild? The illustration shows them in parts. I'll have to look at them when I get home.
-
wesk
- Site Administrator
- Posts: 16462
- Joined: Sun Apr 03, 2005 6:00 pm
- Location: Wisconsin
- Contact:
The lamps are "N" not "M". "M" is the fuel gauge. The rubber tail end boots are a part of the rear cover assembly, item "L". ORD# 7384392.
The #40 sits right on the rubber tail boot.
The body and shield are retained on the gauge panel with the two screws. The rear cover assembly can be rotated and removed to allow the lamp change.
Perhaps this will clear things up a bit:
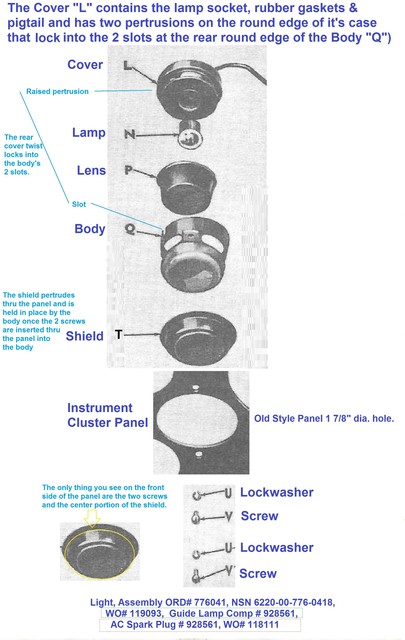
Remember folks this applies to the M38's and M38A1/M170's produced from 1950 thru 1955. The later M38A1's and the M170's used the M151 style dash lamps.
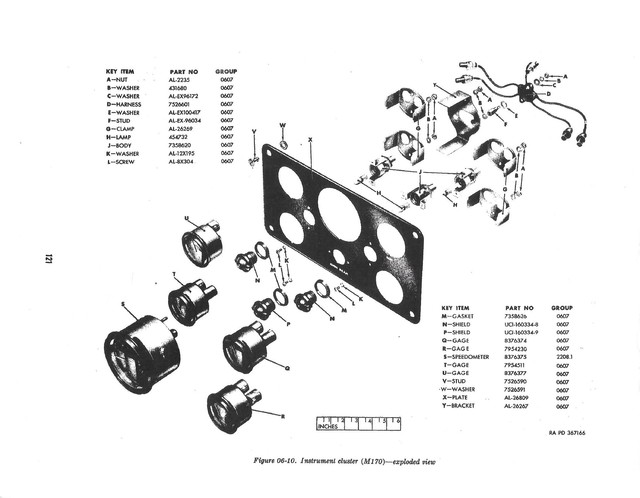
The #40 sits right on the rubber tail boot.
The body and shield are retained on the gauge panel with the two screws. The rear cover assembly can be rotated and removed to allow the lamp change.
Perhaps this will clear things up a bit:
Remember folks this applies to the M38's and M38A1/M170's produced from 1950 thru 1955. The later M38A1's and the M170's used the M151 style dash lamps.
Wes K
45 MB, 51 M38, 54 M37, 66 M101A1, 60 CJ5, 76 DJ5D, 47Bantam T3-C & 5? M100
Mjeeps photo album: http://www.willysmjeeps.com/v2/modules. ... _album.php
45 MB, 51 M38, 54 M37, 66 M101A1, 60 CJ5, 76 DJ5D, 47Bantam T3-C & 5? M100
Mjeeps photo album: http://www.willysmjeeps.com/v2/modules. ... _album.php
-
ocwd
- Jeep Enthusiast
- Posts: 721
- Joined: Sun May 13, 2007 6:00 pm
- Location: Placentia, CA
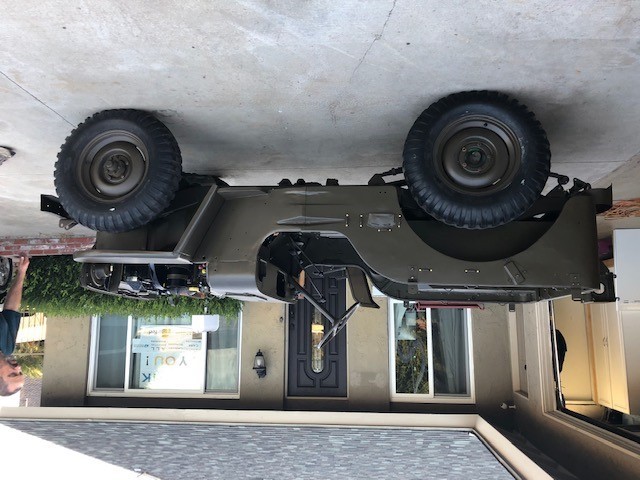
Tub Installed
Got the tub, fenders, grill, tailgate, and radiator installed over the week end. Also started installing the wiring harness.
-
wesk
- Site Administrator
- Posts: 16462
- Joined: Sun Apr 03, 2005 6:00 pm
- Location: Wisconsin
- Contact:
Transferred from stand alone post to part of the original po
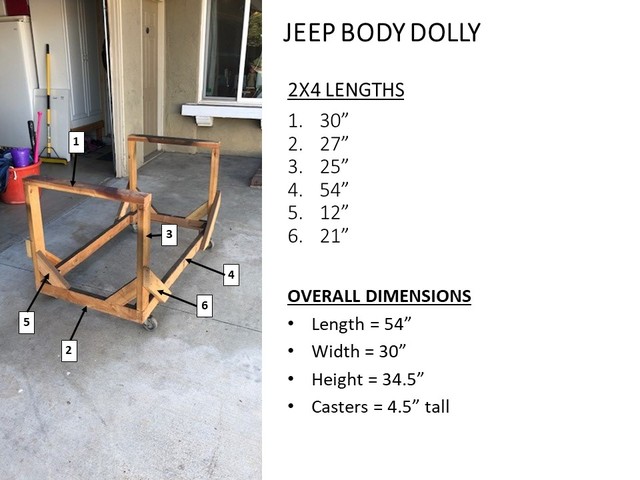
PostPosted: Wed Sep 02, 2020 8:53 am Post subject: Body Dolly By: ocwd
Don't need the body dolly anymore. It's nice to be making space in my garage.
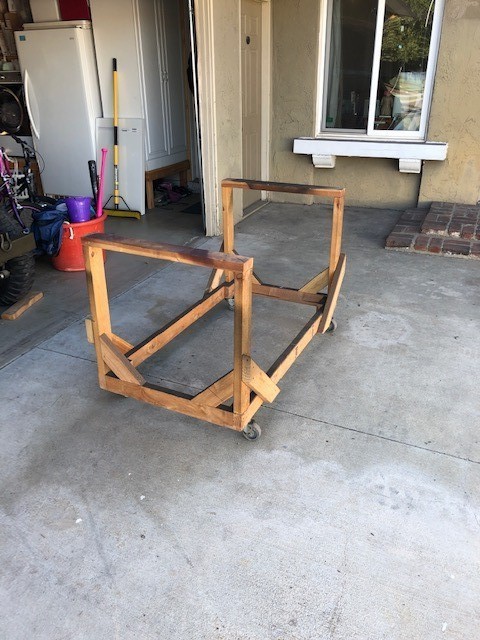
Don't need the body dolly anymore. It's nice to be making space in my garage.
Wes K
45 MB, 51 M38, 54 M37, 66 M101A1, 60 CJ5, 76 DJ5D, 47Bantam T3-C & 5? M100
Mjeeps photo album: http://www.willysmjeeps.com/v2/modules. ... _album.php
45 MB, 51 M38, 54 M37, 66 M101A1, 60 CJ5, 76 DJ5D, 47Bantam T3-C & 5? M100
Mjeeps photo album: http://www.willysmjeeps.com/v2/modules. ... _album.php
-
ocwd
- Jeep Enthusiast
- Posts: 721
- Joined: Sun May 13, 2007 6:00 pm
- Location: Placentia, CA
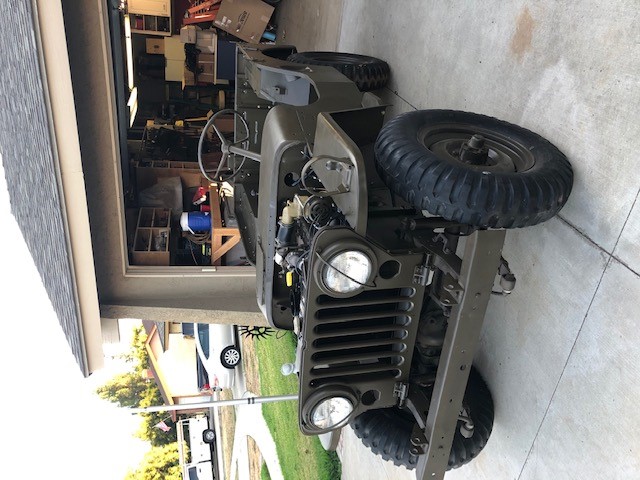
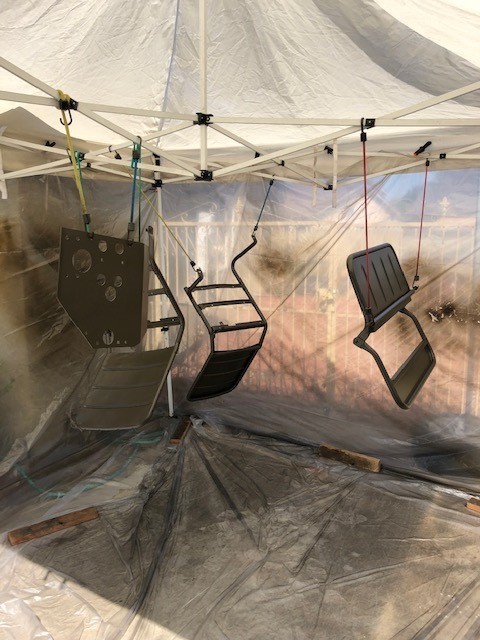
More Progress
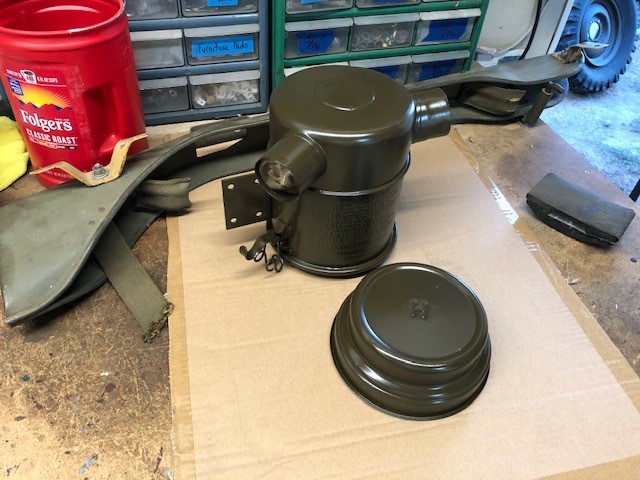
I decided to paint my air cleaner OD instead of black. I think i'm just about done painting large parts. I just need to finish painting my windshield frame. I've put 3 coats of paint on it and still have red primer showing through. I'll need to get in the corners with a brush.
-
ocwd
- Jeep Enthusiast
- Posts: 721
- Joined: Sun May 13, 2007 6:00 pm
- Location: Placentia, CA
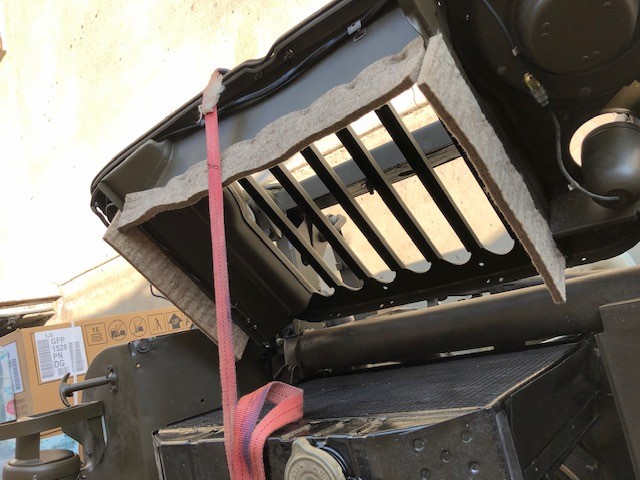
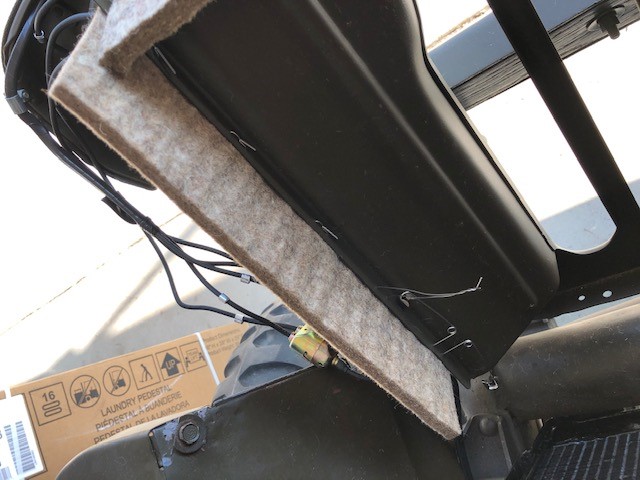
Radiator Seal
I got the radiator seal installed last weekend. I used a couple of safety pins to make holes in the felt then poked the fasteners through. I used the staples from the kit for the top and safety wire for the sides. The safety wire was much easier to work with.
-
4x4M38
- Jeep Legend
- Posts: 3487
- Joined: Thu May 29, 2014 6:00 pm
- Location: Texas Hill Country
-
keats

- Jeep Enthusiast
- Posts: 342
- Joined: Wed Apr 13, 2005 6:00 pm
- Location: Middletown Ct
you can coat the felt with the plastic dip liquid rubber used to coat tool handles etc. It will look just like the originals found on m38's
https://www.lowes.com/pd/Plasti-Dip-14- ... lsrc=aw.ds
https://www.lowes.com/pd/Plasti-Dip-14- ... lsrc=aw.ds
Gary Keating
1949 C3A, 1952 M38,
1954 M170, 1957 Cj3B
1949 C3A, 1952 M38,
1954 M170, 1957 Cj3B
-
ocwd
- Jeep Enthusiast
- Posts: 721
- Joined: Sun May 13, 2007 6:00 pm
- Location: Placentia, CA
Body Dolly
See below. I used #8x3" construction screws to put it together. The casters are from an old furniture dolly that I had. Locking casters might be a good idea. I just threw small pieces of wood under the wheels to keep it from rolling around while I worked on the Jeep.