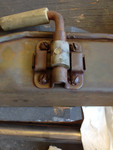
Yes, Rick, the rod rotates over across the mount very easily.
The rubber is very hard though. The spring steel jobbies are
pretty stiff but probably supposed to be so. Need to figure out
how to replace the webbing. Looks riveted on.
The u shaped round bar at the bottom is missing so I'll need to
fab that pup.
Basically a light patina of surface rust/dust but no corrosion
to speak of.
Thought I'd get an idea off the Internet what an M1 carbine might run nowadays.
Geez .
1950 M38 find
-
4x4M38

- Jeep Legend

- Posts: 3487
- Joined: Thu May 29, 2014 6:00 pm
- Location: Texas Hill Country
-
ChuckW
- Active Member

- Posts: 210
- Joined: Sat Apr 16, 2005 6:00 pm
- Location: Alabama
Check this thread:
http://www.willysmjeeps.com/v2/modules. ... pic&t=9511
http://www.willysmjeeps.com/v2/modules. ... pic&t=9511
Chuck W.
Dixie Division MVC #002
1952 M38/M100
M274A2
1964 CJ3B
Dixie Division MVC #002
1952 M38/M100
M274A2
1964 CJ3B
-
4x4M38
- Jeep Legend
- Posts: 3487
- Joined: Thu May 29, 2014 6:00 pm
- Location: Texas Hill Country
Yup,
I remember the thread well, Chuck.
Come on, you just wanted to bump that really nice M38 back up, right?
I did look at some Airsoft M1's yesterday. That led to the M1919, then a Thompson, then a guy that built a Ma Deuce, then a website that sold parts and showed how to semi a 1919, then.........
Before I knew it I forgot what I was looking for originally!
I hate the Internet.
Did you build the 1919 from plans?
Nice jeep, by the way.
B
-
4x4M38
- Jeep Legend
- Posts: 3487
- Joined: Thu May 29, 2014 6:00 pm
- Location: Texas Hill Country
Rifle holder
Hey Rick,
Are there supposed to be just two springs, one on each side
under the swivel barrel holder? Because those two seem pretty
loose and the L shaped holder does not stay in place.
Seems like maybe there is another spring steel piece missing.
Are there supposed to be just two springs, one on each side
under the swivel barrel holder? Because those two seem pretty
loose and the L shaped holder does not stay in place.
Seems like maybe there is another spring steel piece missing.
-
RICKG
- Jeep Legend
- Posts: 1752
- Joined: Mon Aug 30, 2010 6:00 pm
- Location: SO IDAHO
-
4x4M38
- Jeep Legend
- Posts: 3487
- Joined: Thu May 29, 2014 6:00 pm
- Location: Texas Hill Country
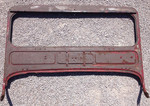
I think I have it figured out. The two ears sticking out of each side that I thought were separate spring steel pieces are supposed to be one piece?
http://willysmjeeps.com/v2/modules/gall ... acket.jpeg
Also, on the bottom are four pairs of very small holes spaced down the piece almost equally apart. Were they supposed to have rivets and some material of some sort attached? I have not seen any material or webbing in any photos except for the two pieces on the spring steel pieces, at the rear down the bottom from each side to hold the stock, and one more piece riveted to the very back piece to protect the back end of the stock.
[/img]
-
RICKG
- Jeep Legend
- Posts: 1752
- Joined: Mon Aug 30, 2010 6:00 pm
- Location: SO IDAHO
-
4x4M38
- Jeep Legend
- Posts: 3487
- Joined: Thu May 29, 2014 6:00 pm
- Location: Texas Hill Country
-
4x4M38
- Jeep Legend
- Posts: 3487
- Joined: Thu May 29, 2014 6:00 pm
- Location: Texas Hill Country
Well it's been a few days since I actually laid
hands on Kilroy. I decided since the wifey was
spending the day away I'd go do something
constructive.
As bought my water pump bypass hose started
at the water pump and ran around the front
of the engine back down the right side to where
the temp gauge would go. There was a 1/2"
pipe nipple sticking out of the head with a brass
tee screwed into it, which had a 5/8 hose nipple
for the bypass as well as the civvy bushing for the
12 volt temp sender.
I began by removing the hose and clamp from
the water pump fitting, then spraying Liquid
Wrench and trying to remove the brass hose fitting
from the pump.
Promptly broke it off flush with the pump.
A few choice words, and some "I knew betters..,"
and I headed to NAPA for an extractor.
An hour and a half later, and many expletives
deleted, I had eventually returned said orifice to
a 1/4 NPT thread, including picking and drilling
up to a 7/16" bit. Working a tap slowly in and out,
I was able to get back to clean threads.
Now of course I had brass shavings in the well
below the fitting.
Figured it was as good a time as any to install those
new hoses I bought so I pulled the lower hose and
sucked what was left out with a shop vac.
I was very surprised as to how clean and relatively dry I got the well area .
Now I realize I probably have fine brass particles in the fluid, but from
the looks of the insides of the fitting and hoses
I'm not sure what little that remains will be
terminal. I plan on getting the hammer to a shop and
having a thorough engine flush done, as well
as pulling the rad and having it cleaned.
So now I chased the threads, applied anti-seize to the two
nipples, screwed them in and was able to finally
install the correct bypass hose.
Oh, yeah, there's that other end to take care of.
Got the temp sender and bushing out, the
brass tee off, but the nipple did not budge.
By now it was 3:30 and I wasn't going through
that process again, so a quick trip to the hardware
store for a 1/2" pipe coupling, wrap Teflon tape,
thread on the coupling, tape and install the bushing,
then the sender, and my 7 hour project is finally
buttoned up.
Good gravy, where's the Shiner ?
-
4x4M38
- Jeep Legend
- Posts: 3487
- Joined: Thu May 29, 2014 6:00 pm
- Location: Texas Hill Country
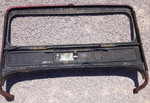
windshield
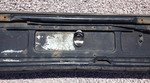
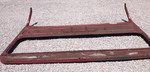
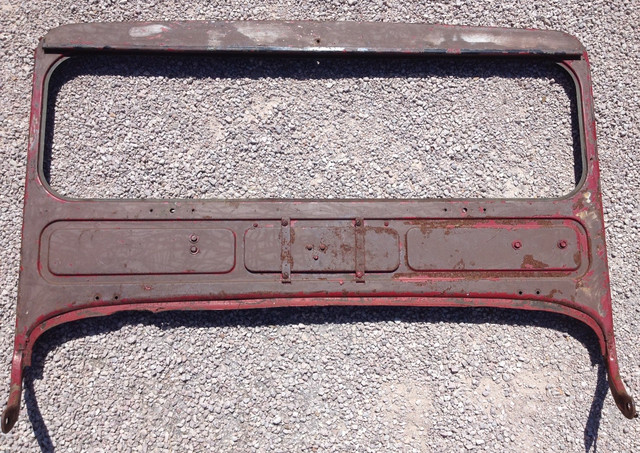
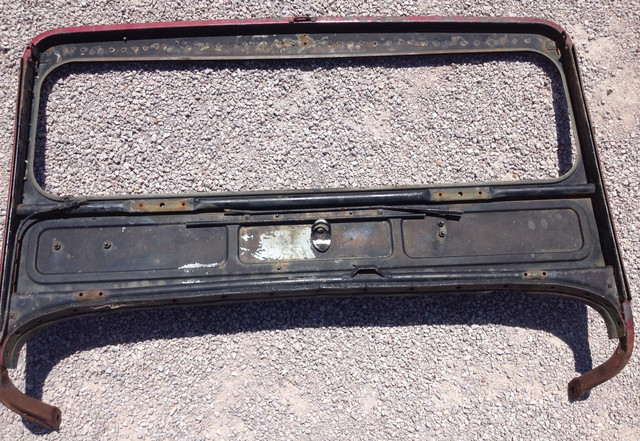
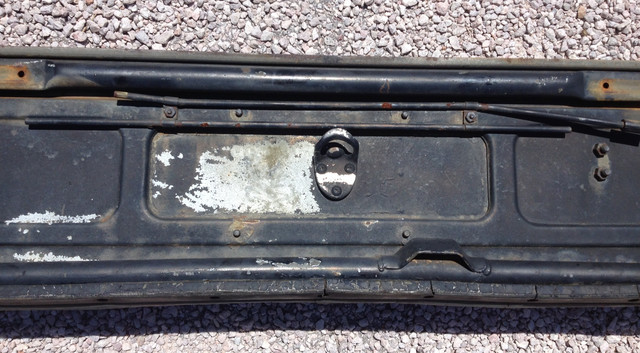
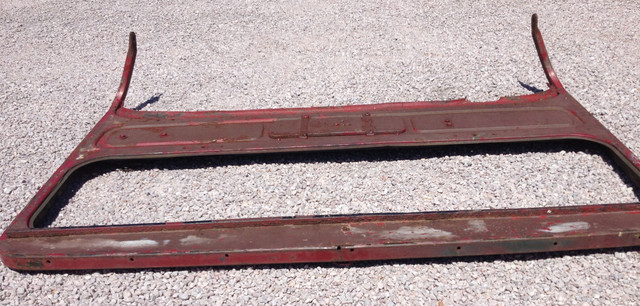
More than nine months after I purchased a window frame on Ebay from seller Sparrowhawk, that my brother in law was kind enough to pick up for me, and 1000 miles later, I finally got to lay hands on it.
Exactly as described, mounting arms are solid, some surface rust, a few holes in the canvas top channel, extra holes for a civvy top, hard lines for the windshield wipers as well as the valve, and the bolts for the rifle rack.
Some Bondo, a couple of extra colors, and one sure enough Bubba mod.
Thinking real hard about leaving it, but I think the rack won't fit with it there.
Sure is handy though......
http://willysmjeeps.com/v2/modules/gall ... .sized.jpg
http://willysmjeeps.com/v2/modules/gall ... .sized.jpg
http://willysmjeeps.com/v2/modules/gall ... .sized.jpg
http://willysmjeeps.com/v2/modules/gall ... .sized.jpg
-
4x4M38
- Jeep Legend
- Posts: 3487
- Joined: Thu May 29, 2014 6:00 pm
- Location: Texas Hill Country
-
wesk

- Site Administrator

- Posts: 16459
- Joined: Sun Apr 03, 2005 6:00 pm
- Location: Wisconsin
- Contact:
You would gain a wider audience if you post this entry on the wanted board.
Wes K
45 MB, 51 M38, 54 M37, 66 M101A1, 60 CJ5, 76 DJ5D, 47Bantam T3-C & 5? M100
Mjeeps photo album: http://www.willysmjeeps.com/v2/modules. ... _album.php
45 MB, 51 M38, 54 M37, 66 M101A1, 60 CJ5, 76 DJ5D, 47Bantam T3-C & 5? M100
Mjeeps photo album: http://www.willysmjeeps.com/v2/modules. ... _album.php
-
4x4M38
- Jeep Legend
- Posts: 3487
- Joined: Thu May 29, 2014 6:00 pm
- Location: Texas Hill Country
-
wesk
- Site Administrator
- Posts: 16459
- Joined: Sun Apr 03, 2005 6:00 pm
- Location: Wisconsin
- Contact:
I would suggest keeping this thread focused on what this board is for. The progress of one's project and save the technical and wanted questions for the appropriate boards. The whole idea with our web site is the sharing of knowledge and the ease of accessibility to knowledge. This board is where folks interested in following the progress of a specific project is kept simple by limiting discussions here to that topic. Specific individual projects.
The loss to others in this group when we start posting technical questions here is obvious. Half or more of our group never see's the answers posted since they are probably not following your specific project progress.
The loss to others in this group when we start posting technical questions here is obvious. Half or more of our group never see's the answers posted since they are probably not following your specific project progress.
Wes K
45 MB, 51 M38, 54 M37, 66 M101A1, 60 CJ5, 76 DJ5D, 47Bantam T3-C & 5? M100
Mjeeps photo album: http://www.willysmjeeps.com/v2/modules. ... _album.php
45 MB, 51 M38, 54 M37, 66 M101A1, 60 CJ5, 76 DJ5D, 47Bantam T3-C & 5? M100
Mjeeps photo album: http://www.willysmjeeps.com/v2/modules. ... _album.php
-
4x4M38
- Jeep Legend
- Posts: 3487
- Joined: Thu May 29, 2014 6:00 pm
- Location: Texas Hill Country
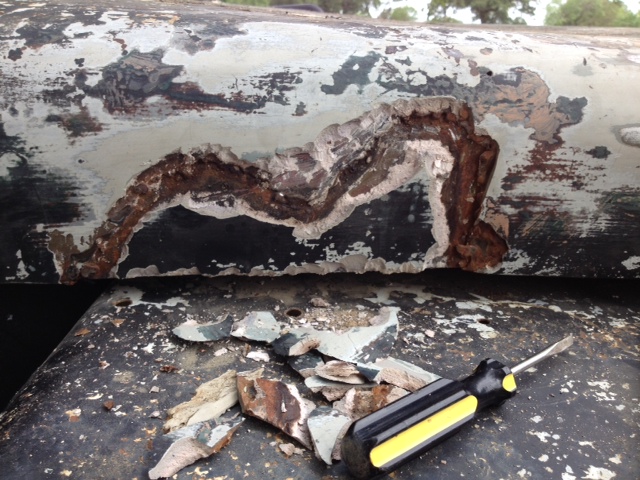
hood patch
Among other skills, Bubba showed tremendous incentive to use as much rod, plate and Bondo to get that fording hood cutout taken care of.
After I carved about 3/4 pound of Bondo out of the joints I could see what was going on. Or so I thought.

http://willysmjeeps.com/v2/modules/gall ... /hood.jpeg[im
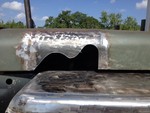
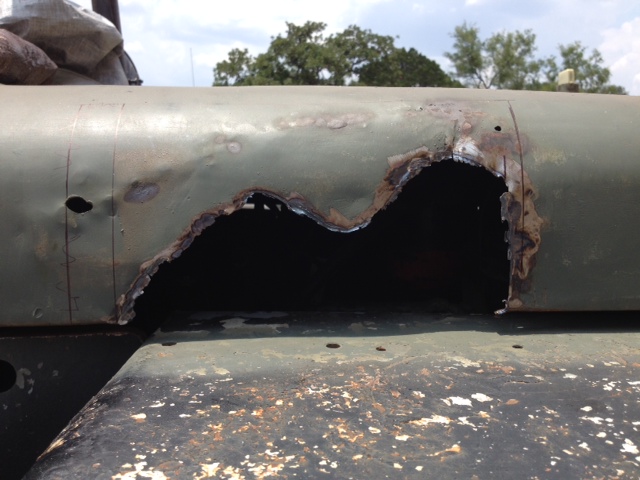
Once I got the joint cleaned up I could see he installed a plate about 1/3 larger than the hole, and bubble-gummed it not only on the outside but the inside of the hood. Much judicious and careful use of the grinder separated the plate from the hood leaving me with this. You can just see the outline of the full size of the plate above the cutout.

http://willysmjeeps.com/v2/modules/gall ... tout1.jpeg
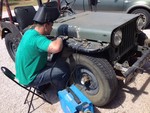
My son Jake welding in an 18 gauge patch:
http://willysmjeeps.com/v2/modules/gall ... elder.jpeg
It took a lot of work to get here:
http://willysmjeeps.com/v2/modules/gall ... tout2.jpeg
After I carved about 3/4 pound of Bondo out of the joints I could see what was going on. Or so I thought.
http://willysmjeeps.com/v2/modules/gall ... /hood.jpeg[im
Once I got the joint cleaned up I could see he installed a plate about 1/3 larger than the hole, and bubble-gummed it not only on the outside but the inside of the hood. Much judicious and careful use of the grinder separated the plate from the hood leaving me with this. You can just see the outline of the full size of the plate above the cutout.
http://willysmjeeps.com/v2/modules/gall ... tout1.jpeg
My son Jake welding in an 18 gauge patch:
http://willysmjeeps.com/v2/modules/gall ... elder.jpeg
It took a lot of work to get here:
http://willysmjeeps.com/v2/modules/gall ... tout2.jpeg