An M38a1 Project thread - Duke gets some loving

Start your project thread here for advice and for others to follow along with your project. This is a long term thread.

Moderator: wesk

User avatar
Willis
Member
Posts: 26
Joined: Sun Sep 13, 2015 6:00 pm
Location: Harrisburg, PeeAy

An M38a1 Project thread - Duke gets some loving

Post by Willis »

This thread will be to chronicle the face lift I am giving an M38a1. I purchased the jeep a few weeks ago from a very good friend whose life became a bit to busy. He called the jeep Duke, so i guess I will too.

Duke is registered as a 1953 M38a1. And that's really all I know about it at this point. Runs well, drives okay - but is in need of a lot of general maintenance.

Here are some pictures of when I first brought it home.

Image

Image

Image

I intend to paint it OD with the fixings and make a driver out of it.

A lot of the work I have done so far has been exploratory. Changing fluids, scratching off grime, and getting it running. I'm not a stranger to old jeeps or the process, but this is my first M jeep. Photo's of my old 2a:

Image

Me learning to drive on the same jeep:

Image


Any way, as I go through the jeep, i will be taking pictures and chronicling the project in this forum.

Thanks,
Jeremy
User avatar
Willis
Member
Posts: 26
Joined: Sun Sep 13, 2015 6:00 pm
Location: Harrisburg, PeeAy

Post by Willis »

The first thing I did was dust off my sheet metal welding skills (or lack there of). I'm just using a little Mig 140 which I picked up last year, and had never used. The glove box...er....map container....door was cracked in half as noted above. So, I welded it back together. It could use a little filler, but that will come later. It was nice to smell the smell of burnt metal again.

Image

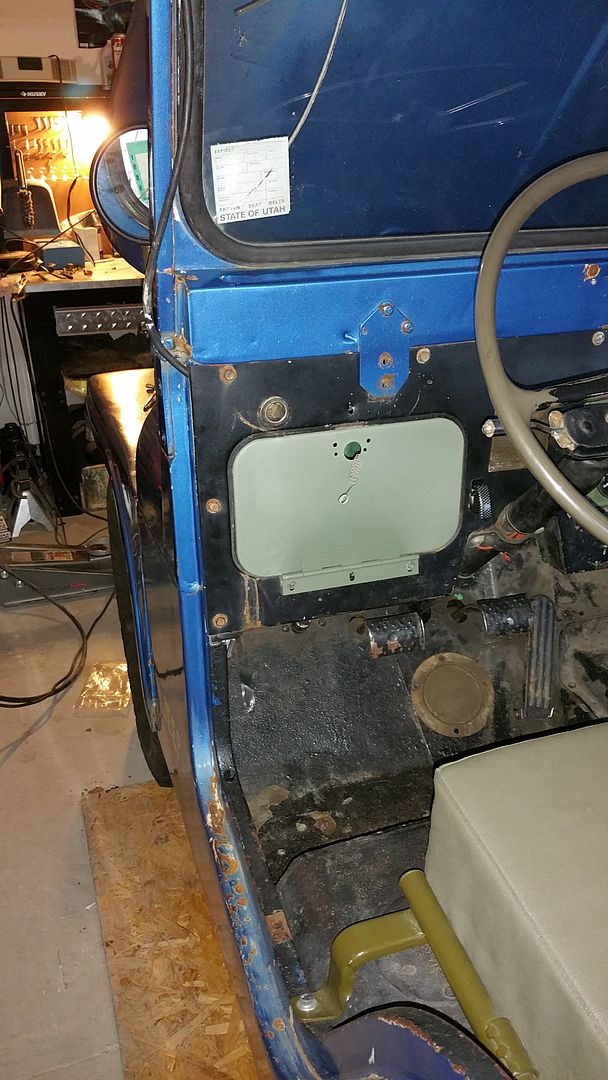
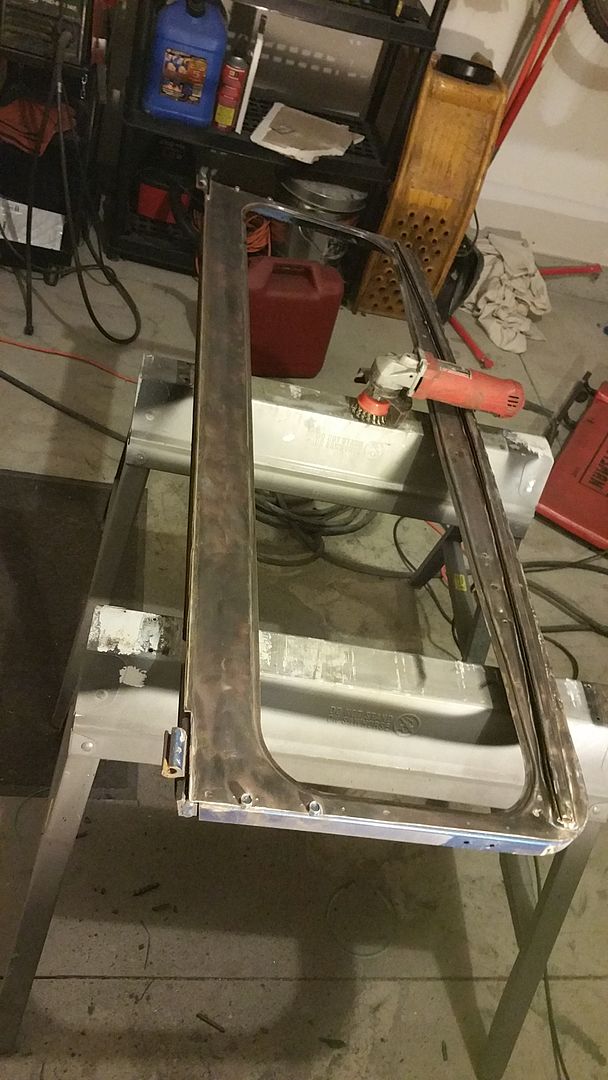
From there, I've started work on the windshield. You can see here, what I'm dealing with:
Image

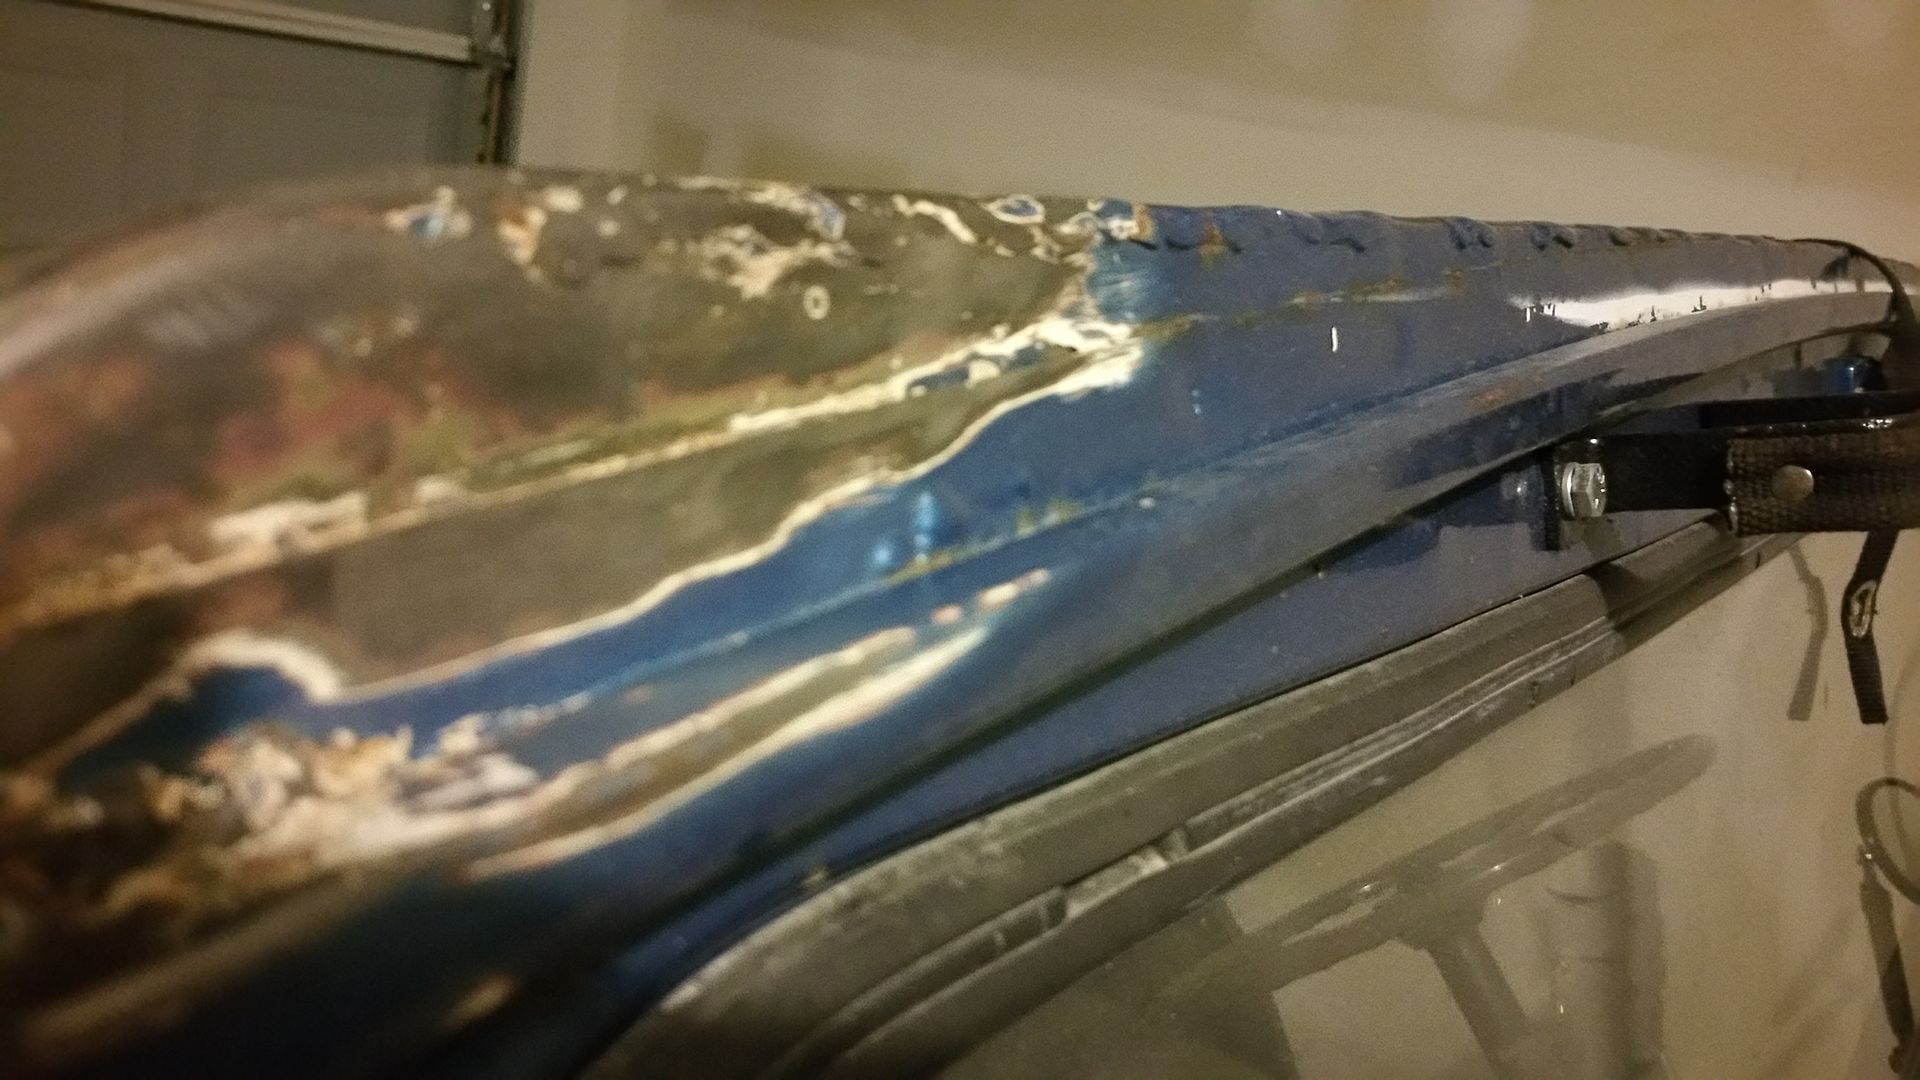
I'm not entirely sure why someone would run a weld across the top like that. It's kind of going to force me into completing that weld and then grinding it smooth. Dunno how I want to handle that. Suggestions?

Image

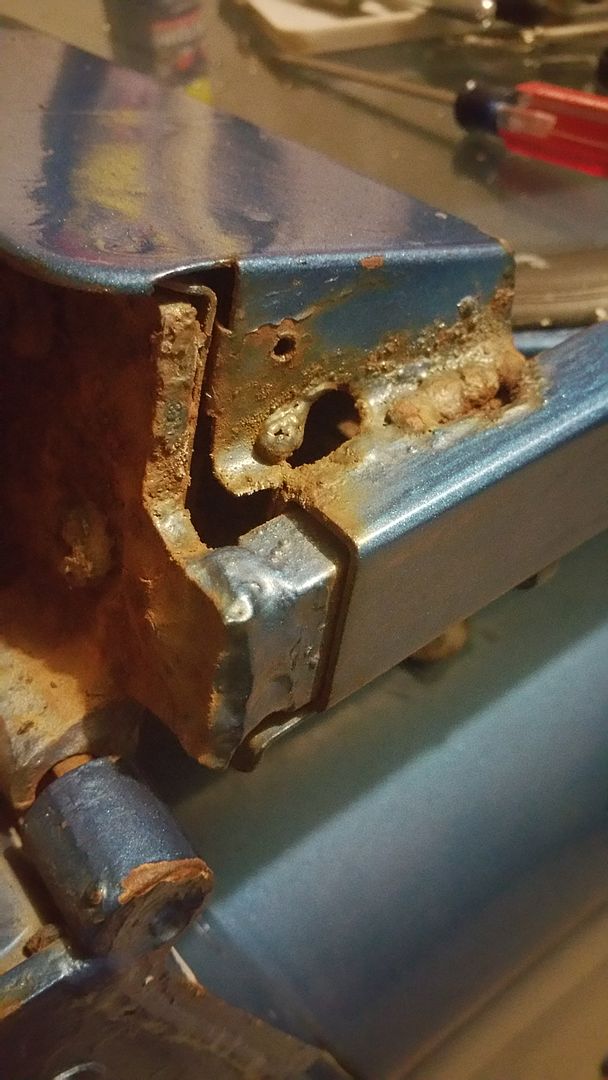
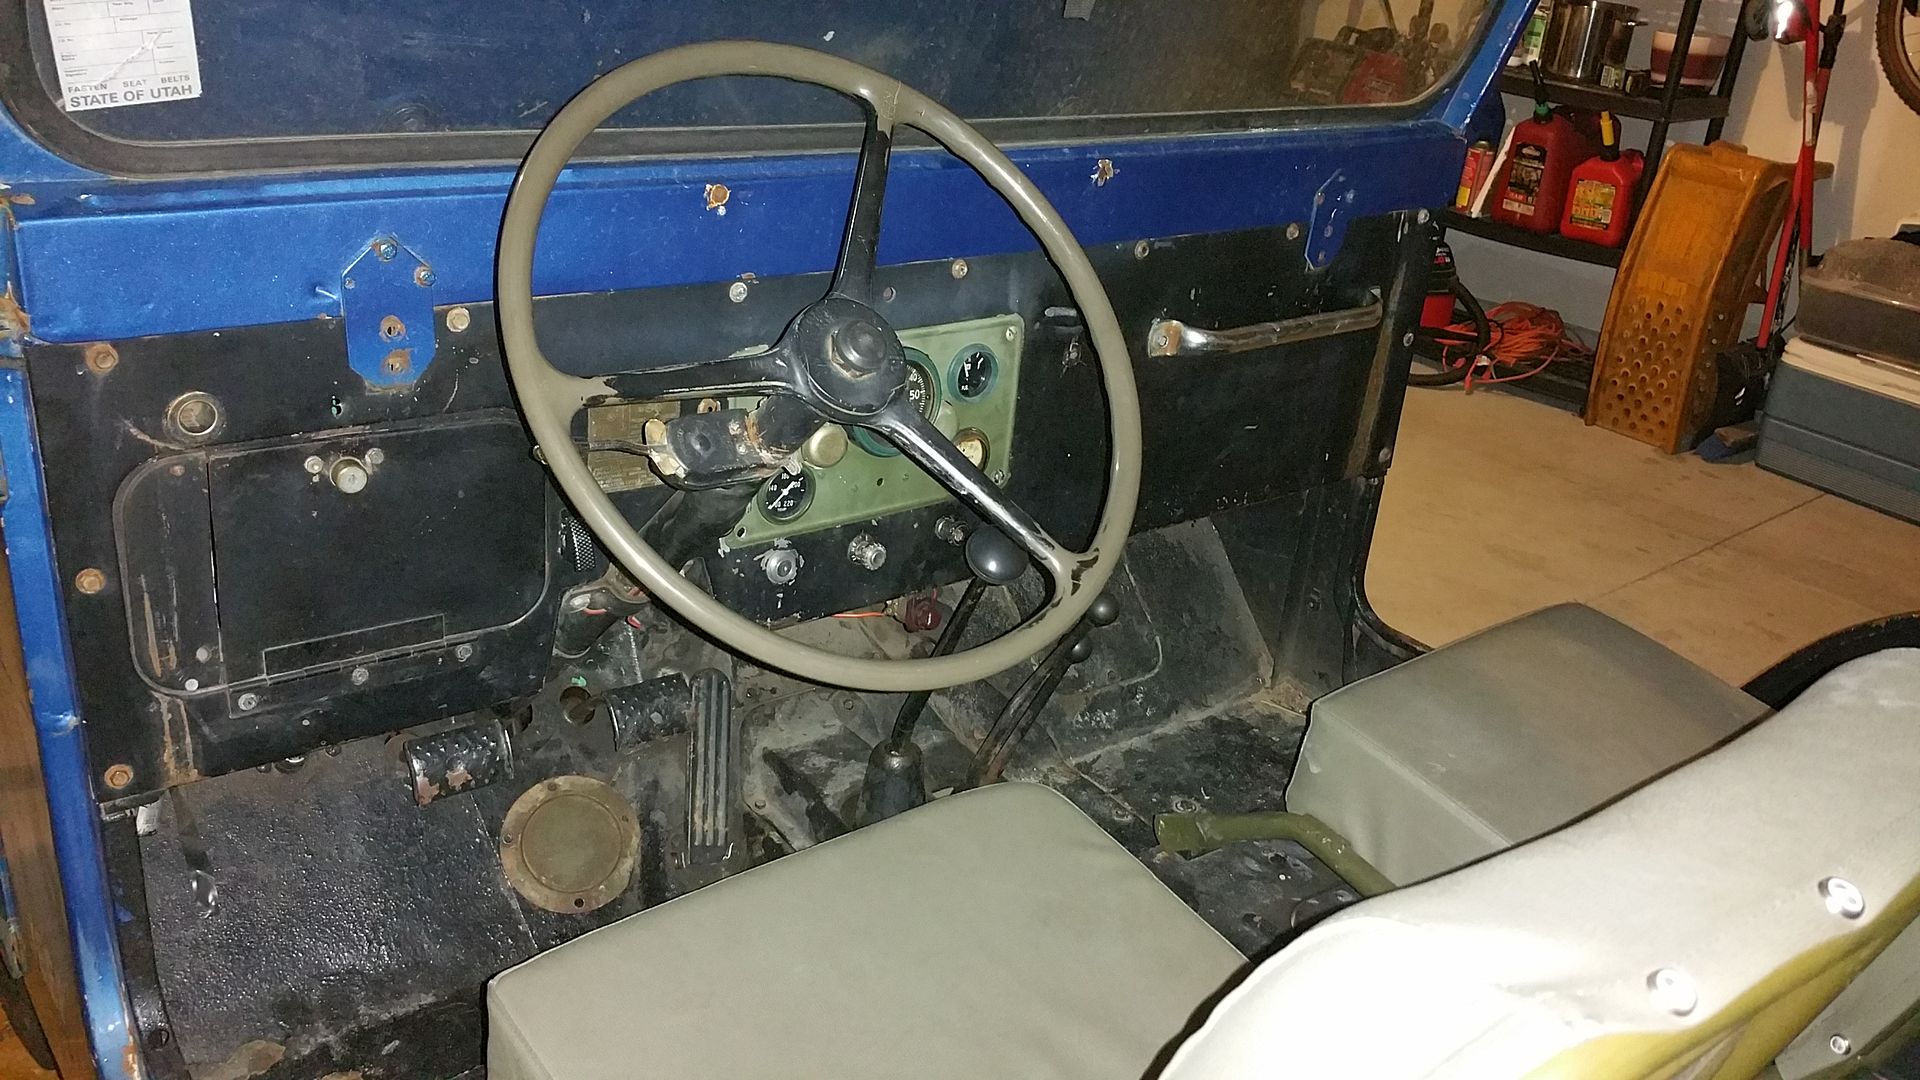
I'm not entirely sure how I'm going to replace the nuts inside the windshield that hold the windshield latch. Anyone have any good idea's? My thought was to drill a big enough hole to just insert a nut and then fill it up with weld and grind it flush. I've thought about a Rivnut, but i don't think they install flush.
Image

Image

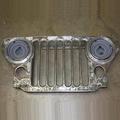
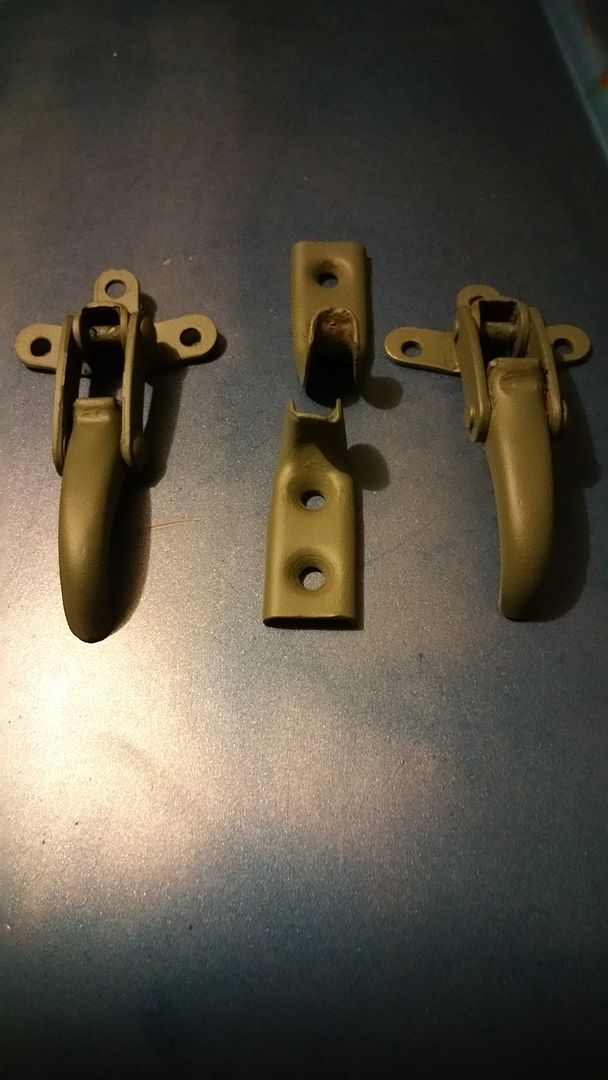
A jeep buddy in the next neighborhood over had a set of these. Cleaned them up a bit, but they will go to the blasters
Image

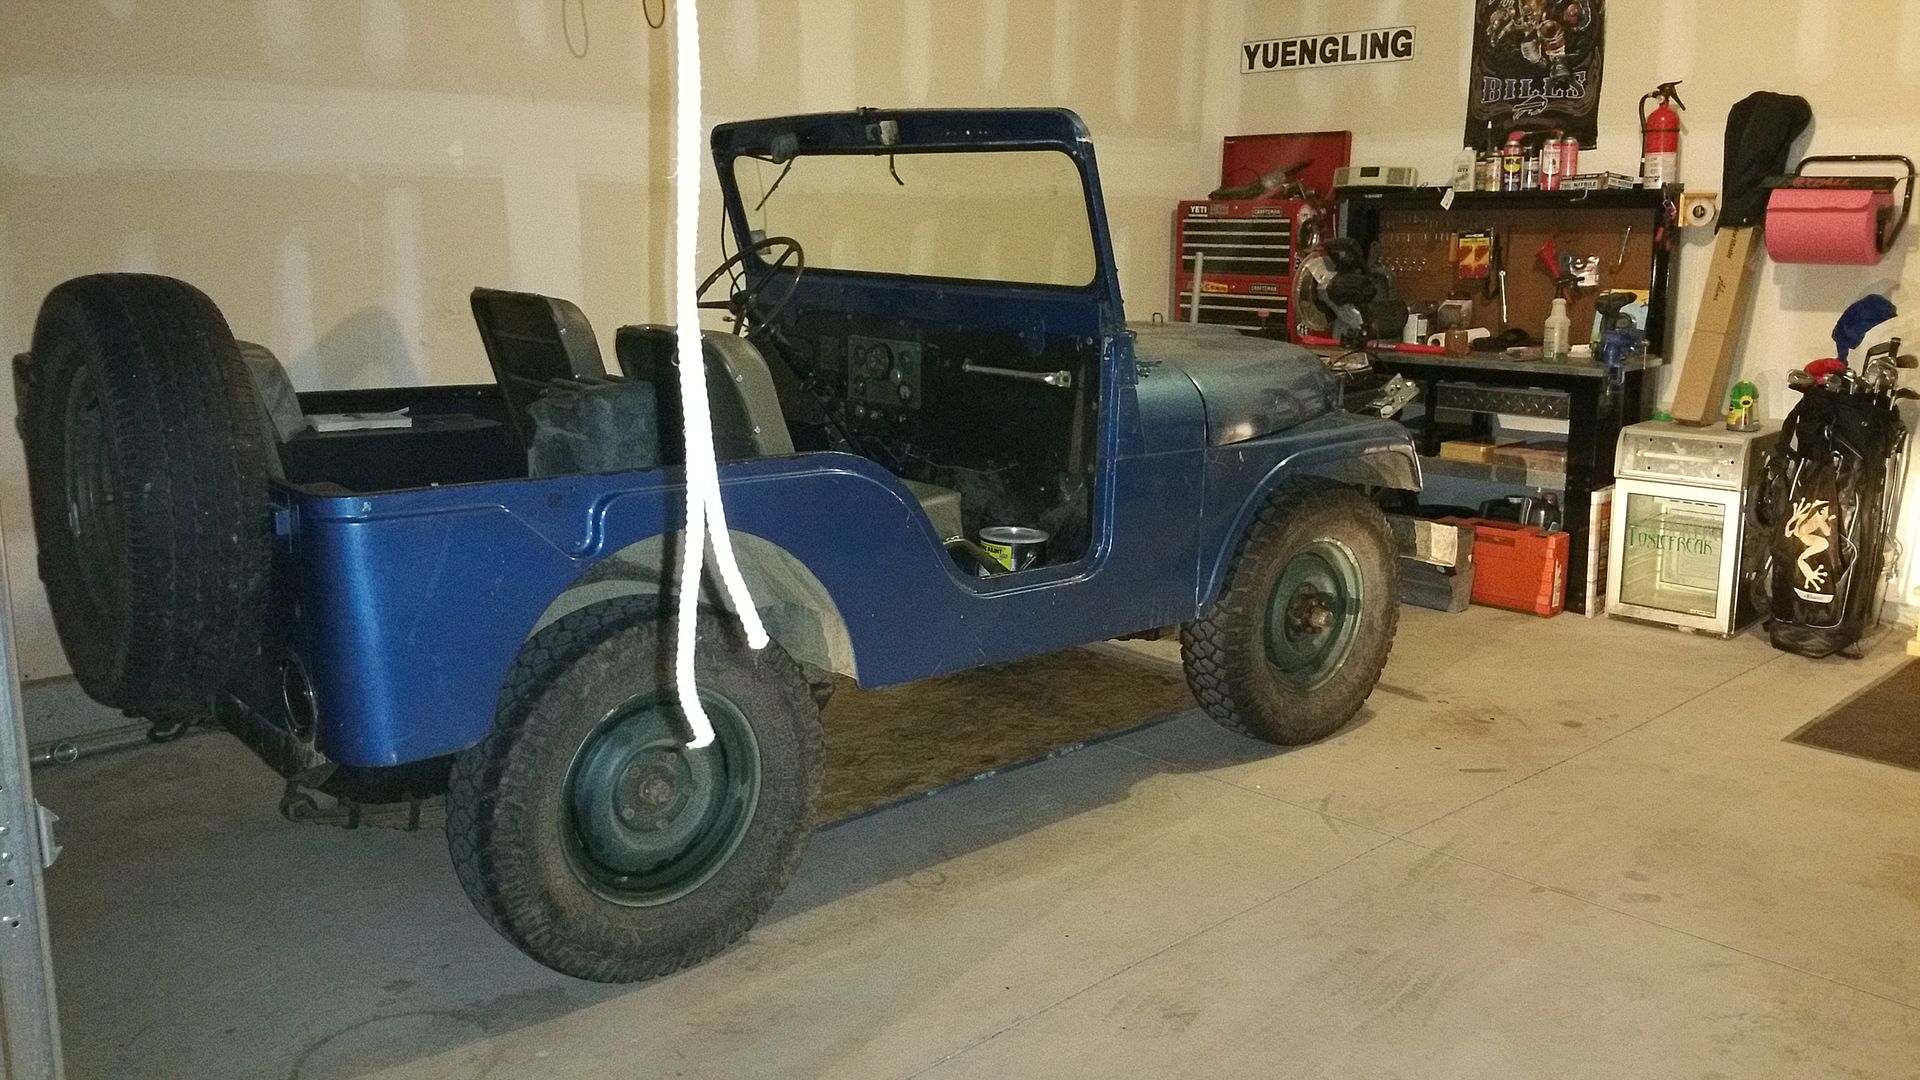
Last nights work was to remove the glass from the windshield and start grinding it down. Does anyone have the dimensions for the 2 piece windshield panes? I've purchased new rubber, and have the old glass. Could a glass shop use my existing windshield as a template and make a new one....and then just cut it in half?
Image
User avatar
mastertek2000
Member
Posts: 74
Joined: Mon Sep 07, 2015 6:00 pm
Location: Freetown MA
Contact:

Post by mastertek2000 »

i may be wrong but that windshield looks like a CJ not M38A1 but it was my understanding that the M38A1 was a split glass
Roy 53 M38A1 44 MB
User avatar
oilleaker1
Member
Posts: 973
Joined: Wed May 13, 2009 6:00 pm
Location: South Dakota

Post by oilleaker1 »

The rubber splits the glass in the windshield opening. I'm happy to see you put Duke back as he should be. Looks like a good solid Jeep to fix up. Then drive. That's where the real fun begins. I think welding in nuts as you planned is your best fix. Nut serts tend to spin in the hole . With all that pressure on them welding would be much more secure. The OD paint when finished makes you look like a pro. You'll have many good times in Duke! John
User avatar
Xamon
Member
Posts: 593
Joined: Mon Sep 17, 2012 6:00 pm
Location: South East Saskatchewan

Post by Xamon »

The tub looks a bit more cj5 to me as it is missing the slave cable hole on the passenger side. might just be patched over of course.
User avatar
Willis
Member
Posts: 26
Joined: Sun Sep 13, 2015 6:00 pm
Location: Harrisburg, PeeAy

Post by Willis »

Yep, the slave cable dish is patched over. I'll be welding it back in.

I started filling holes on the windshield. There were 17 small holes from self taping screws.

Tonight I'll be drilling out the latch mounting nuts and welding in new ones. And then continue grinding.7

Image

Image
User avatar
Willis
Member
Posts: 26
Joined: Sun Sep 13, 2015 6:00 pm
Location: Harrisburg, PeeAy

Post by Willis »

Last night I went to work on the latch nuts. I didn't have but one nut left that was worth saving with the 6 holes. I ended up drilling it out anyway.

I started by drilling out each nut and worked up to 1/2 holes. A 1/2" hole perfectly fits the nut.

Image

I, after screwing my first attempt up, used the latch as a jig to keep everything nice and square when tacking the nuts in place.

Image

I then took a stick and whittled down the end so it screwed inside the nut and finished welding them in. They didn't come out to bad, but do need a little filler.

Image

Image

Image

I was worried at first as when i bolted them in place, the latch was really loose. Then I remembered I took the windshield to cowl rubber off. I'm hoping that will tighten things up a bit.

After some filler work, the windshield will be done. Does anyone have a pattern or diagram for the 2 piece windshield glass?
Last edited by Willis on Mon Oct 12, 2015 9:06 am, edited 1 time in total.
User avatar
4x4M38
Member
Posts: 3487
Joined: Thu May 29, 2014 6:00 pm
Location: Texas Hill Country

Post by 4x4M38 »

That's a pretty ingenious way to put those nuts in and keep
everything lined up.

Nice work!
User avatar
Kendall
Member
Posts: 348
Joined: Fri Feb 24, 2006 6:00 pm
Location: Wichita, KS

Post by Kendall »

I removed the glass from my 1952 M38A1 to have a local glass company replace the one broken side.
From the one good side, the dimensions are: 27 11/16"X 13"X 1/4". The two square corners were nipped. I am not sure how to measure the radius.
Hope this helps,
Kendall
1951 M38
1952 M38
1952 M38A1
1942 Dodge WC-55
1951 M100 trailer
1942 Ben Hur trailer
User avatar
Willis
Member
Posts: 26
Joined: Sun Sep 13, 2015 6:00 pm
Location: Harrisburg, PeeAy

Post by Willis »

Sweet. Thank you Kendall. I have the one piece windshield saved and will supply your measurements and my glass to the shop. I would assume the radius would be the same.

More to follow
User avatar
Willis
Member
Posts: 26
Joined: Sun Sep 13, 2015 6:00 pm
Location: Harrisburg, PeeAy

Post by Willis »

Kendall - can you post a picture of the glass? I'd like to see the nipped corners. Also, can you confirm that your windshield is the non fold out windshield.
User avatar
Willis
Member
Posts: 26
Joined: Sun Sep 13, 2015 6:00 pm
Location: Harrisburg, PeeAy

Post by Willis »

The windshield is coming along okay. I'm not too happy with the welds the previous owner applied across the top of the windshield. I ground them smooth and I'm using some filler to round everything off. I'm not happy about it, it won't look correct, but my hands were tied given the lack of parts for these things.

While waiting for the filler to dry on the windshield frame, I did some exploratory grinding. It's obvious whoever had this jeep, years ago, was making a cj5 clone. I was worried that they would have welded the seam along the fenders....lucky me they didn't.

Image

Image

It always seems that when the wire wheel is attached to the grinder, i can't stop myself.

I went ahead and grinded the passenger side area where the slave receptacle dish is suppose to be. I have never seen so much bondo! 3/8" in some places!!!!

Image

Starting to emerge
Image


Finally!
Image

Quite literally a half gallon of bondo is now on my floor, my tools, my....everywhere. Also....got in my beer. I still drank it out of respect...but i'll be covering my beer in the future. :?
User avatar
Xamon
Member
Posts: 593
Joined: Mon Sep 17, 2012 6:00 pm
Location: South East Saskatchewan

Post by Xamon »

As one fellow pointed out before, you can remove bondo with a heat gun and a putty knife, it makes much less mess and is often much faster too.
User avatar
Willis
Member
Posts: 26
Joined: Sun Sep 13, 2015 6:00 pm
Location: Harrisburg, PeeAy

Post by Willis »

Interesting - I'll give it a shot.

Thanks
User avatar
Bretto
Member
Posts: 1390
Joined: Tue Nov 23, 2010 6:00 pm
Location: Orem, UT

Post by Bretto »

WAY faster and cleaner and you don't scuff the underlying metal either.
Post Reply