How To: Fuel Pump Rebuild

Discussion topics on Willys Overland M series vehicles

Moderators: TomM, Moderator, wesk

Post Reply
User avatar
Hawkshadow
Member
Posts: 310
Joined: Tue Oct 09, 2012 6:00 pm
Location: Toronto, Ontario, Canada

How To: Fuel Pump Rebuild

Post by Hawkshadow »

Welcome to a rebuild of your dual action fuel pump. With some dedicated time and concentration, this is a fairly easy and enjoyable rebuild. Make sure that you have an open work space to set things out. I also suggest taking detailed pictures during disassembly for reference during assembly.

Admittedly it has now been a couple of years since I rebuilt my pump. I intended to write this article at the time, but it has been pointed out that I forgot. As such, if anyone sees any details that should be added, please let me know!

Before we begin. I will be referencing the dual action pump assembly in 3 pieces. There is the central body, with the fuel pump on top and the vacuum pump on the bottom.

Remove the pump, making sure that you do not loose the pump to engine spacer.

Image

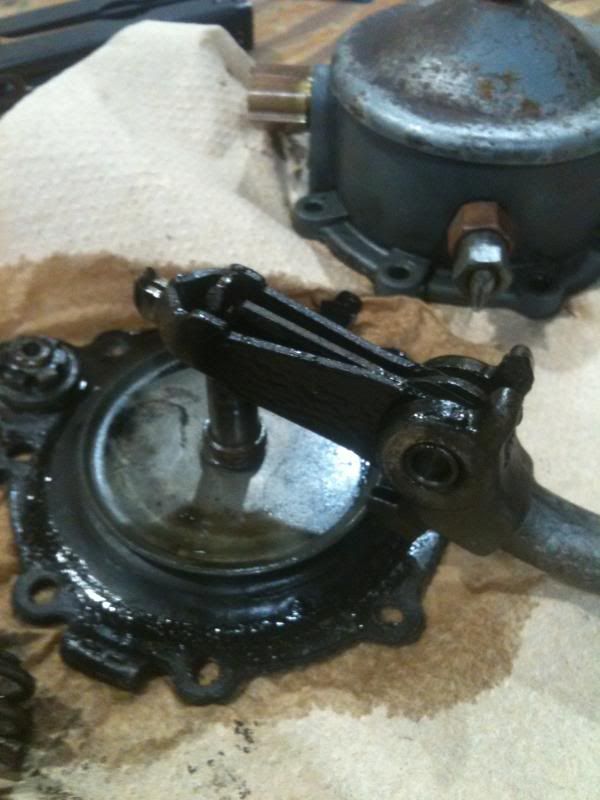
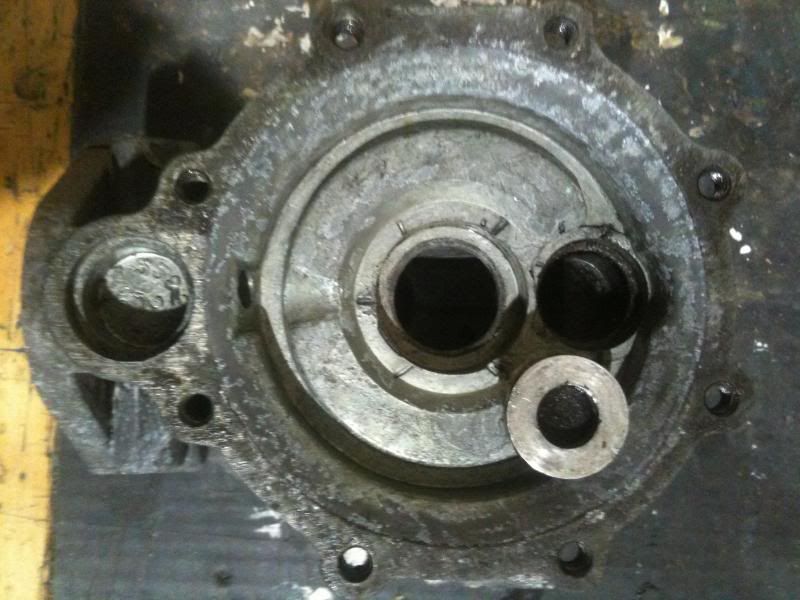
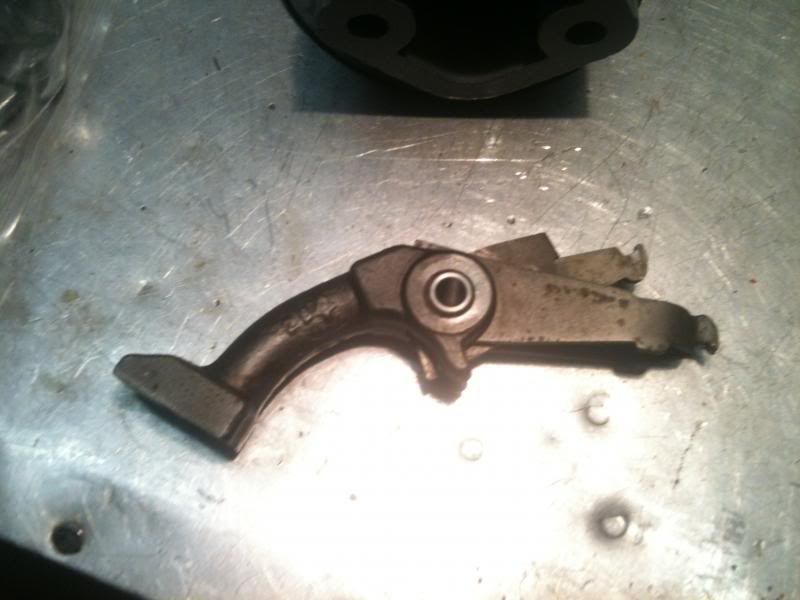
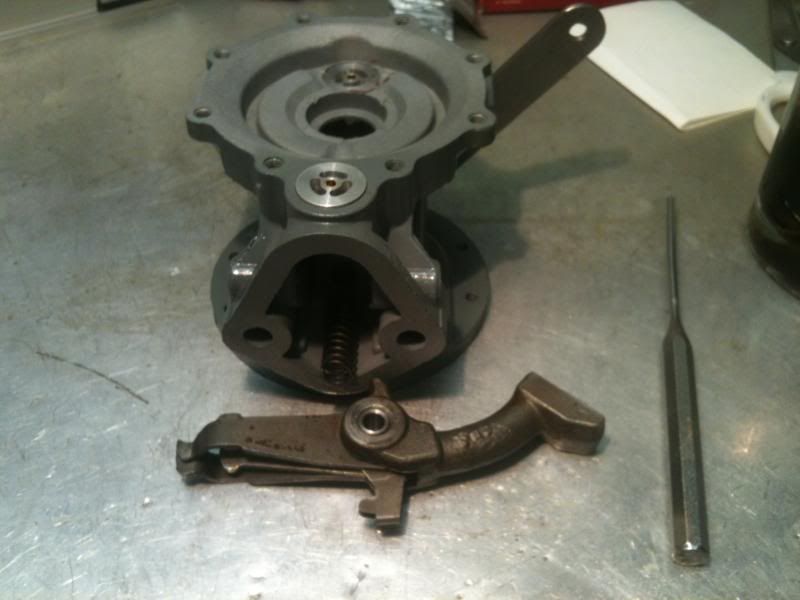
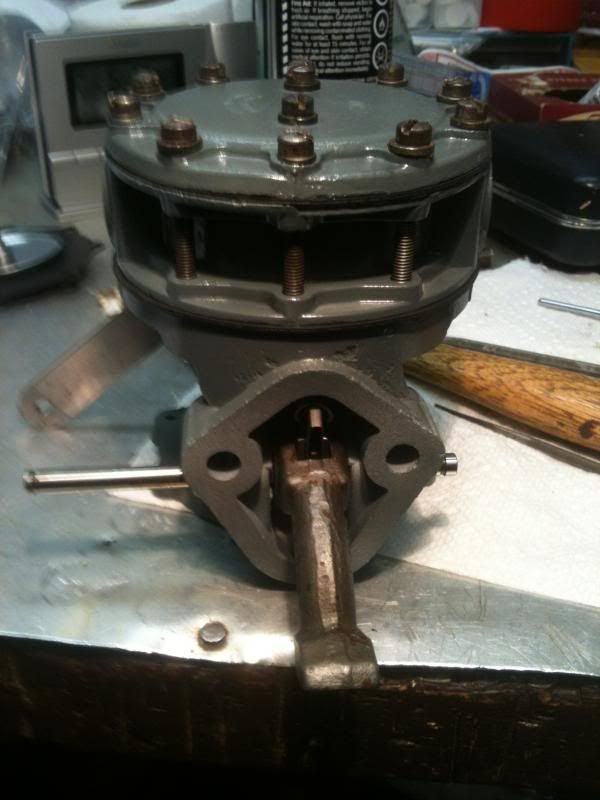
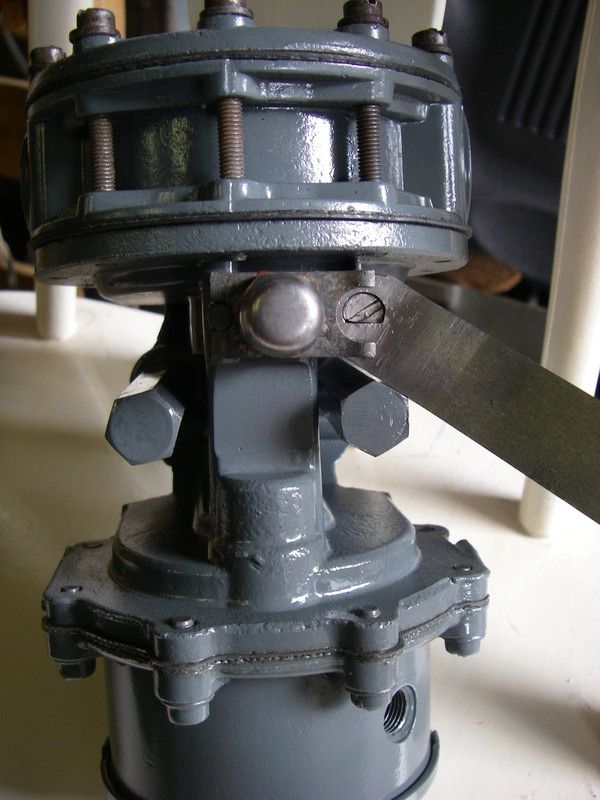
Take note of everything as you disassemble your pump. This picture shows how the arm sits.
Image

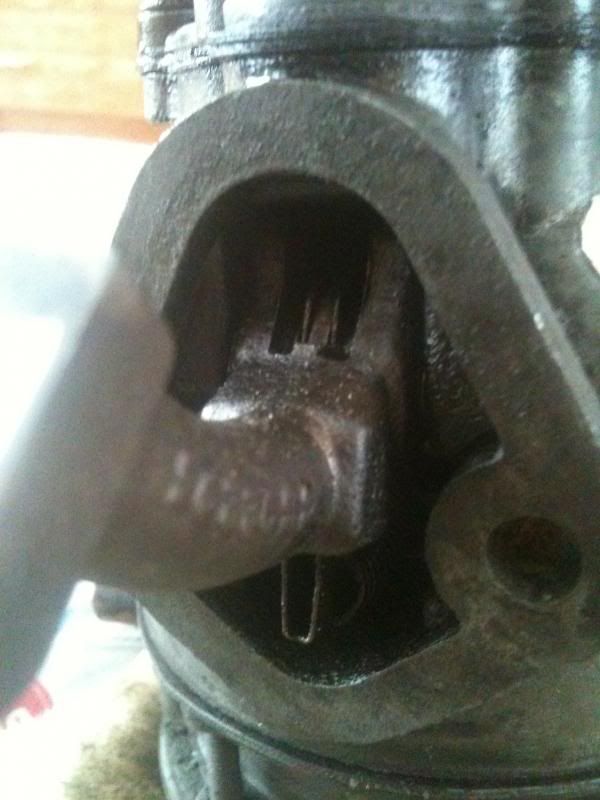
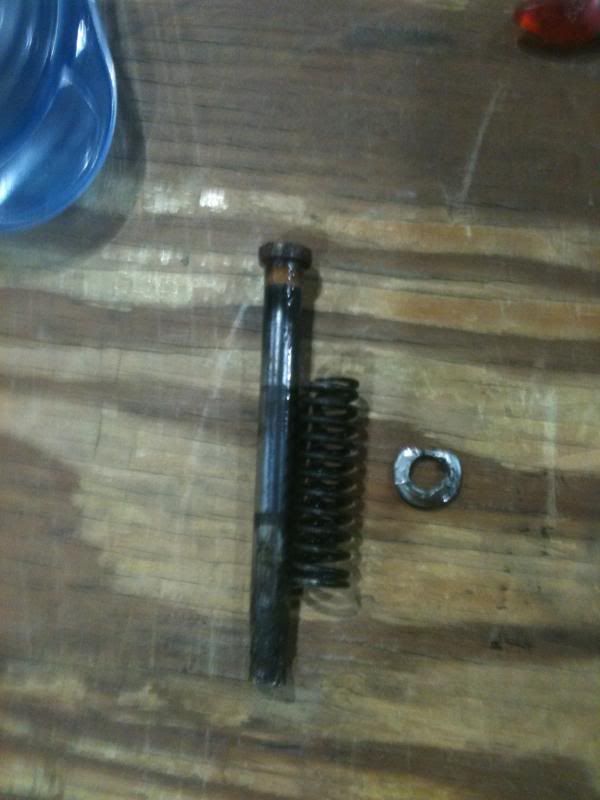
Remove the shaft that the arm hinges on. This will also release the arm's spring.
Image

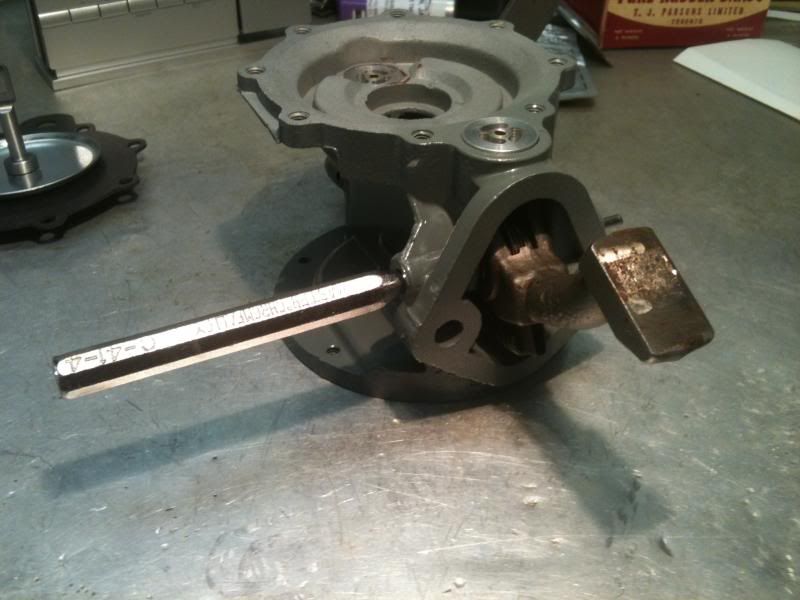
Remove the screws that hold the vacuum pump to the body.
Image

Remove vacuum pump.
Image

Image

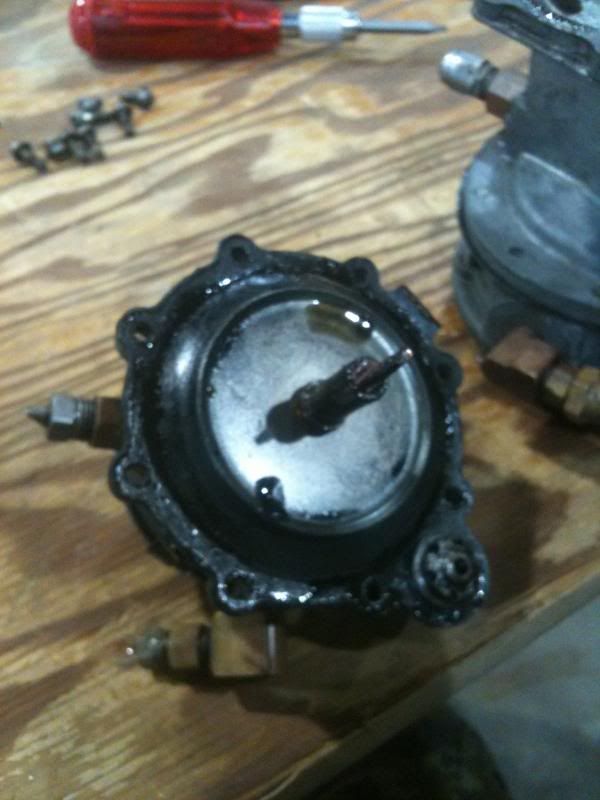
This is how the arm links in to the vacuum diaphragm arm.
Image

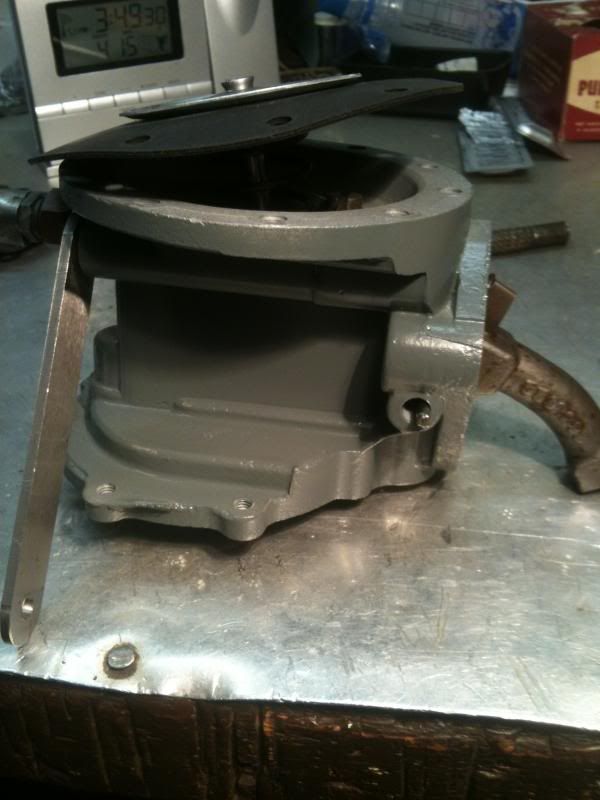
Remove the fuel pump portion from the body.
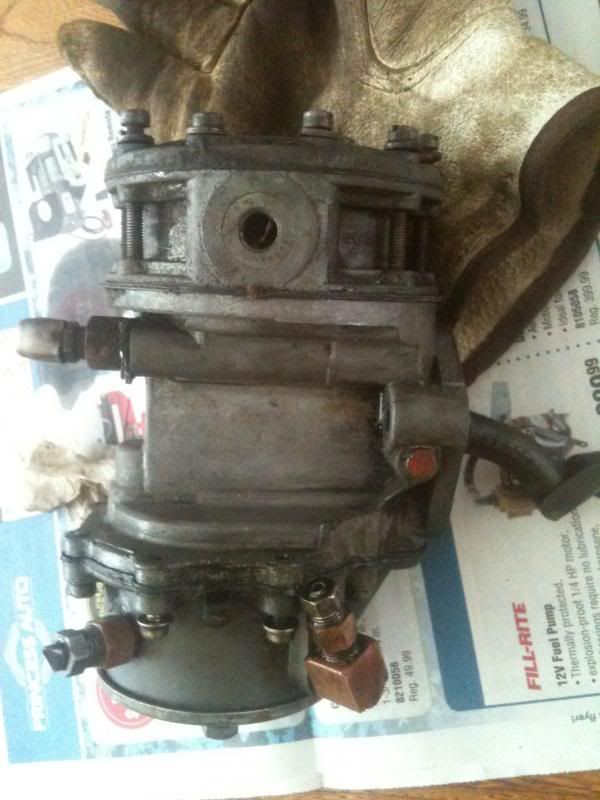
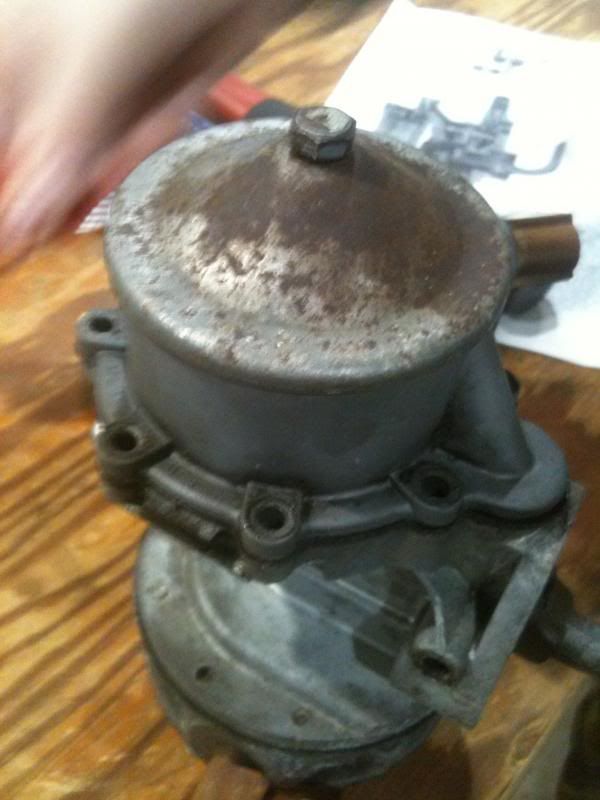
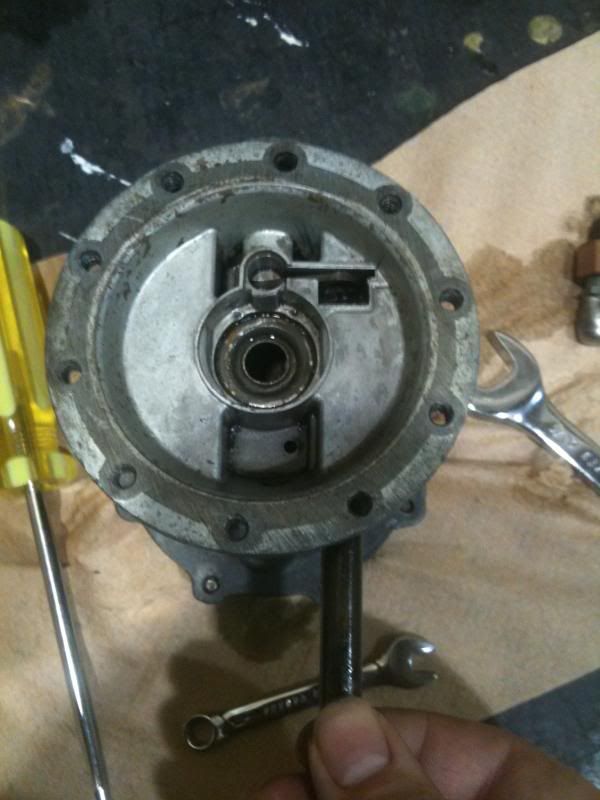
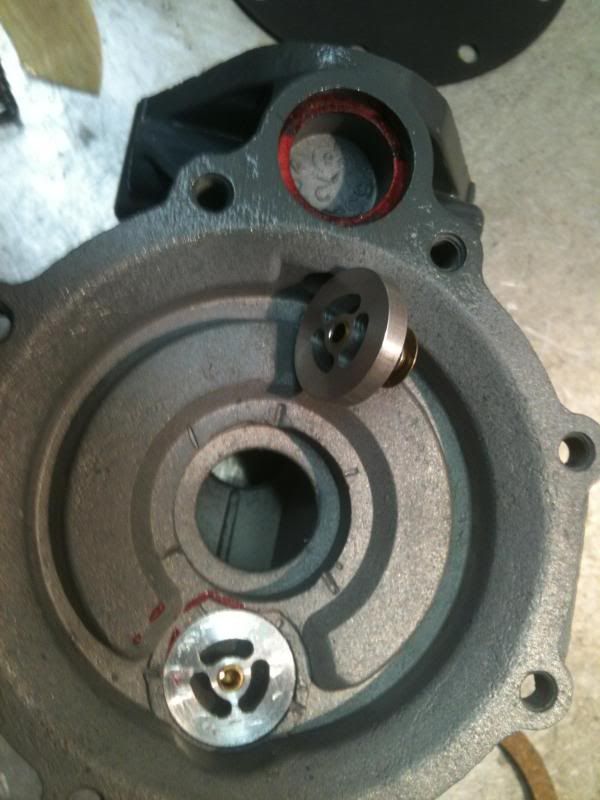
Image

Image

Main body.
You can see that on this pump, the vent line was capped with a breathable fitting similar to the ones on the axles.
Image

Unscrew that fitting.
Image

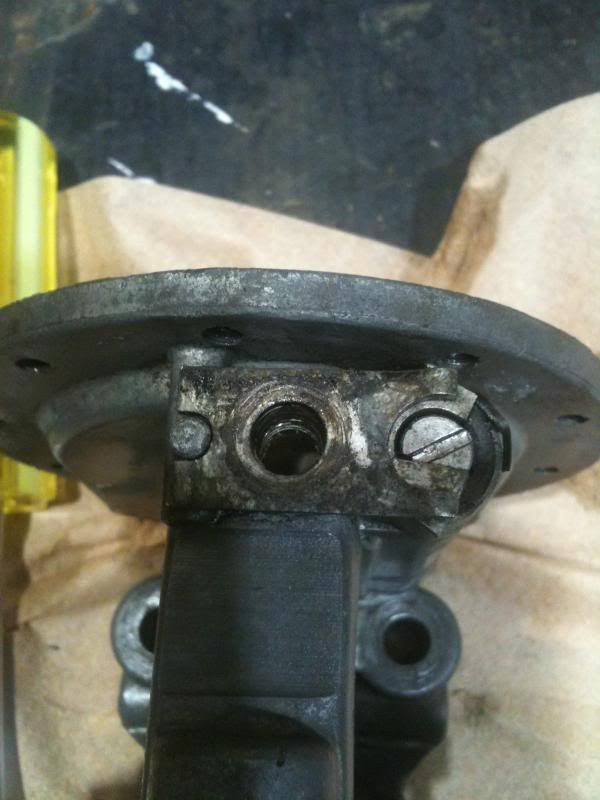
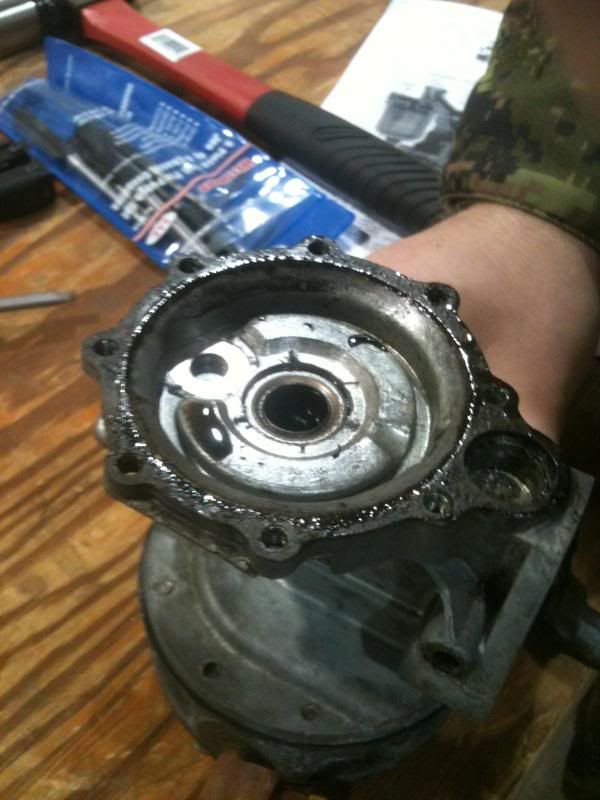
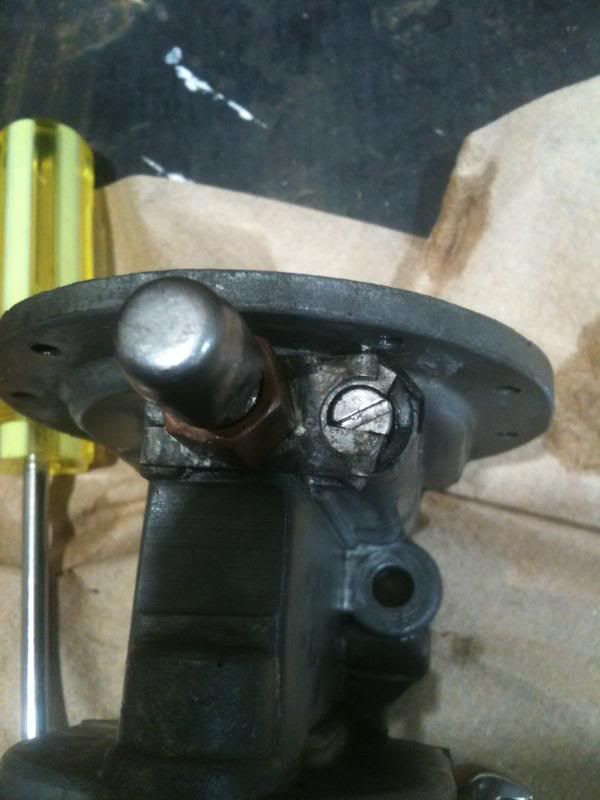
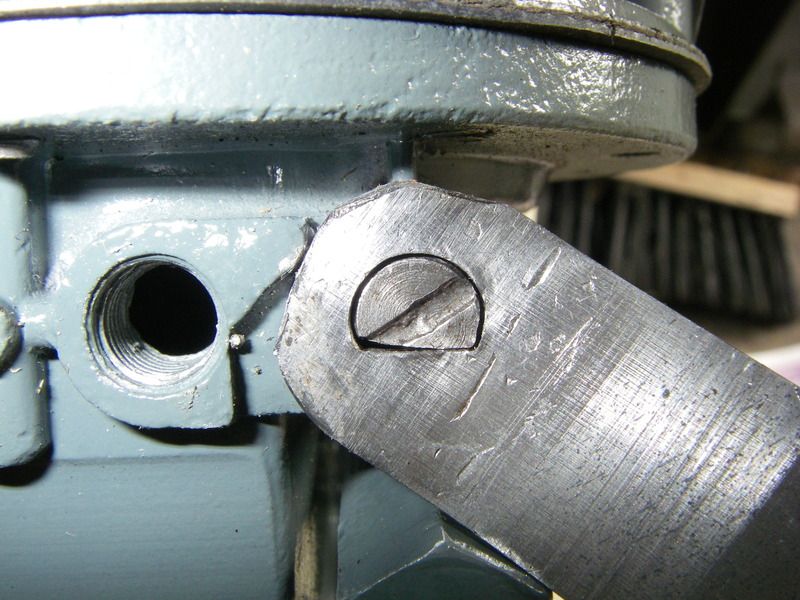
Remove the retaining plate. The metal piece that you see here keeps the shaft seated. It will be replaced by the primer arm during assembly.
Image

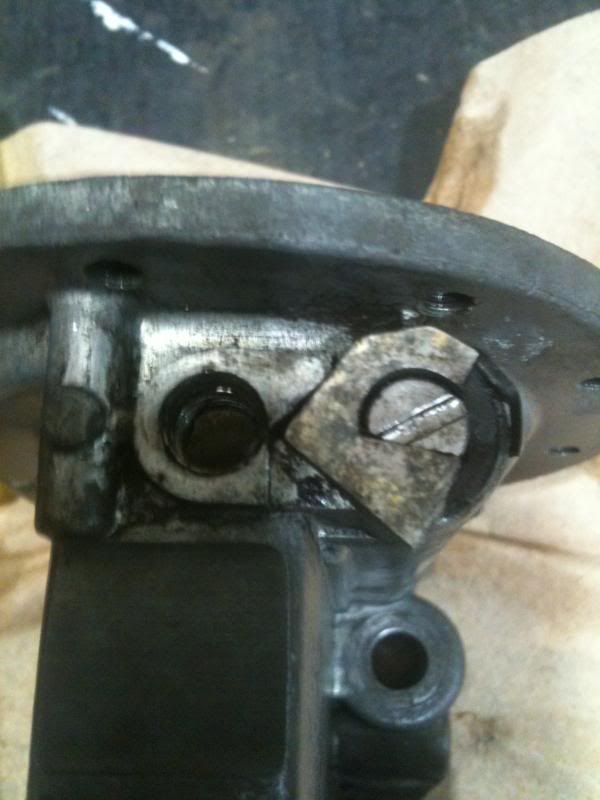
Remove and note the rubber o-ring next.
Image

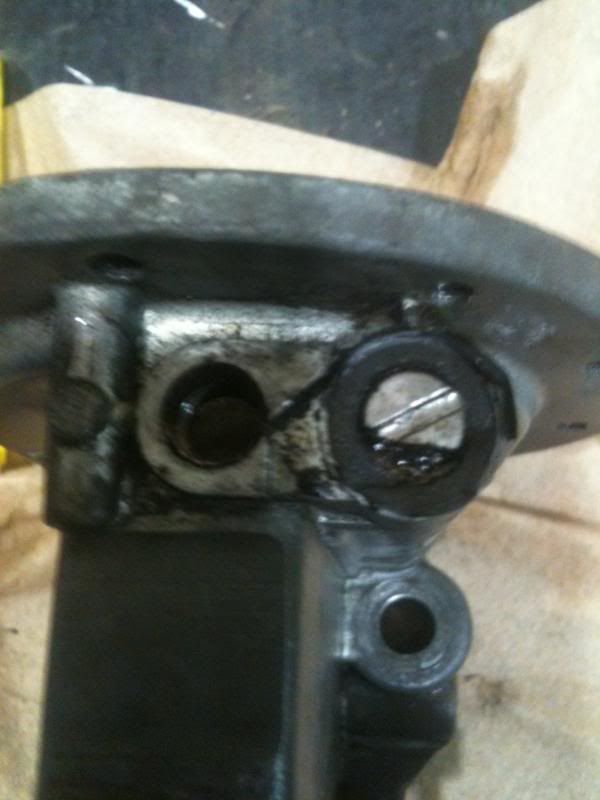
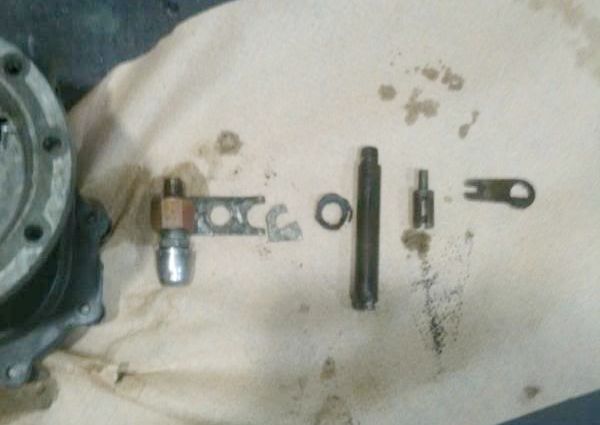
Remove the primer shaft. At the end of the primer shaft there is a link which goes across to across to a pin. This pin is what operates the diaphragm during priming.
Image

Here it is laid out. On the right you can see the link and pin referenced above.
Image

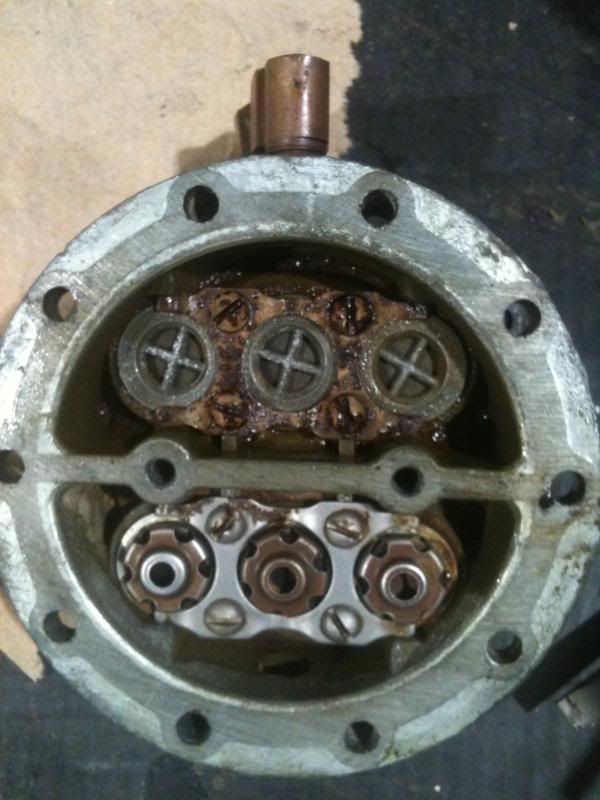
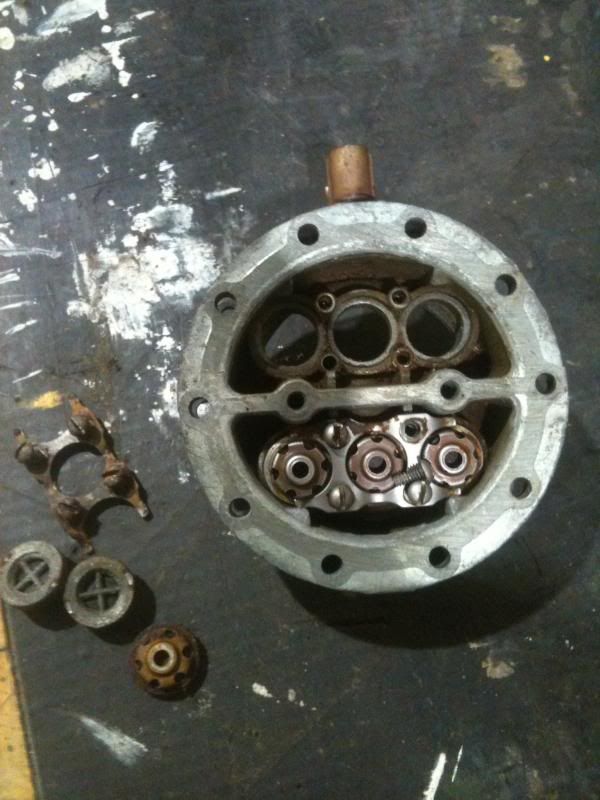
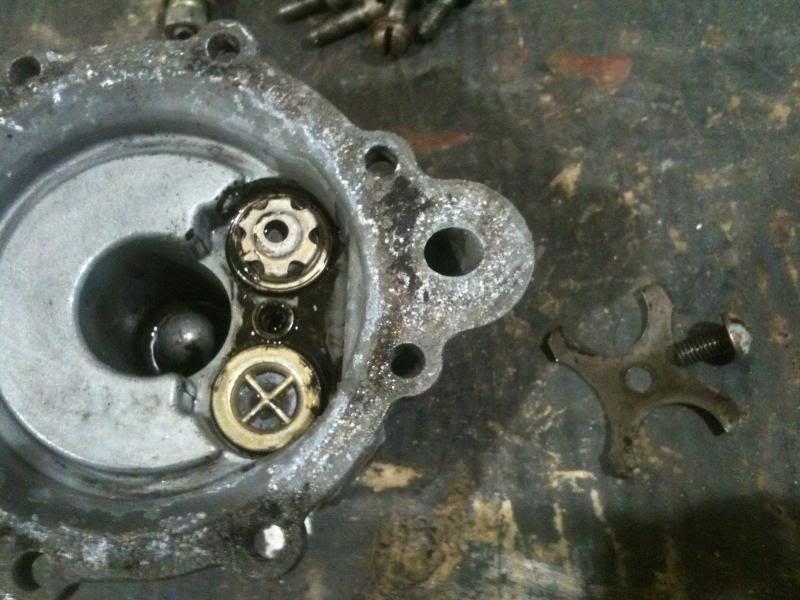
Returning to the fuel pump, remove the valves. Note the orientation of the valves in the pump!
Image

Image

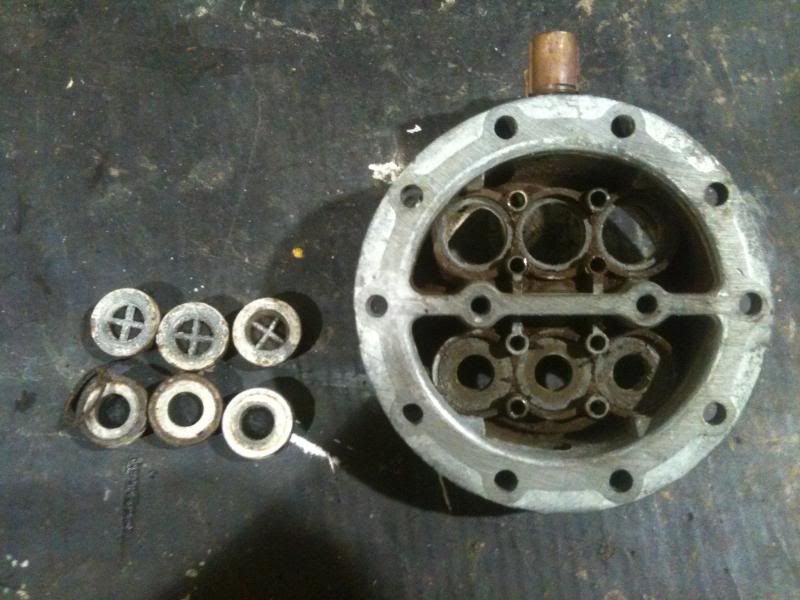
Remove the valves from the vacuum pump
Image

Remove remaining components from the body.
Image

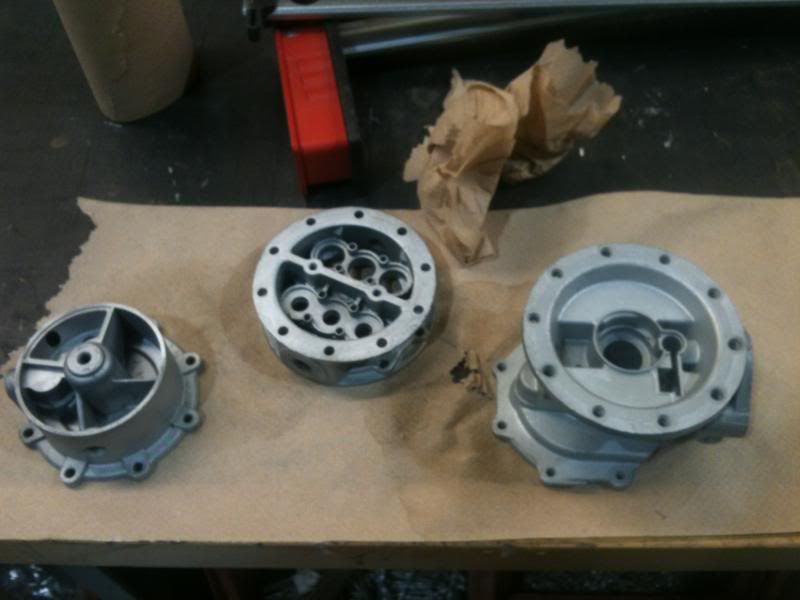
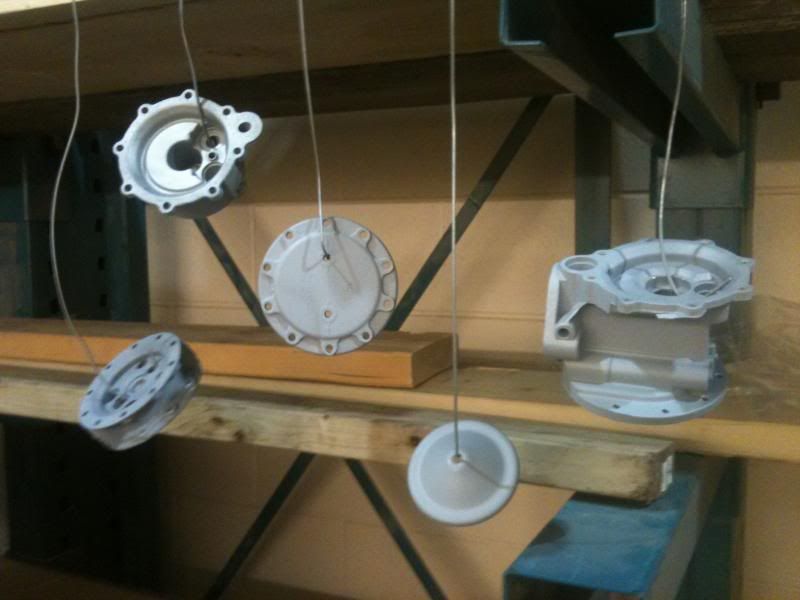
Clean the disassembled pieces as you see fit. After a sandblast to clean all of the deposits and any remaining bits of gasket, I chose to prime and paint my pump.
Image

Image


Assembly

Here are all of the components from the rebuild kit supplied from Then and Now.
Image

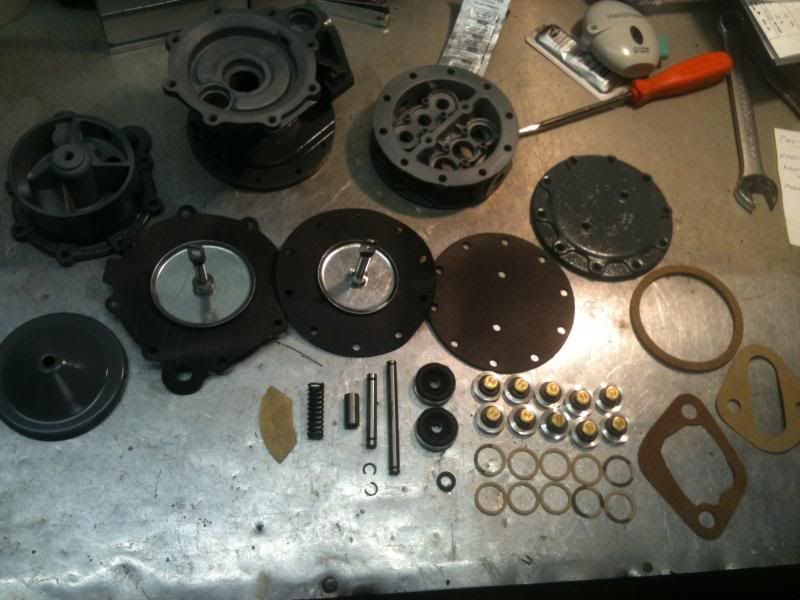
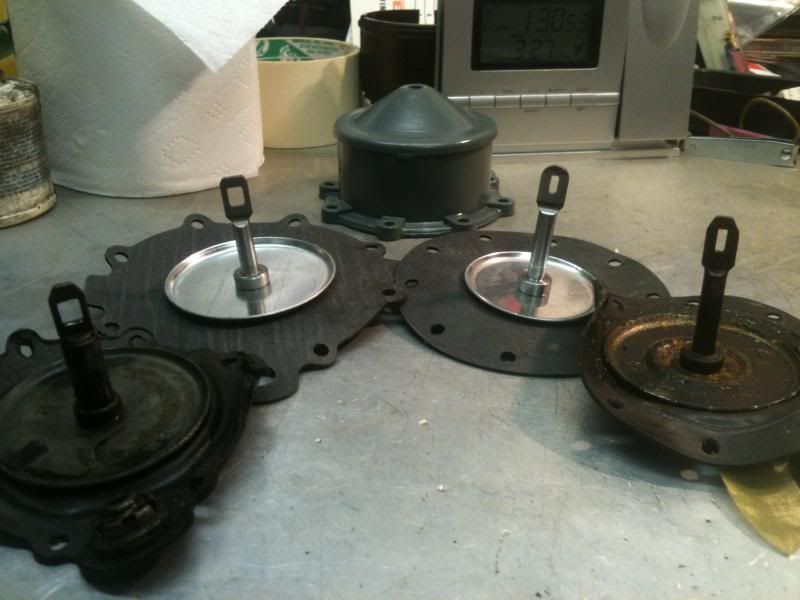
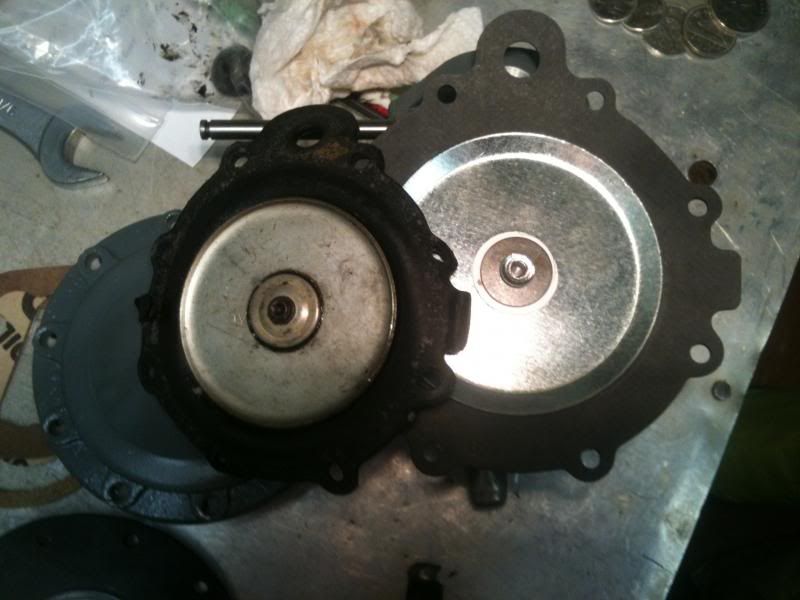
The old diaphragms beside the new. We will return to this comparison later.
Image

Install the new gaskets and valves throughout. I used hi-tak to hold the gaskets in place during assembly.
Image

Here you can see that there was a difference between the old and new vacuum diaphragms. I contacted Then and Now and they promptly shipped a replacement of the proper size.
Image

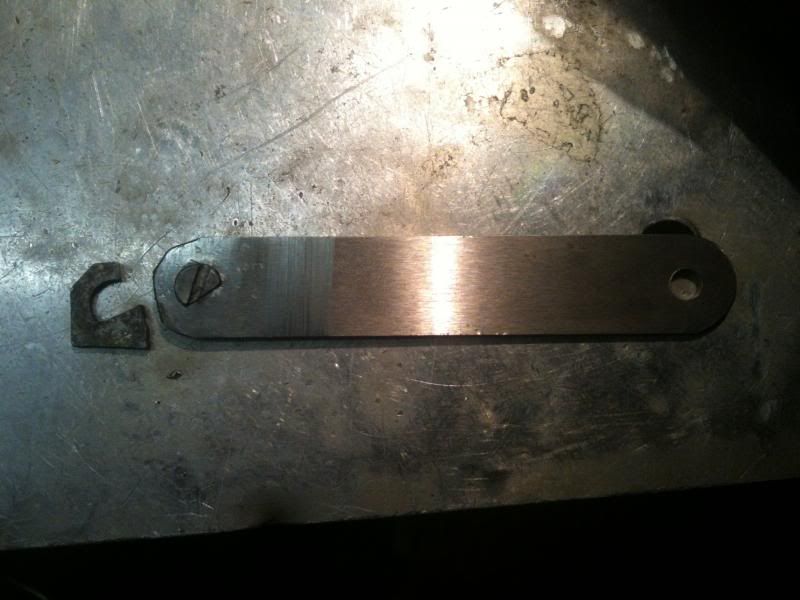
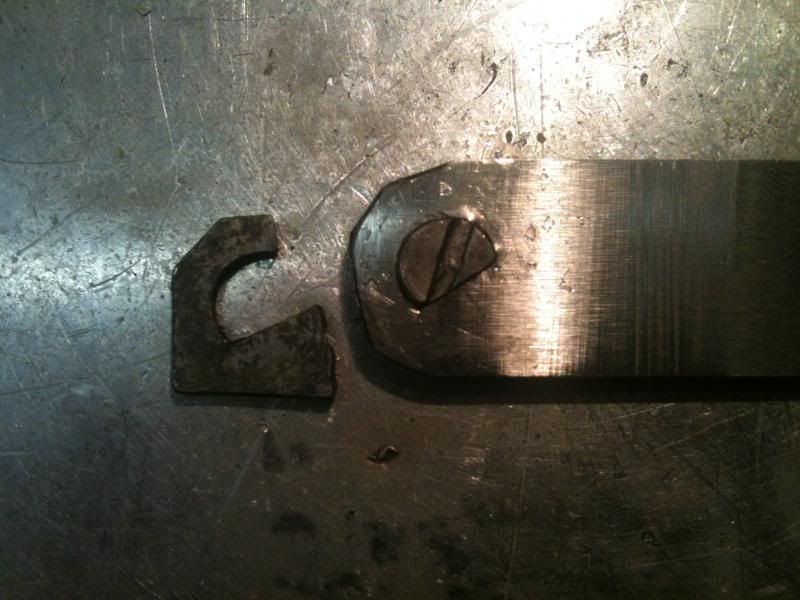
This is the primer arm that arrived from Then and now. It required some fitting and shaping to work. Re-assemble the primer shaft and links in the order removed and install at this point.
Image

Image

Image


Install the new bushing in the arm.
Image

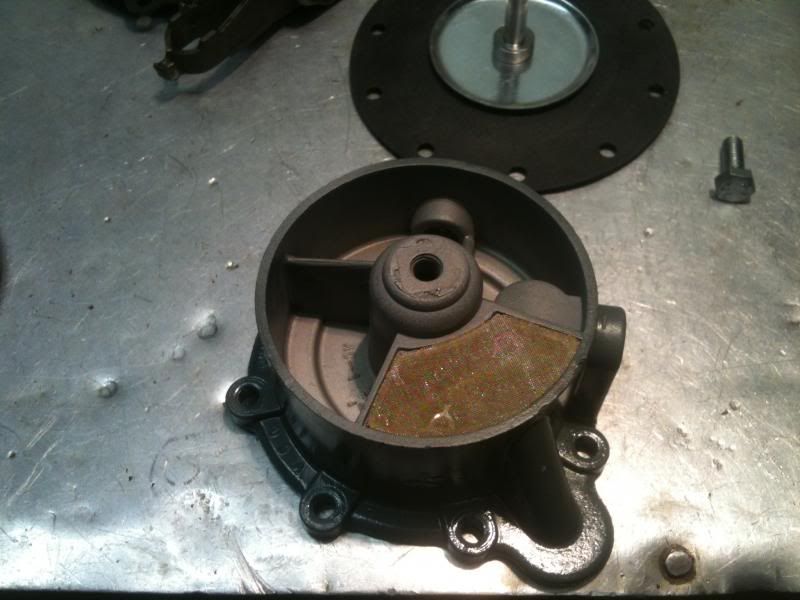
Install the new filter screen in the vacuum pump.
Image

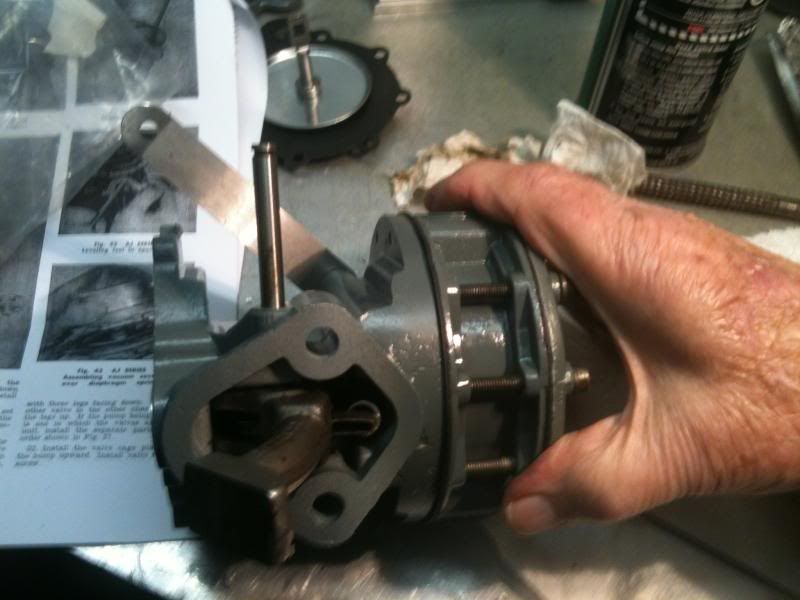
To install the arm, use a long thin punch in place of the pin during assembly.
Image

Image

Install the new fuel pump diaphragm, hooking the diaphragm shaft to the pump arms. Hooking the diaphragm shafts to the arms is a finicky task. Take your time.
Image

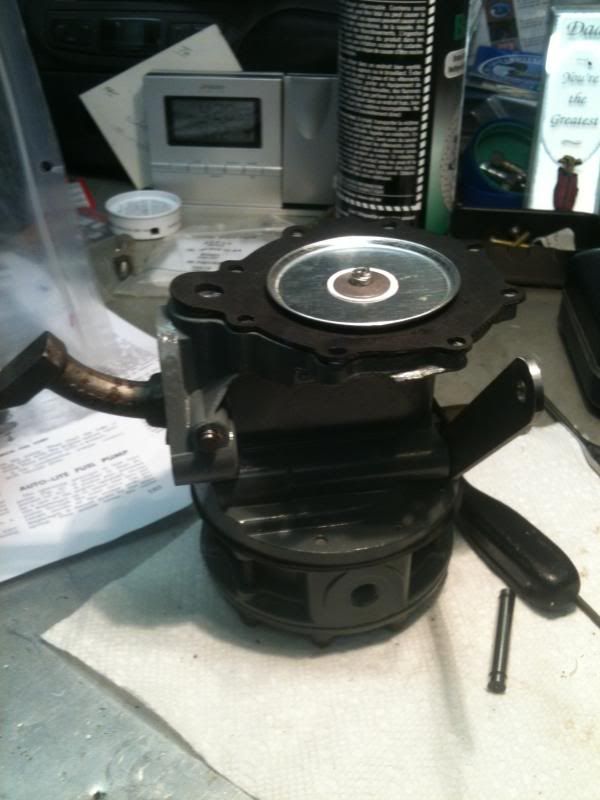
Install the pump housing.
Image

Image

Install vacuum pump diaphragm.
Image

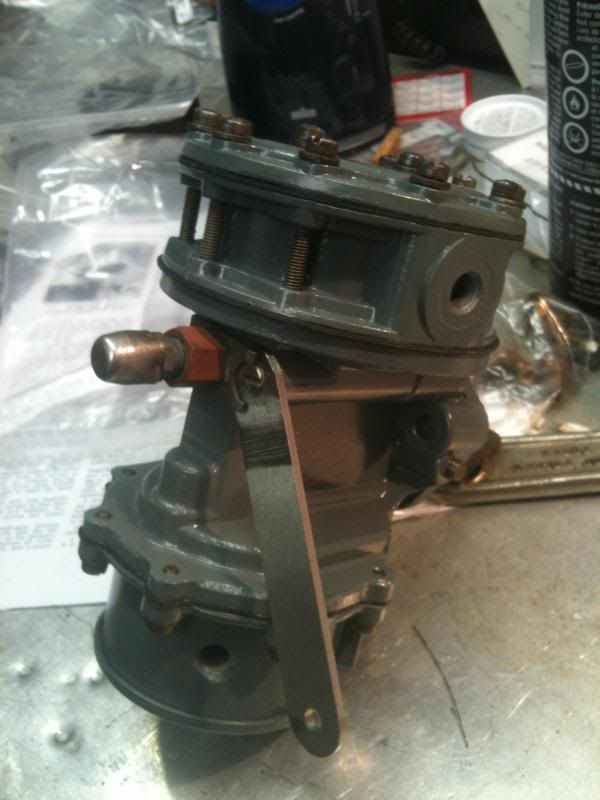
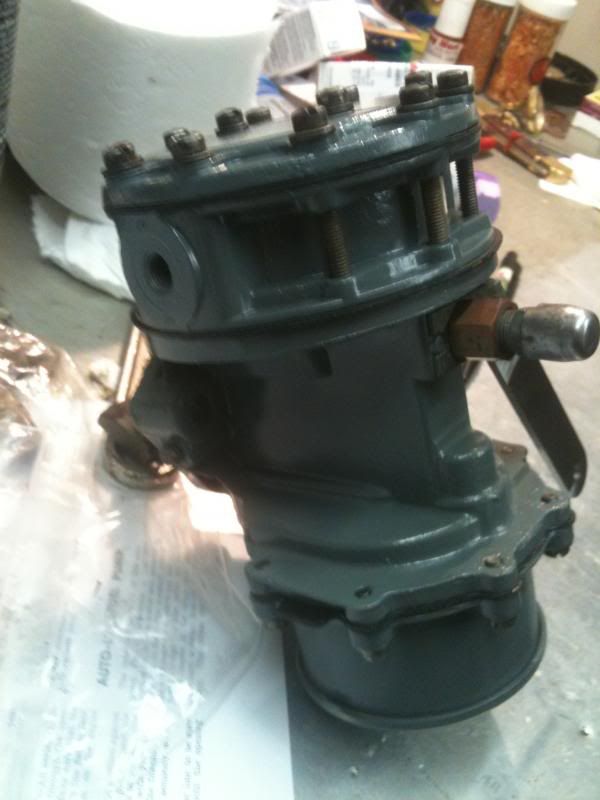
There you have it. Note that I did not make the forward bend in the primer handle when I initially did the rebuild. Ensure that you do this!
Image

Image

Image

As mentioned at the beginning, it has been a couple of years since I completed this rebuild. If there is anything that I may have missed or forgotten in that time, please feel free to add it in!
Jordan

M38 CDN
52-30718
User avatar
wesk
Site Administrator
Site Administrator
Posts: 16413
Joined: Sun Apr 03, 2005 6:00 pm
Location: Wisconsin
Contact:

Post by wesk »

Hello Jordan,

Very nicely done! :D

I took the liberty of making a PDF copy and have it linked on our downloads page. Thanks so much for taking the time to produce this excellent tutorial.

Here's the PDF link: http://www.willysmjeeps.com/v2/modules. ... it&lid=165
Wes K
45 MB, 51 M38, 54 M37, 66 M101A1, 60 CJ5, 76 DJ5D, 47Bantam T3-C & 5? M100

Mjeeps photo album: http://www.willysmjeeps.com/v2/modules. ... _album.php
southpw
Member
Posts: 268
Joined: Sat Jun 14, 2014 6:00 pm
Location: Cambridge, Ontario, Canada

Post by southpw »

Very nice write up. Did you find literature stating that the vent you have on yours should indeed be a vent? And for what purpose? I used same kit but my primer arm is held in with just a bolt. Maybe why I get vac pressure but no fuel pressure when bench testing.

Image
1952 M38 project
Brad
User avatar
jeeperjoe
Member
Posts: 105
Joined: Thu Apr 18, 2013 6:00 pm

Post by jeeperjoe »

Nice write up. thanks for posting it. What model pump in that? I spotted some differences between it and my 4096. For one thing mine doesn't have a screen in it. Perhaps it's supposed but it's not there. Also TM9-1828A figure 58 shows that there's supposed to be TWO screens in the pumps, one on the vacuum side and another on the fuel side. The screens could be one of the differences in the various models of the pumps. That's one reason why I've been trying to get DETAILED information about the various pumps.

If I read your description correctly, your pump had the shaft for the priming lever but not the lever. Correct? Mine doesn't even have a lever, just a brass plug in the hole where it goes.

BTW where you able to just push the shaft for the pump arm out? The end of the shaft on my 4096 pump and the two civie pumps that I have, all have the end of the shaft braded over so that they can't come out unless I grind the brad off first.
User avatar
keats
Member
Posts: 342
Joined: Wed Apr 13, 2005 6:00 pm
Location: Middletown Ct

Post by keats »

I have never rebuilt one of these pumps but did think about it and read up on it. The repair manual states that both diaphragms need in a flexed position before tighting cover screws or to much fuel pressure will result.
A special tool is shown on how to do the vacuum side, and the fuel side you need to apply pressure to the pump arm to flex fuel diaphragm. Did you find this necessary?

c. Assemble Fuei Cover to Body.
(1) Install cover on body, making sure that file marks on cover and body line up. Push on rocker arm until diaphragm is flat across body flange. Install cover screws and lock washers loosely until screws just engage lock washers. Push rocker arm in full stroke and tighten cover screws securely. Release rocker arm.
(2) Diaphragm must be held in flexed position while tightening cover screws or pump will deliver too much pressure.


(3) While holding vacuum diaphragm in position, the body should be clamped in a vise, vacuum side up. Clamp on either side of the mounting flange. The vacuum diaphragm must be held level with body flange during the following operations. The diaphragm is held level by inserting a %2- inch piece of metal between rocker arm stop and body. This tool (figs. 32 and 33) can be made from a piece of steel, 0/16 x %2 X6. Bend one end to form a right angle hook three- eighths of an inch from bend to end.
(5) Insert two No. 10-32NF X 11/2 screws in two opposite holes in cover flange. Turn these long screws down, alternating a few turns on each. Insert regular screws with lock washers and tighten until screws just engage lock washers. Replace two long screws with regular screws and lock washers.
(6) Remove 3/32-inch tool (fig. 33) from rocker arm position. This allows the heavy vacuum spring to push diaphragm into a flexed position. Tighten all cover screws securely.


[/img]
Gary Keating
1949 C3A, 1952 M38,
1954 M170, 1957 Cj3B
User avatar
wesk
Site Administrator
Site Administrator
Posts: 16413
Joined: Sun Apr 03, 2005 6:00 pm
Location: Wisconsin
Contact:

Post by wesk »

Image

The lower or fuel side diaphragm is flexed using the pump's main driven lever. The upper or Vacuum diaphragm is flexed using the special tool.

here are the referenced instructions (Par C & E) for the diaphragm leveling:

Image

Image
Wes K
45 MB, 51 M38, 54 M37, 66 M101A1, 60 CJ5, 76 DJ5D, 47Bantam T3-C & 5? M100

Mjeeps photo album: http://www.willysmjeeps.com/v2/modules. ... _album.php
User avatar
Hawkshadow
Member
Posts: 310
Joined: Tue Oct 09, 2012 6:00 pm
Location: Toronto, Ontario, Canada

Post by Hawkshadow »

Thanks for brining it up. I forgot about that step. To flex the fuel diaphragm I used the primer arm. Can't recall what I did for the vacuum, but it's been running fine with no issues.
Jordan

M38 CDN
52-30718
User avatar
oilleaker1
Member
Posts: 973
Joined: Wed May 13, 2009 6:00 pm
Location: South Dakota

Post by oilleaker1 »

Well done. I would like to add my rebuild failed. My Jeep would not supply fuel going up hill. Drove me nuts. The problem was when I blasted the corrosion out of the body , installed gaskets and check valves, the fuel/vacuum suction was leaking past the gaskets under the check valves. The surfaces were rough from corrosion. I also discovered that the spring steel fingers that hold the check valves in place were not tight enough. You could easily move the check valves in the pocket with your finger when tightened down!!!!! I found a stone and arbor in my dremel tool set that fit the aluminum pocket well. By hand, I lapped the seats. I then removed a bit of material from the mounting posts that the steel fingers mount on. Added a small washer under the hold down screws, and re-assembled the pump. It now functions well up hill. No more frustration. My pump was also hard starting. I had to choke it all the time to get it to start. Another clue. Funny how 8-12000 feet in elevation brings out the bad. John
User avatar
paru
Member
Posts: 1
Joined: Sat Sep 10, 2022 6:00 pm

Post by paru »

Hi, I enjoyed reading the article on rebuilding your M38 fuel pump. I am rebuilding my M38A1 fuel pump after finding gas in my crankcase.

When you put your pump together did you use gasket glue on the diaphragm gaskets on both the fuel and vacuum sides? There was a reference to using Permatex Hi-tac for positioning valves/gaskets for assembly. I'm not sure if this pump just relies on the diaphragm rubber sealing against the body/cover with the pressure applied by the screws. Mine didn't seem to have any glue on these parts when taken apart but I've typically always used glue on gaskets for sealing in the past.

What is recommended for assembly; gasket glue or no glue with gaskets?

Thanks.
User avatar
wesk
Site Administrator
Site Administrator
Posts: 16413
Joined: Sun Apr 03, 2005 6:00 pm
Location: Wisconsin
Contact:

Post by wesk »

Paru,

If you will go to the Downloads Page and download the TM 9-1828A Fuel Pump rebuilding and follow the directions given in there and you should have no problems.

http://www.willysmjeeps.com/v2/modules. ... it&lid=109
Wes K
45 MB, 51 M38, 54 M37, 66 M101A1, 60 CJ5, 76 DJ5D, 47Bantam T3-C & 5? M100

Mjeeps photo album: http://www.willysmjeeps.com/v2/modules. ... _album.php
Post Reply