51 M38

Start your project thread here for advice and for others to follow along with your project. This is a long term thread.

Moderator: wesk

User avatar
jake138
Site Administrator
Site Administrator
Posts: 128
Joined: Mon Nov 17, 2014 6:00 pm
Location: Connecticut

51 M38

Post by jake138 »

So this is how it all starts. As far back as I can remember, I've always had a fascination with Willys. When I was in middle school, I would peruse the internet in my free time just looking at ads for old Willys, telling myself that maybe someday I'd be able to restore my own. FC's, CJ's, pickups, anything, I've never been partial to any particular model, as long as it had Willys somewhere in the name, I could take a liking to it. I told myself that maybe someday when I had a house and was settled in with a family that maybe I would start my own restoration.

As I got older and through high school, I quickly realized that life isn't going to slow down and wait for me to catch up. When I was in college, a good friend of mine pulled a CJ3A out of his uncles field and got her on the road on his own, engine swap after transmission, axles and all. Then one Sunday morning, him and I hopped in and went for a quick putt through some trails near his house, and I got bit. I got bit by the Willys bug, and I got bit hard: I had to have my own.

A couple weeks of digging on craigslist, a few afternoon drives around New England, and I found it. The had-to-have, diamond in the rough, 1951 M38.

I bought her about 4 months ago, so before I get much further with my work I've decided its time to start logging my progress.

Image

Image

Image

Image

Image

Image

Image

Image

Image

Image

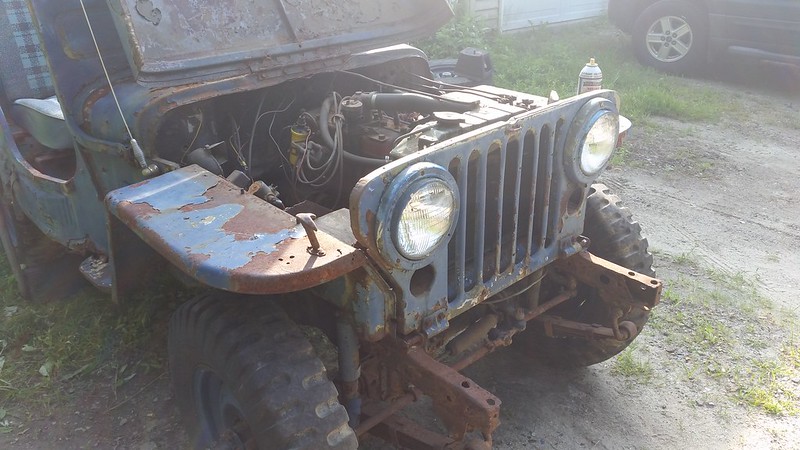
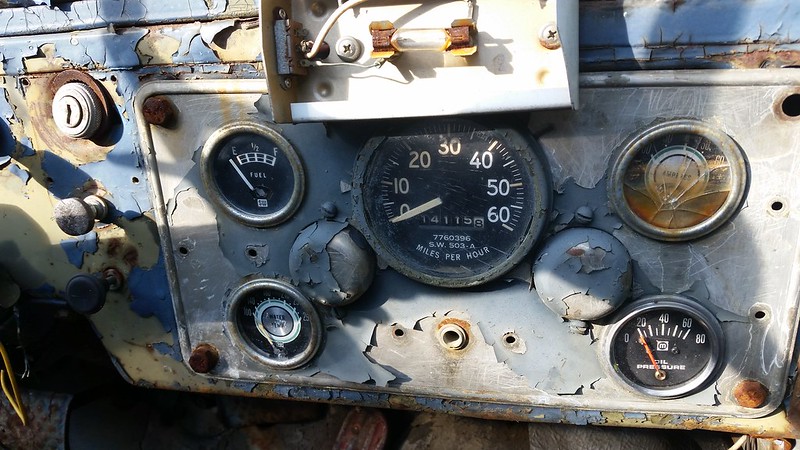
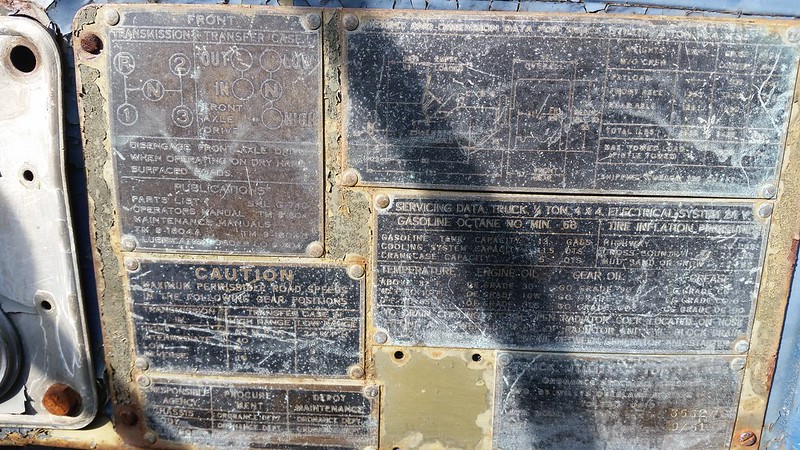
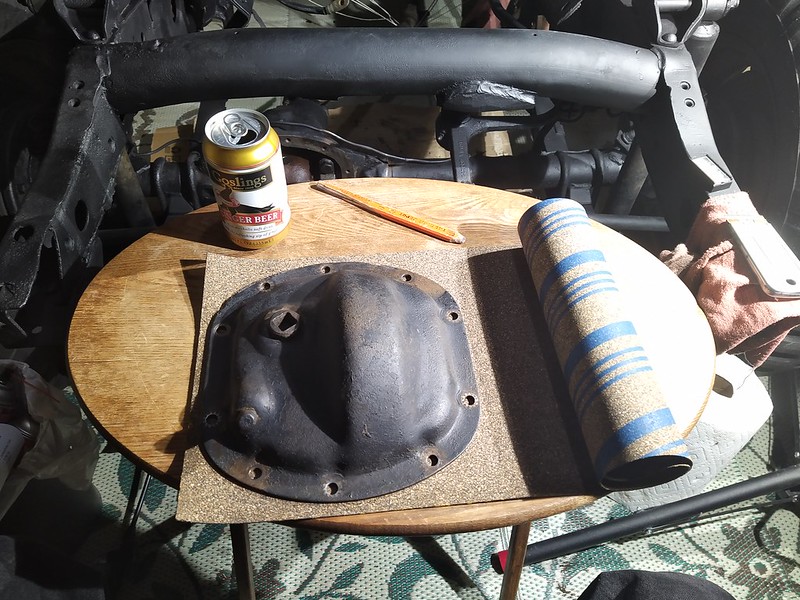
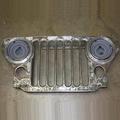
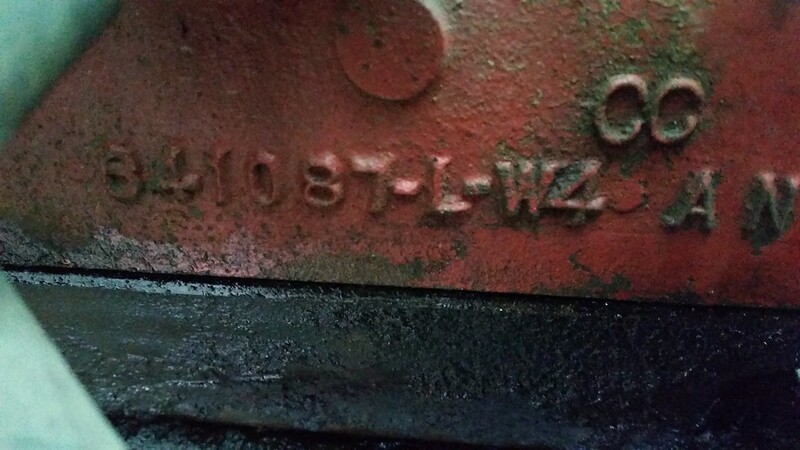
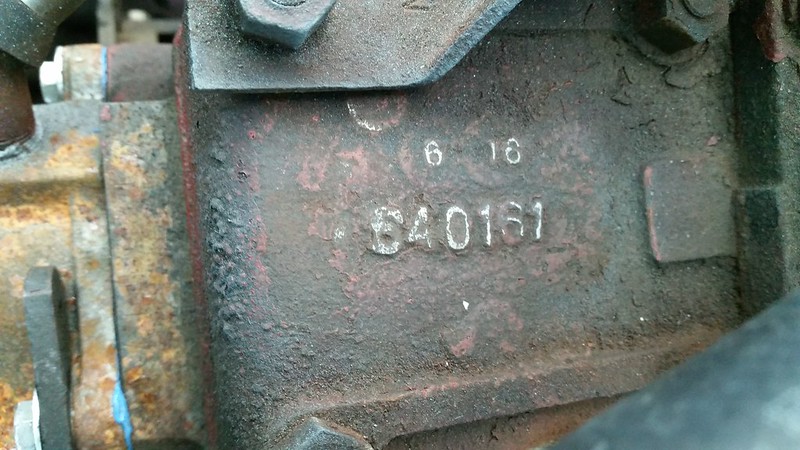
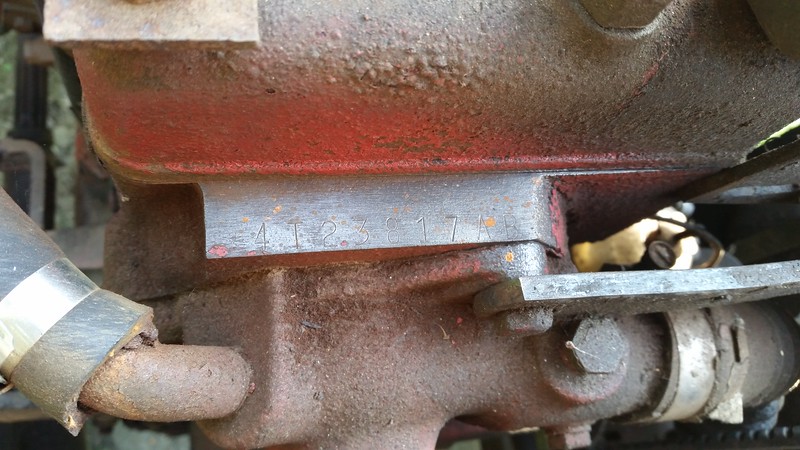
These pictures were the day she came home. Since then I have mostly videos, but I've done basics like new belt, plugs, wires, upper and lower radiator hoses, Solex carb, double groove water pump, and I've bought a 24v distributor that will be going on soon. I know its a rebuilt civvy motor with 12v mod, but everything else as far as I can tell is factory.

In the long haul, I'd like to do my own type of resto-mod. I'm going back to 24 volts for sure, but theres a few things I'll probably make the way I want to have it. So this is how it all starts, we'll see where I go from here.
Last edited by jake138 on Sun Mar 28, 2021 6:32 pm, edited 3 times in total.
User avatar
BullRun
Member
Posts: 459
Joined: Mon Mar 09, 2009 6:00 pm

Post by BullRun »

Nice find! There are quite a few mentions on here about blue being on M38's. My M38 has quite a few areas and parts with the same blue.

Lots of people selling parts but your go to guy for replacement sheet metal is Midwest Military. From my experience his parts are better than NOS factory replacement parts in some instances.

It looks like you have a military block and crank with a civilian water pump. I can't tell if it is a civilian head or military. Just guessing civilian. Also the red is a clue it has been rebuilt at some point. The block tag on the passenger side will probably have your crank and piston measurements from the rebuild and also which ordnance depot rebuilt it. The water pump boss will have your block serial number.

M38's sometimes get crazy numbers when restored and sold. So depending on the mods it is always a good idea to make them reversible if possible in todays automobile market.

The M38's are a really interesting jeep!
User avatar
Bretto
Member
Posts: 1390
Joined: Tue Nov 23, 2010 6:00 pm
Location: Orem, UT

Post by Bretto »

Welcome!
It's great to see fresh a new project roll in. I may be biased but I think you got the best of the WILLYS. :D Thanks for the pics and keep them coming. You'll be happy you did and will have something to look back on.
Keep us updated. You got a bumpy fun trek ahead of you.
Goodluck,
Brett
User avatar
wesk
Site Administrator
Site Administrator
Posts: 16413
Joined: Sun Apr 03, 2005 6:00 pm
Location: Wisconsin
Contact:

Post by wesk »

Snake is not the best name to call someone by. Why not post your real first name in your signature block.

If you can give us these three numbers we can help determine what engine you have.

Image

The block serial will have a prefix of letters or letter & numbers.
Wes K
45 MB, 51 M38, 54 M37, 66 M101A1, 60 CJ5, 76 DJ5D, 47Bantam T3-C & 5? M100

Mjeeps photo album: http://www.willysmjeeps.com/v2/modules. ... _album.php
User avatar
whydahdvr
Member
Posts: 647
Joined: Thu Jul 17, 2008 6:00 pm
Location: Melrose, MA and Santa Fe, NM

Post by whydahdvr »

Looks good! Lots to work on so you won't get bored.
Wes mentioned putting your name on but how about also your location? I'm in New England as well, Boston/North Shore area.
Good luck!
North Shore, MA
Santa Fe, NM
1942 GPW
1952 M38
1964 Apollo 5000 GT

De Opresso Liber
ACRay
Member
Posts: 80
Joined: Wed Jul 23, 2014 6:00 pm
Location: Fort Bliss Texas

Post by ACRay »

I love seeing someone buy one that needs rescue that's going to rescue it. I always shed a tear when I see classics rusting away in someones yard that refuses to sell or preserve in any way. Good luck and I'm sure looking forward to seeing the build pics come
User avatar
jake138
Site Administrator
Site Administrator
Posts: 128
Joined: Mon Nov 17, 2014 6:00 pm
Location: Connecticut

Post by jake138 »

Hope everyone had a great Thanksgiving. I just came home from a trip down to North Carolina for the weekend. I've been busy the past two weeks preparing for the trip so I just read through everything and I'm glad to see people as excited about my build as I am. Here's what I came up with:

Image

Image

641087-L-W4 is the block casting number as I see it

Image

640161 is the head casting number as I see it

I also found that I still have my fender mounted data tag behind the passenger seat, albeit painted over.

Image

It looks like the numbers on the tag are stamped on, so would I be able to safely sand off some of the blue paint in order to read it properly, or will I destroy some painted on information on the tag? I haven't actually seen any photos of what this particular tag is supposed to look like.
Last edited by jake138 on Sun Mar 28, 2021 6:37 pm, edited 4 times in total.
Jake, Central CT
51 M38 s/n 35627
User avatar
jake138
Site Administrator
Site Administrator
Posts: 128
Joined: Mon Nov 17, 2014 6:00 pm
Location: Connecticut

Post by jake138 »

Completely forgot to upload the block serial:

Image

4T23817AB
Last edited by jake138 on Sun Mar 28, 2021 6:37 pm, edited 2 times in total.
User avatar
RICKG
Member
Posts: 1752
Joined: Mon Aug 30, 2010 6:00 pm
Location: SO IDAHO

Post by RICKG »

DONT sand the tag (patent plate) Jake. Take it off and soak it
in brake fluid till the paint lifts off. That tag is aluminum (I think)
and you'll quickly scratch the heck out of it by sanding.
keep 'em rollin'
RICKG MC 51986 DOD 01-52, '50 CJ3a
User avatar
wesk
Site Administrator
Site Administrator
Posts: 16413
Joined: Sun Apr 03, 2005 6:00 pm
Location: Wisconsin
Contact:

Post by wesk »

Looks like you have a 47-50 Willys Pickup engine with the stock late 40's civvy head.

Rick is correct. Soak with DOT 3 brake fluid a day or so and the paint will rinse off with water.
Wes K
45 MB, 51 M38, 54 M37, 66 M101A1, 60 CJ5, 76 DJ5D, 47Bantam T3-C & 5? M100

Mjeeps photo album: http://www.willysmjeeps.com/v2/modules. ... _album.php
User avatar
jake138
Site Administrator
Site Administrator
Posts: 128
Joined: Mon Nov 17, 2014 6:00 pm
Location: Connecticut

Post by jake138 »

Awesome thanks for identifying my motor for me. I knew it wasn't an original motor, but I'm still pretty excited that atleast I know what it is now.

I have today off from work so I'll start soaking the tag.

Update:

Started working on recovering my hood registration numbers today. With the advice from a few people in another thread, I bought a can of paint stripper and a few sheets of 400, 600, and 800 grit paper. I started off by testing a small area towards the center of my hood, to see how quickly the 400 grit would remove paint, as well as see how many layers of paint I would be going through:

Image

So it looks like I had the outer layer of blue, a tan primer, a darker blue, a reddish brown primer, then finally the OD green. While I was sanding this, I started tested the paint stripper on a different section of the hood. Following the instructions on the can, I coated the area, waited ten minutes and stripped off the outermost layer. I repeated this three times and discovered that I had already hit bare metal.

So now I had my mind made up. I felt that the paint stripper was too risky to use, and I also decided that the 400 grit was a little more aggressive than what I wanted. So I started right off working the passenger side of the hood with the 800.

Image

After about 40 minutes, I had made it through most of the outer blue.

Image

Another half hour or so later and I had exposed a good area of the tan primer.

Image

Soon I was through the tan and found the dark blue underneath, also hitting green in a few spots. At this point, my lower back was sore from being hunched over so I figured this a good spot to take a break. I will get back at it tomorrow and see what I can discover.
Last edited by jake138 on Sun Mar 28, 2021 6:41 pm, edited 3 times in total.
Jake, Central CT
51 M38 s/n 35627
User avatar
jake138
Site Administrator
Site Administrator
Posts: 128
Joined: Mon Nov 17, 2014 6:00 pm
Location: Connecticut

6 years later

Post by jake138 »

Sorry for the delay, it's been a busy 6 years since my last post.

We've made some progress, and I've had a lot of help getting to this update.

So we went ahead and cleaned up the engine. Replaced a couple valves, lapped everything back in and put the head back on with all new gaskets. The water pump was replaced with an M38 spec double groove pulley. Gave it all a coat of engine enamel and it's ready to run.

Image
Last edited by jake138 on Sun Mar 28, 2021 6:41 pm, edited 3 times in total.
Jake, Central CT
51 M38 s/n 35627
RonD2
Member
Posts: 2065
Joined: Wed Oct 01, 2014 6:00 pm
Location: South Carolina, Dorchester County

Post by RonD2 »

We hope that later is a little sooner than 6 more years Jake!

And if you scroll up, we need all new photos because that PhotoBucket stuff ain't cutting it no more. Can't see much detail.....

Good luck!

:lol:
Ron D.
1951 M38 Unknown Serial Number
1951 M100 Dunbar Kapple 01169903 dod 5-51

“The only good sports car that America ever made was the Jeep."
--- Enzo Ferrari

User avatar
jake138
Site Administrator
Site Administrator
Posts: 128
Joined: Mon Nov 17, 2014 6:00 pm
Location: Connecticut

Post by jake138 »

Going to go back in time a few months here.

I had the Jeep in the shop and finally was able to bring it home where I can spend more time working on it. First picture coming off the U-haul and into the back of the garage.

Image

I built what I've been referring to as "rolling stanchions" which are cheap furniture dolleys with 2x4 frames to lift the body high enough to allow the frame to roll out underneath, saving space in the garage. The horizontal pieces holding the body are my 2x10 oak ramps, with the aluminum end plates removed.

Image

Image

While the Jeep was in the shop, I managed to get about half the frame cleaned. Removed rust with a wire wheel on the angle grinder and washed it down with acetone before painting with Rustoleum Rust Reformer in a rattle can. I'm very pleased with how well the paint lays out and how it adheres. According to the can, it accomplishes some type of chemical reaction that binds the primer to the rust and essentially "undoes" the oxidation. I've hit the primer with the wire wheel and it takes a substantial amount of time to strip the paint off back down to bare metal.

That weekend I was able to finish degreasing the frame and after a few more hours with the wire wheel, I primed the front half.

The dogs were uninterested in Jeep time.
Image

Very skeptical wife assessing the work ahead of me.
Image
The pump sprayer is a $10 Lowes job filled with acetone that I use wash everything before I paint.

This quick primer job served two purposes: it gave me an excuse to go over the entire frame with wire wheel and assess what needs to be done, and it gave me a sense of having accomplished something. There are still many parts that will be stripped and redone, but at this point, at least nothing is rusting further, and it makes me feel better about having something done. You can see I skipped the propeller shafts entirely: these will be removed later when doing the pinion seals so that they can be cleaned and painted seperately. The shocks will also be completely replaced soon.

Image[/url]

Back in the garage, I removed both diff covers to take a peak at the gears and see if the axles needed attention. Both gear sets looked pretty good to me, although the front axle's gear lube looked more like peanut butter and less like gear lube. It took a few cans of brake clean to fully wash out the muck, but it looked really good inside afterwards.

Image

I like to use the cork gasket sheets from O'Reillys. I traced out the diff covers and cut the gasket out with a razer blade.
Image

Image

Not shown is the diff covers being cleaned, primed, and reinstalled.
Last edited by jake138 on Sun Mar 28, 2021 6:49 pm, edited 1 time in total.
Jake, Central CT
51 M38 s/n 35627
User avatar
4x4M38
Member
Posts: 3487
Joined: Thu May 29, 2014 6:00 pm
Location: Texas Hill Country

Post by 4x4M38 »

Jake,
Good progress!

You’ll want to rebuild your Bendix joints up front and lose that steering dampener. It being there indicates your rig was probably suffering from the “Death Wobble”. The dampener is the go-to crappy fix instead of going completely through your steering components all the way from the joints to the steering wheel.

Take care,
Post Reply