If you are restoring factory class you need to go to the MVPA web site and pose your question to their judging staff. Otherwise motor pool class or driver shouldn't make any difference. _________________ Wes K
45 MB, 51 M38, 54 M37, 66 M101A1, 60 CJ5, 76 DJ5D, 47Bantam T3-C & 5? M100
Joined: Oct 10, 2012 Posts: 310 Location: Toronto, Ontario, Canada
Posted: Tue Nov 18, 2014 9:46 am Post subject:
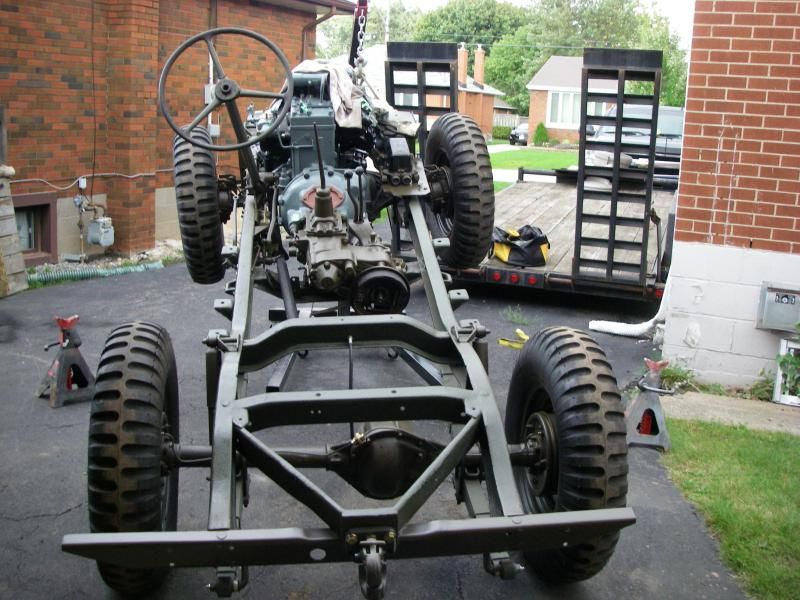
Sometimes a little creativity is required during these projects... Like when you removed the exhaust system in one piece after the engine and then re-installed the engine first.
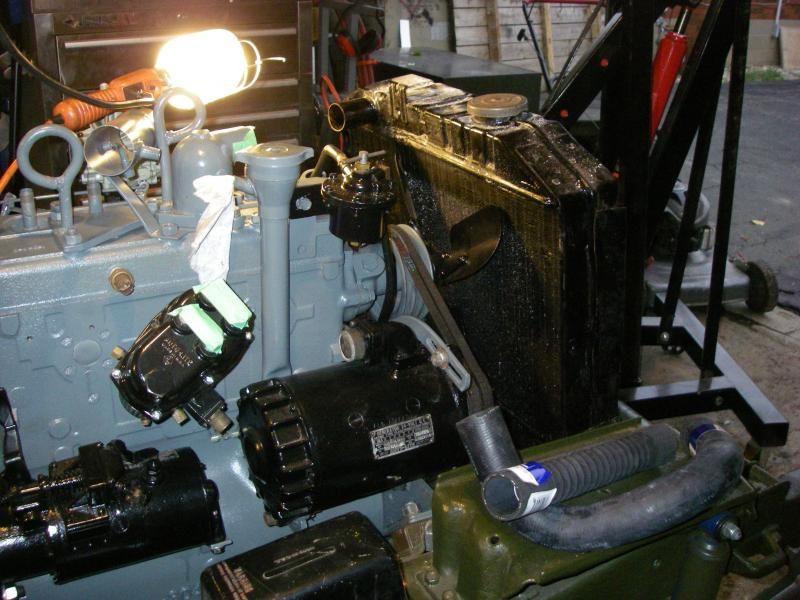
Onto mounting the radiator and hoses. As opposed to the 2 piece lower assembly listed from some jeep suppliers I highly suggest Napa #7728. a perfect fit, just trim to length. I also went with the flexible hose FF197 for the upper as opposed to a piece of straight hose.
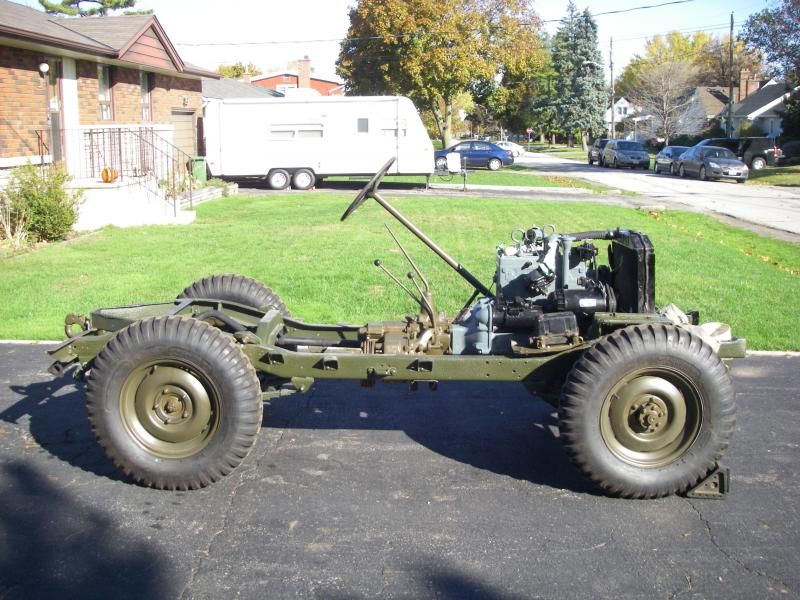
Here she is basking in the fall sunshine patiently waiting for the body.
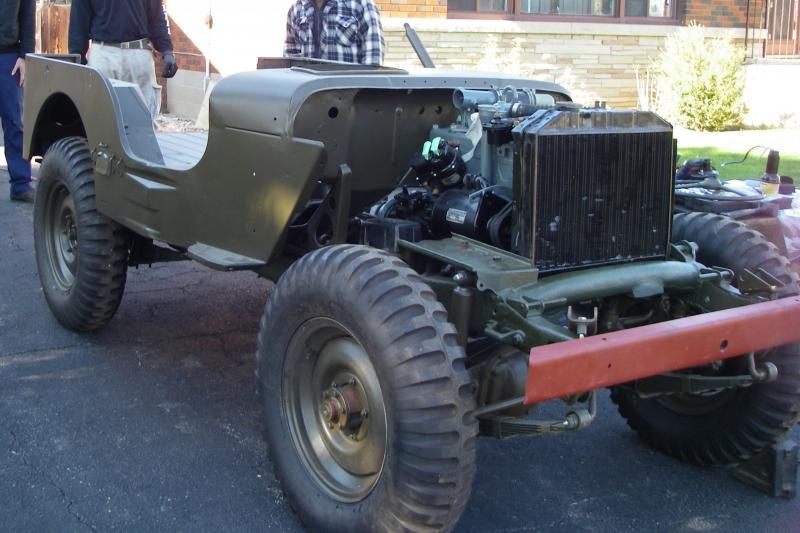
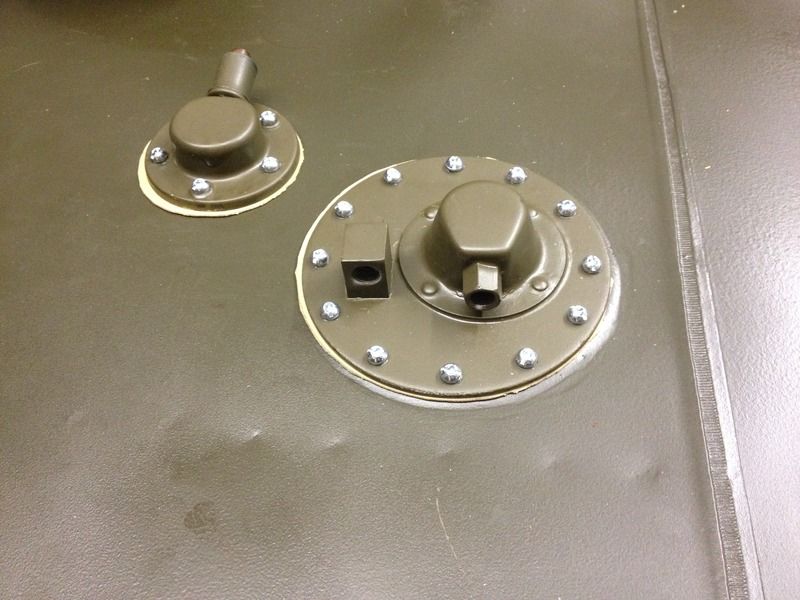
Skipping over the dozen or so times that the body went on and off as we marked and drilled mounting holes... here she is! The new body lined up and mounted quite well, lining up better than some of the originals I've seen. The underside of the tub and typical problem spots such as in the taillight housings, toolbox, battery box, and under the gas tank have all been protected with colour-matched linex as well.
Joined: Oct 10, 2012 Posts: 310 Location: Toronto, Ontario, Canada
Posted: Mon Jan 12, 2015 9:23 pm Post subject:
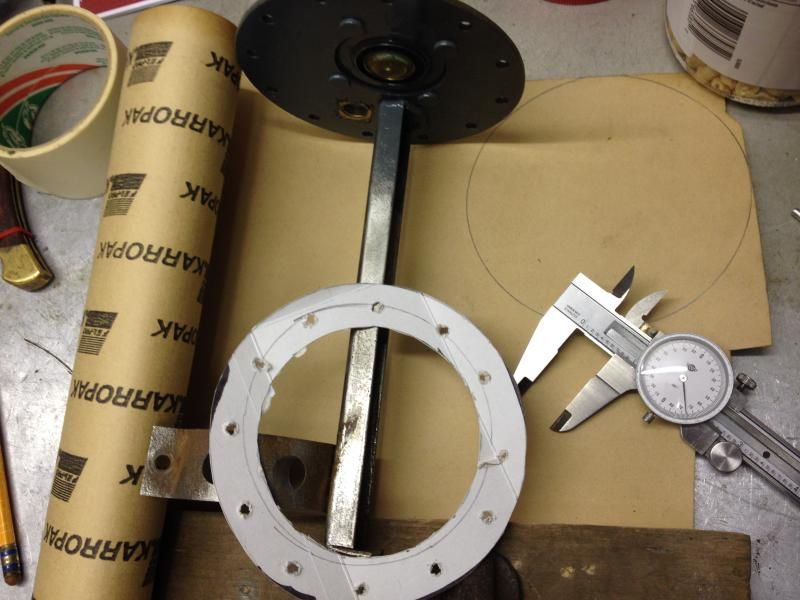
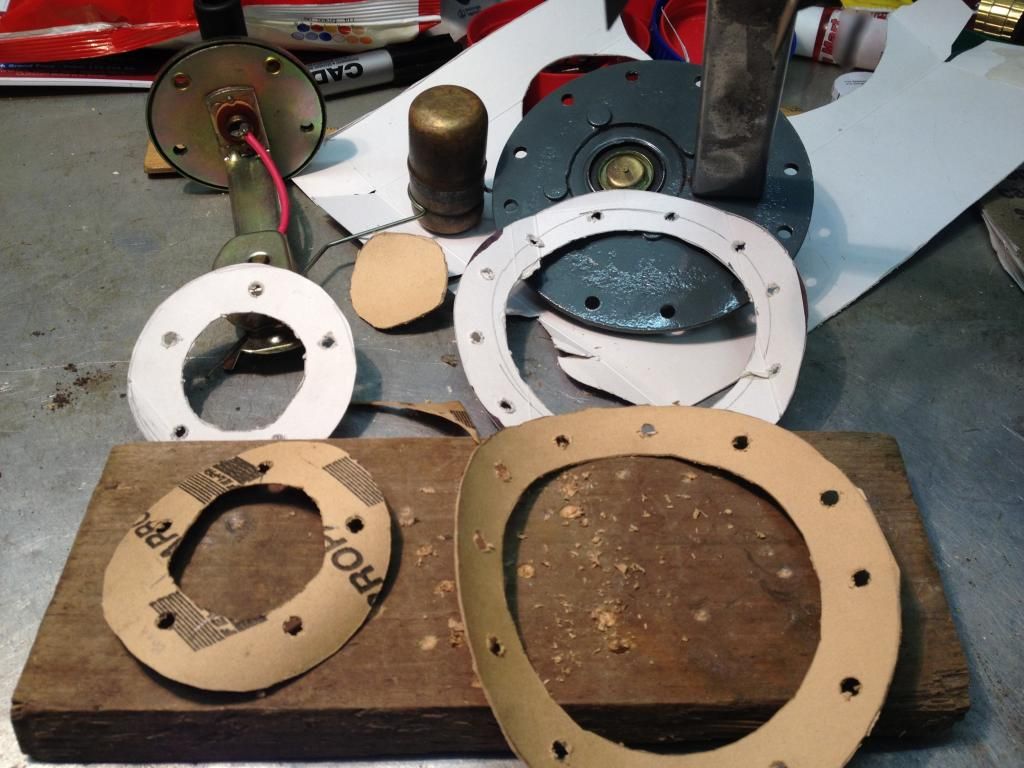
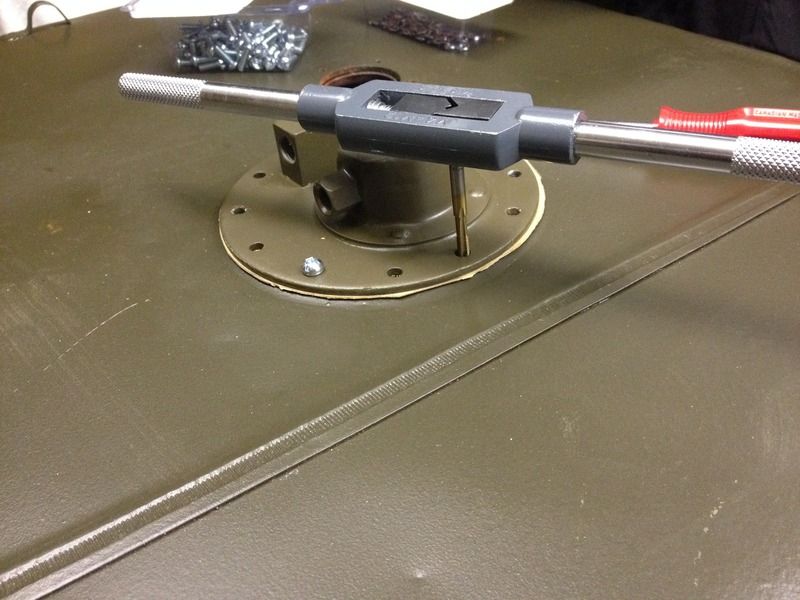
Frigid weather certainly slows down the progress on this type of project, but it's important to keep busy. So, I spent a couple of hours with calipers and an exacto knife making up some gaskets for the gas tank.
I spent a while making out measurements and did a trial run with cardboard before moving on to gasket material.
2 practice units complete. It was quite a pleasant surprise to find that you can make the sending unit gasket from the extra inside of the pickup gasket!
A little while later, patience pays off and there is 2 perfectly matched gaskets.
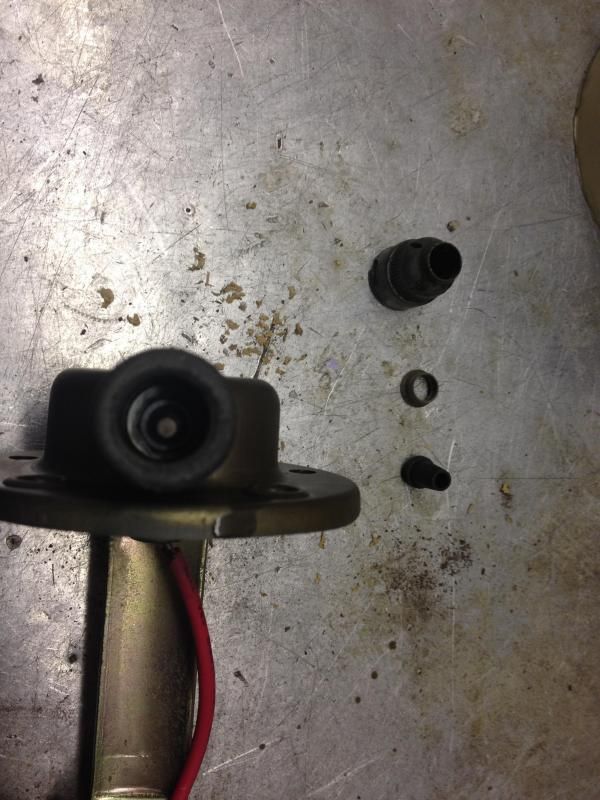
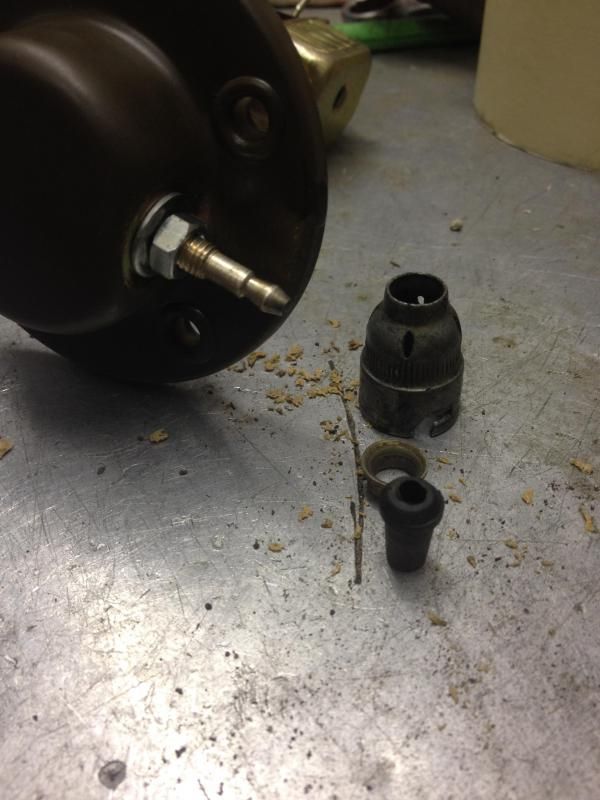
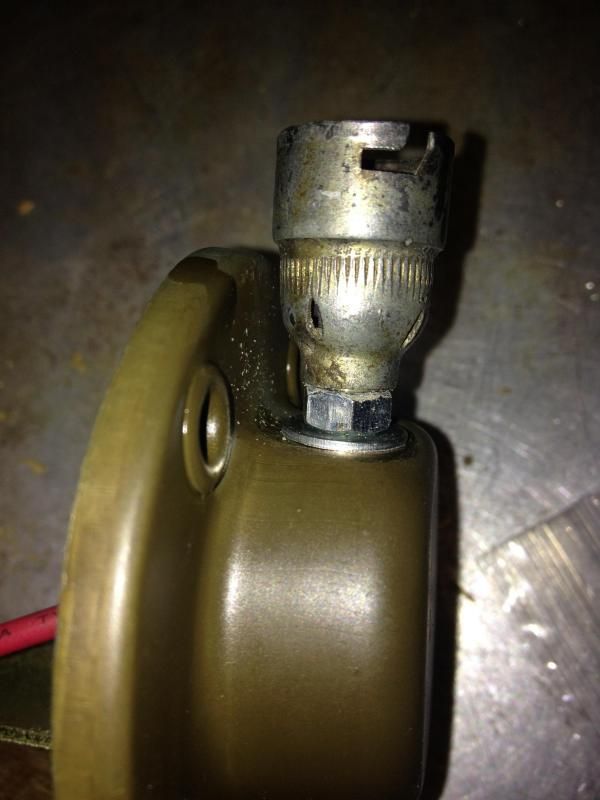
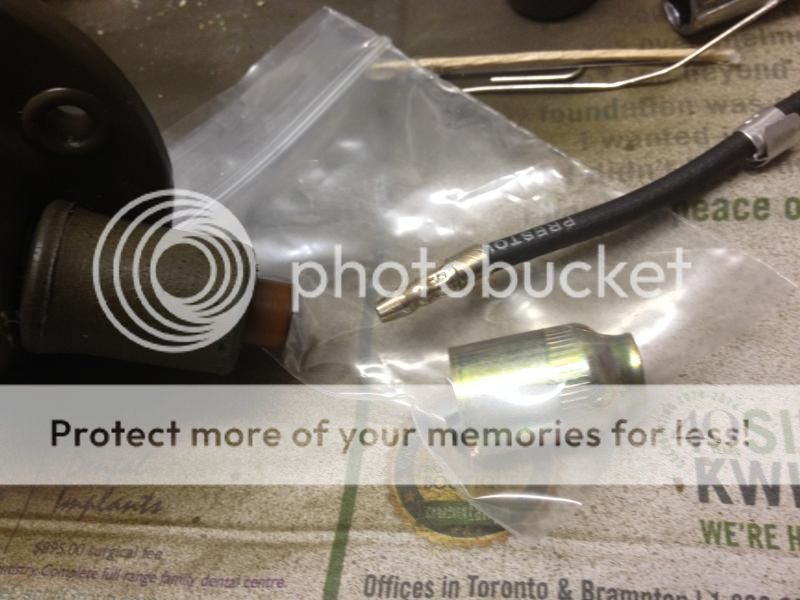
Next I moved on to converting the Packard connector on the sending unit to a Douglas connector. Not sure if this is the best method, all input is welcome!
Prepare parts
Remove Packard setup
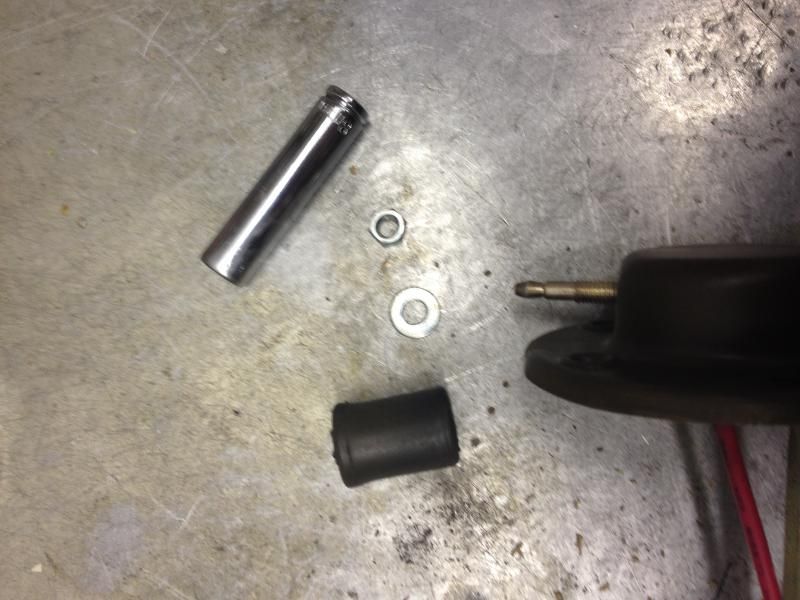
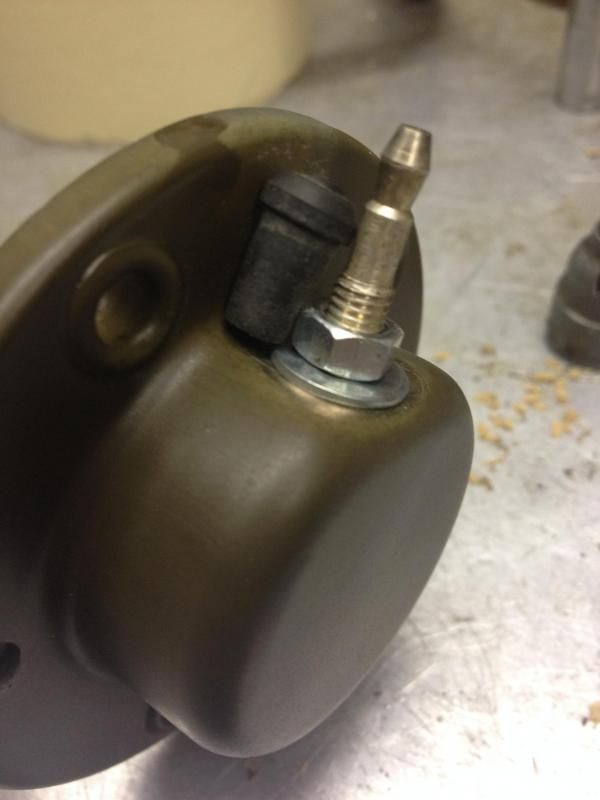
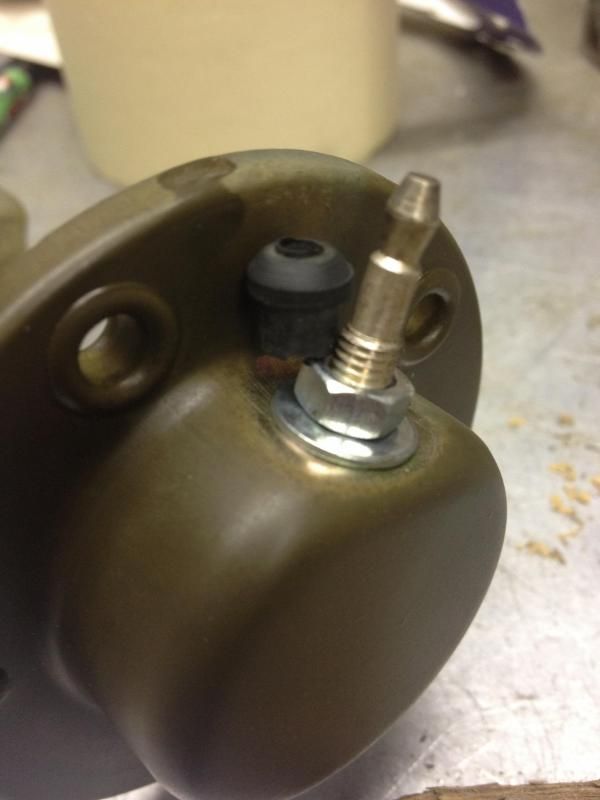
This is where I am unsure if this was the best method and am wondering if anyone else has any other input. I attempted to place the Douglas connector straight onto the unit but there was a lot of play and the pin on the unit was unsecure. I replaced the washer and nut that came on the unit.
With the nut and washer on the pin the rubber piece was a little too long.
Rubber trimmed to size
Assembled unit with Douglas connector installed.
Thoughts on this setup? I have never attempted to convert Packard to Douglas before, and am thinking that I may be doing so again especially if I pick up some of those new Klixon circuit breakers. _________________ Jordan
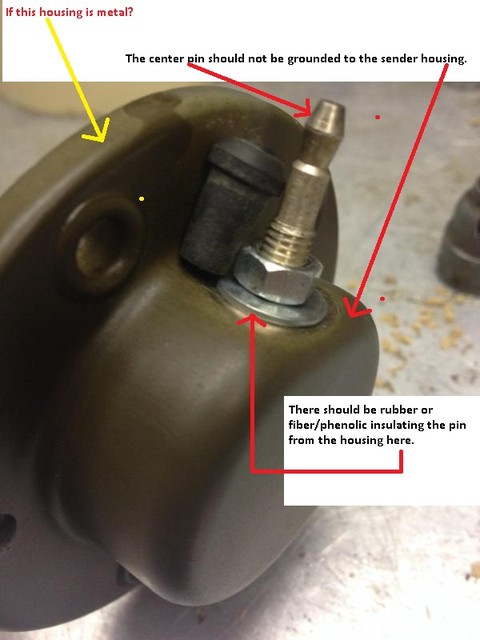
If the housing of the sender is metal then you seem to be missing something to insulate the + 24V pin from the sender case. Even if there is a grommet filling the hole in the case where the pin passes thru you still have the washer touching the case.
Joined: Oct 10, 2012 Posts: 310 Location: Toronto, Ontario, Canada
Posted: Tue Jan 13, 2015 6:12 pm Post subject:
Great point Wes! Thanks! I'm thinking I'll put a rubber washer as the first thing out from the body which is made of stainless steel. I'm also thinking about moving the nut to the inside of the connector to make it a little more secure. Would that affect the connection in any foreseeable way? _________________ Jordan
Joined: Oct 10, 2012 Posts: 310 Location: Toronto, Ontario, Canada
Posted: Tue Jan 13, 2015 7:48 pm Post subject:
Thanks Rick. This has certainly been an exciting and informative labour of love over the past few years. I know the big days of being able to start and drive are coming soon and the excitement is growing! I greatly appreciate all of the advice that I've received along the way.
I need to get a hole punch for future gaskets. I carefully used a drill bit for this one and having a hole punch would've made it much easier. _________________ Jordan
Joined: Oct 10, 2012 Posts: 310 Location: Toronto, Ontario, Canada
Posted: Mon Jan 26, 2015 9:00 pm Post subject:
Xamon, thanks for the great idea! I picked one up from Tandy Leather for around $20 that I'm sure will come in handy.
For the level sending unit, I'm at a bit of an impasse.
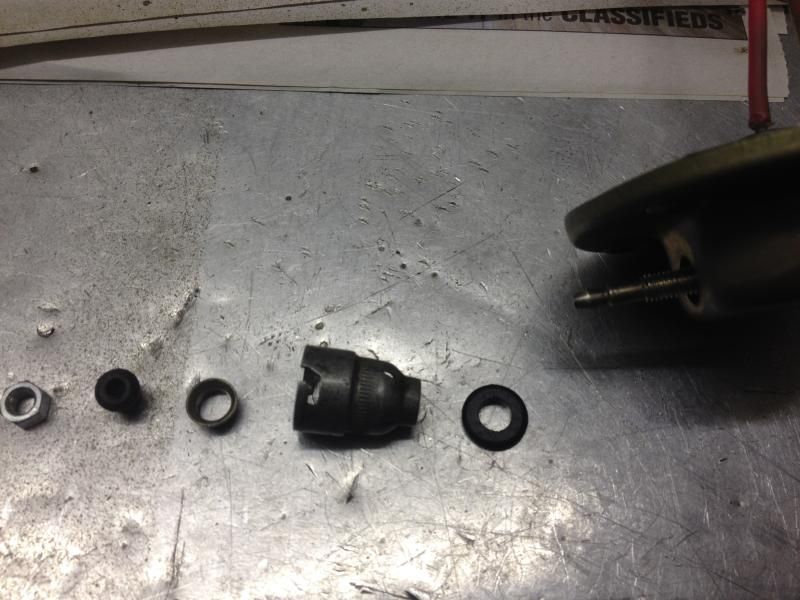
I tried a setup like this, only to find:
A) that the pin isn't secured to the housing and will push into the housing when you try to put on the rubber piece and
B) even when this setup is installed, it doesn't leave enough of the pin exposed to connect the connector.
I tried a smaller O-ring only to arrive at the same conclusion - can't get it seated well, and even if it were fully seated, not enough of the pin is exposed.
Which lead me back to...
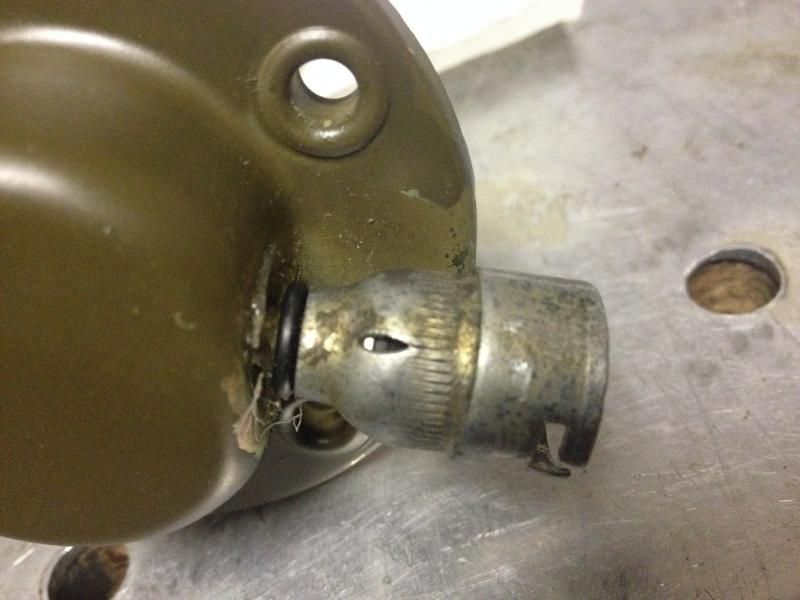
The original setup. I am now wondering about making this one connection into a Packard style.
Thoughts? Has anyone come across this before?
I'll also post the topic in the technical section to see if others have had the same experience or have any additional thoughts. _________________ Jordan
Joined: May 30, 2014 Posts: 3447 Location: Texas Hill Country
Posted: Thu Jan 29, 2015 2:24 pm Post subject:
I've made the screw/bolt holes in the templates as well as
reasonably thin gasket material by laying the material over
the flange and tapping around the hole ring with the round end
of a ball pein hammer. Once you find a hole concentrate there.
Tap lightly. If done right and depending on the squareness of the holes they will come out as good as punched holes. _________________ Brian
1950 M38
MC11481
http://www.willysmjeeps.com/v2/modules.php?set_albumName=album372&op=modload&name=gallery&file=index&include=view_album.php
Joined: Oct 10, 2012 Posts: 310 Location: Toronto, Ontario, Canada
Posted: Sun May 10, 2015 8:25 am Post subject:
Hey Brian,
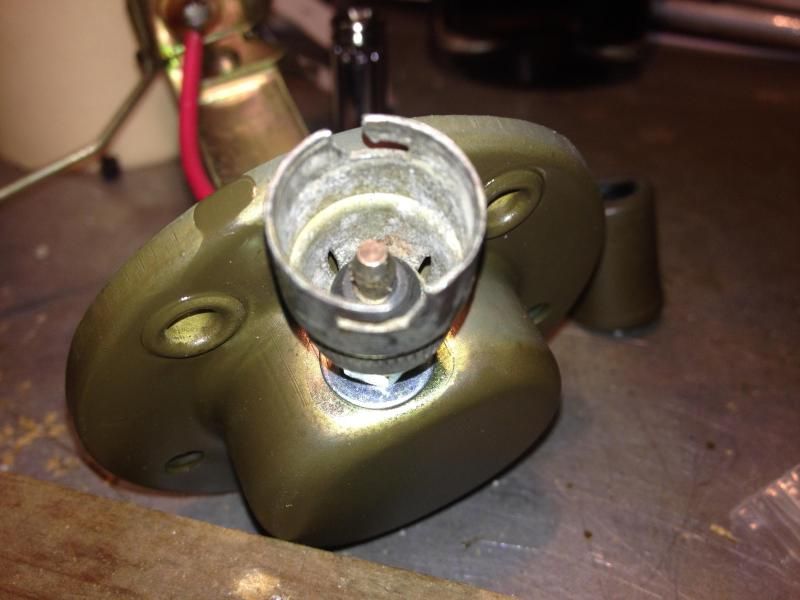
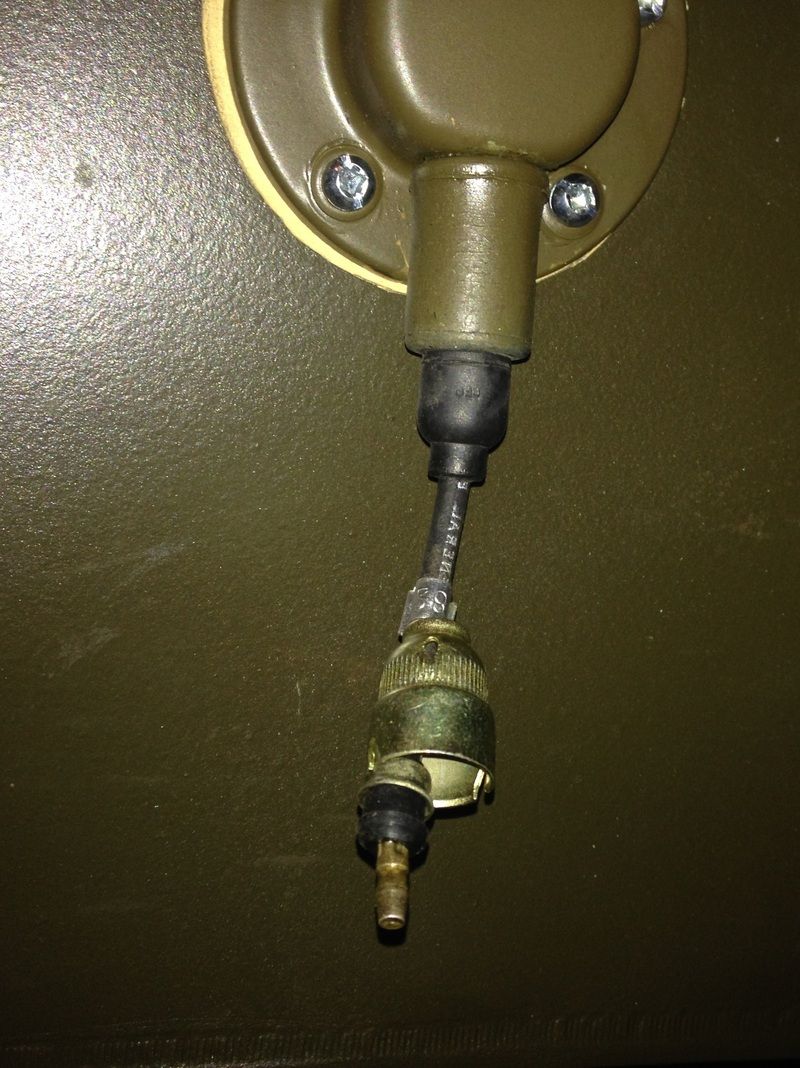
The parts come off in sequence and re-attached with no problem. The threaded pin holds it all together with a nut and washer. The post from 5 Jan and the 5th picture down is a good illustration. _________________ Jordan
You cannot post new topics in this forum You cannot reply to topics in this forum You cannot edit your posts in this forum You cannot delete your posts in this forum You cannot vote in polls in this forum