53 M38A1 Project - a.k.a Lil' Bastard
-
oilleaker1

- Jeep Enthusiast

- Posts: 973
- Joined: Wed May 13, 2009 6:00 pm
- Location: South Dakota
-
53a1

- Jeep Enthusiast
- Posts: 586
- Joined: Tue Jun 24, 2008 6:00 pm
- Location: Kern Co.
-
oilleaker1
- Jeep Enthusiast
- Posts: 973
- Joined: Wed May 13, 2009 6:00 pm
- Location: South Dakota
Don't weld it where you can't get your grinder tool to reach is what I mean. Plan your weld points. I grind mine down with a stone type, and finish it off with a die grinder and 36 grit pad. When done, it looks like you didn't weld there. Nice and clean. Test fitting with sheet metal screws also gives you a chance to change it . I never make mistakes!  John
John
-
53a1
- Jeep Enthusiast
- Posts: 586
- Joined: Tue Jun 24, 2008 6:00 pm
- Location: Kern Co.
-
oilleaker1
- Jeep Enthusiast
- Posts: 973
- Joined: Wed May 13, 2009 6:00 pm
- Location: South Dakota
If you have air at your shop, you can buy really cheap die grinders and then fit carbide grinding heads, disc cut-off bits, and screw-on sander discs (small). These are the most valuable finish tools for cleaning up welds. I think they are well worth the money. You will find them great for cutting things too. Shortening chains, cutting exhaust pipes, hardened bolts, etc. Be sure to not let the spray hit glass , chrome, or nice paint!!! bad learning experience here! You're going to need them anyway ! John
-
53a1
- Jeep Enthusiast
- Posts: 586
- Joined: Tue Jun 24, 2008 6:00 pm
- Location: Kern Co.
All my parts have arrived from Midwest. I got a early battery box cover, rear bumper and hat channels. The quality is PRIMO and I don't know how the guy makes a profit producing parts with that detail but I'm glad he is able to remain in operation.
I used to work in a machine shop and he looks like he is using laser cutting for his sheet metal parts. Those machines are super expensive. Also his break press work is perfect on the rear bumper. Usually you see some taper over a long channel bend if the guy doesn't know how to adjust the machine.
Even the battery box cover had the correct bend to fit the contour of the battery box. I didn't expect that because he would have to had work it or build a tool to stamp it correctly. Would have been easy to skate by with just keeping it flat.
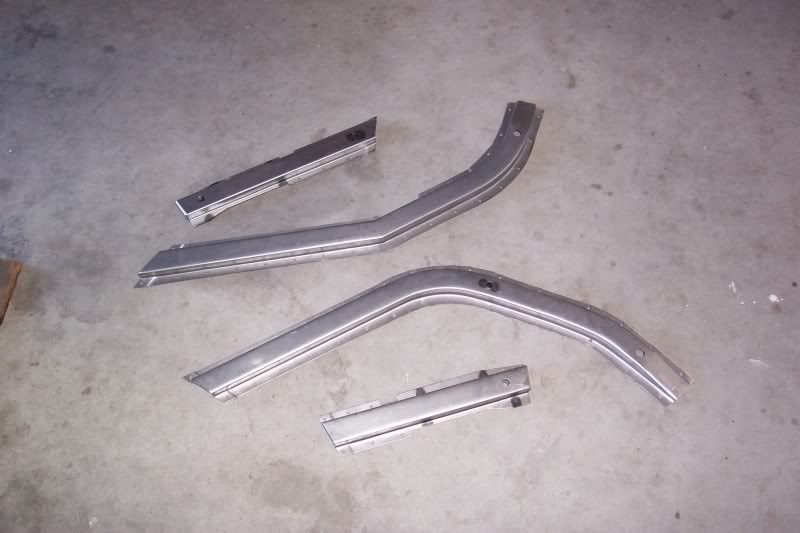
The hat channels are over the top. The bends in those things are unreal. Can't wait to spend more money at Midwest.
I used to work in a machine shop and he looks like he is using laser cutting for his sheet metal parts. Those machines are super expensive. Also his break press work is perfect on the rear bumper. Usually you see some taper over a long channel bend if the guy doesn't know how to adjust the machine.
Even the battery box cover had the correct bend to fit the contour of the battery box. I didn't expect that because he would have to had work it or build a tool to stamp it correctly. Would have been easy to skate by with just keeping it flat.
The hat channels are over the top. The bends in those things are unreal. Can't wait to spend more money at Midwest.
-
53a1
- Jeep Enthusiast
- Posts: 586
- Joined: Tue Jun 24, 2008 6:00 pm
- Location: Kern Co.
The more I toyed with the idea of riveting the bumper on the more I was turned off to the idea. The rivets on the M38A1 frame are almost impossible to get to. Also, I was worried If I didn't get the rivets to sit correctly on the first try you will be in trouble.
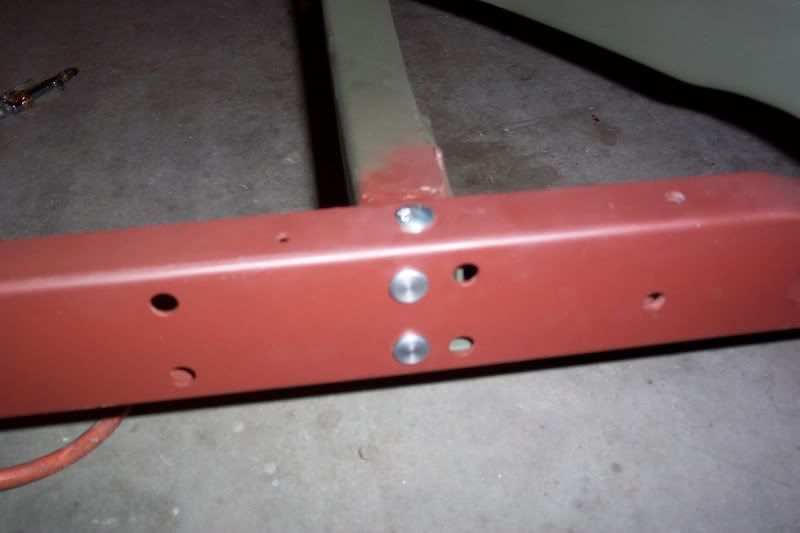
I came up with, in my opinion, a better solution. I turned down some 3/8 carriage bolt heads to .745 holding onto the square part under the bolt head. I then face the head off. They look just like a rivet. The trick is that even with bolts, one on top and bottom on each side of the bumper are so hard to get to you can even get a wrench in there to snug it up.
What I did is I leave the head on those carriage bolts and cut a slot on them. There are four out of the ten that are impossible to get a wrench to turn on. You can then snug up the bolt with a screwdriver then grind the head flat. Those bolts are on the top and bottom so you can't see them anyway.
You have to cut the length of the bolt down on the four problem bolts and grind off the square part when you are done with the lathe work. You can see in the picture the bolts that are visible look perfect and the one on top is the one you have to grind down.
-
53a1
- Jeep Enthusiast
- Posts: 586
- Joined: Tue Jun 24, 2008 6:00 pm
- Location: Kern Co.
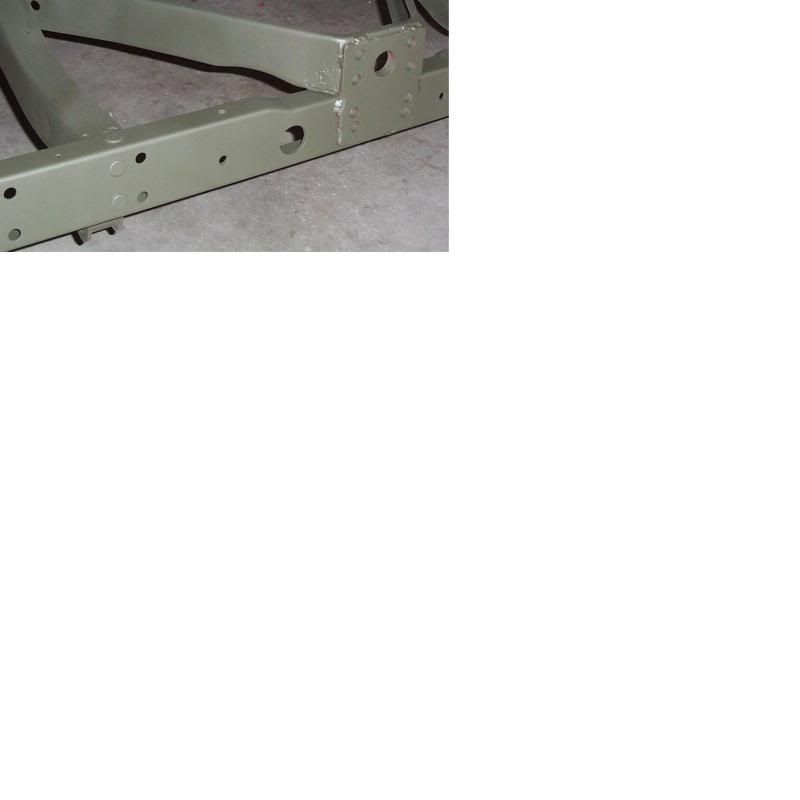
All the faux rivets are installed.
New tires are not in my budget so I found some cheap used retreads dated 1970. I hope they work. If anyone needs the mutt rims let me know. I'm thinking of doing the tire change myself using a Harbor Freight tire changer and balancer. The shop wants more for mount & balance than I payed for two used tires with rims.

These channels are from Midwest. I had to post a picture because they look so nice.
New tires are not in my budget so I found some cheap used retreads dated 1970. I hope they work. If anyone needs the mutt rims let me know. I'm thinking of doing the tire change myself using a Harbor Freight tire changer and balancer. The shop wants more for mount & balance than I payed for two used tires with rims.
These channels are from Midwest. I had to post a picture because they look so nice.
Last edited by 53a1 on Sun Nov 08, 2009 10:22 pm, edited 1 time in total.
-
wesk

- Site Administrator

- Posts: 16461
- Joined: Sun Apr 03, 2005 6:00 pm
- Location: Wisconsin
- Contact:
Nice work on the faux rivets.
The tires have a 50/50 chance of being good or bad. All depends. If you can still see the original red dot balance mark make sure the heaviest part of the tube is aligned with the red dot. (heaviest part is not always the valve stem) If they sat for a long time and are nylon they'll bounce for awhile so run them in first on the jeep for awhile before balancing them. Spin them by hand on the jeep to confirm retread tread is centered all the way around.
Was the center hump channel available?
Wes K
45 MB, 51 M38, 54 M37, 66 M101A1, 60 CJ5, 76 DJ5D, 47Bantam T3-C & 5? M100
Mjeeps photo album: http://www.willysmjeeps.com/v2/modules. ... _album.php
45 MB, 51 M38, 54 M37, 66 M101A1, 60 CJ5, 76 DJ5D, 47Bantam T3-C & 5? M100
Mjeeps photo album: http://www.willysmjeeps.com/v2/modules. ... _album.php
-
53a1
- Jeep Enthusiast
- Posts: 586
- Joined: Tue Jun 24, 2008 6:00 pm
- Location: Kern Co.
-
53a1
- Jeep Enthusiast
- Posts: 586
- Joined: Tue Jun 24, 2008 6:00 pm
- Location: Kern Co.

-
wesk
- Site Administrator
- Posts: 16461
- Joined: Sun Apr 03, 2005 6:00 pm
- Location: Wisconsin
- Contact:
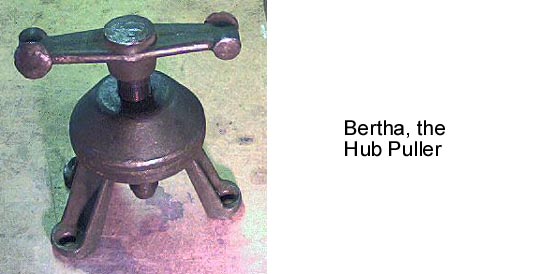
This is the correct puller. Is this the puller you used?
Last edited by wesk on Mon Jan 21, 2013 12:21 pm, edited 1 time in total.
Wes K
45 MB, 51 M38, 54 M37, 66 M101A1, 60 CJ5, 76 DJ5D, 47Bantam T3-C & 5? M100
Mjeeps photo album: http://www.willysmjeeps.com/v2/modules. ... _album.php
45 MB, 51 M38, 54 M37, 66 M101A1, 60 CJ5, 76 DJ5D, 47Bantam T3-C & 5? M100
Mjeeps photo album: http://www.willysmjeeps.com/v2/modules. ... _album.php
-
53a1
- Jeep Enthusiast
- Posts: 586
- Joined: Tue Jun 24, 2008 6:00 pm
- Location: Kern Co.
-
wesk
- Site Administrator
- Posts: 16461
- Joined: Sun Apr 03, 2005 6:00 pm
- Location: Wisconsin
- Contact:
That would be a very low end price. The average would be around $80.
Wes K
45 MB, 51 M38, 54 M37, 66 M101A1, 60 CJ5, 76 DJ5D, 47Bantam T3-C & 5? M100
Mjeeps photo album: http://www.willysmjeeps.com/v2/modules. ... _album.php
45 MB, 51 M38, 54 M37, 66 M101A1, 60 CJ5, 76 DJ5D, 47Bantam T3-C & 5? M100
Mjeeps photo album: http://www.willysmjeeps.com/v2/modules. ... _album.php