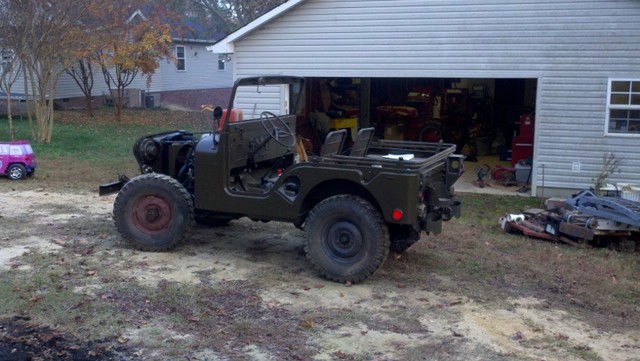
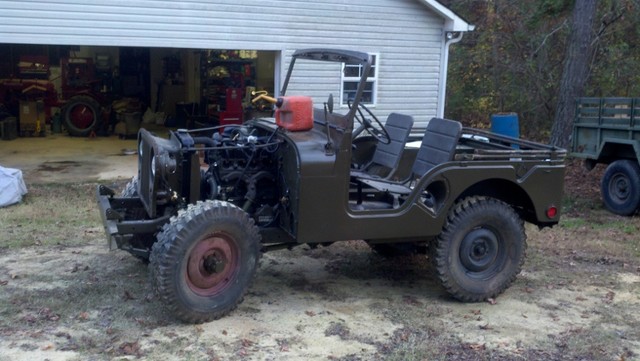
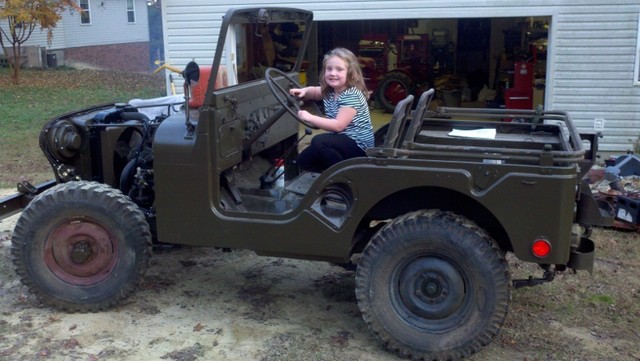
Made a little progress today on the 'A1

Discussion topics on Willys Overland M series vehicles
User avatar
wilfreeman
Jeep Legend
Jeep Legend
Posts: 1079
Joined: Sun Mar 12, 2006 6:00 pm
Location: Richburg, SC
Contact:

Post by wilfreeman »

Here's a couple of pics from today's progress - it's finally out of the garage! :D


Image

Image

Image
User avatar
evanso1975
Jeep Enthusiast
Jeep Enthusiast
Posts: 615
Joined: Sun May 09, 2010 6:00 pm
Location: North Yorkshire, UK

Post by evanso1975 »

That's looking great! Good luck persuading the kid to get out from behind the wheel! :mrgreen:
Owen

1951 US Air Force M38
1944 F-1 1/2-ton Airdrome Trailer
1940 C15 Chevrolet CMP 11-cab
1939 DKW KS200 Motorcycle
MVT # 19406
User avatar
wilfreeman
Jeep Legend
Jeep Legend
Posts: 1079
Joined: Sun Mar 12, 2006 6:00 pm
Location: Richburg, SC
Contact:

Post by wilfreeman »

Thanks - it was a very proud moment when she finally moved under her own power yesterday. I've got a long way to go, but now I have the steam to keep going! Yes, all Jordan wants is for me to put the back seat back in so she can go for a ride. She can't understand why I can only run it for a couple of minutes right now. I'm ready to drive her around the property myself!
User avatar
RICKG
Jeep Legend
Jeep Legend
Posts: 1752
Joined: Mon Aug 30, 2010 6:00 pm
Location: SO IDAHO

Post by RICKG »

Thinking ahead 10 years later..Jordan turns 16 and has drivers
license.."Daddy, some of the kids are meeting downtown later this
evening.. can i take the jeep??" :wink:
keep 'em rollin'
RICKG MC 51986 DOD 01-52, '50 CJ3a
User avatar
wilfreeman
Jeep Legend
Jeep Legend
Posts: 1079
Joined: Sun Mar 12, 2006 6:00 pm
Location: Richburg, SC
Contact:

Post by wilfreeman »

Man, I know that day will come like tomorrow! Hopefully she'll get enough time behind the wheel by then, but she'll probably want to use the Duece (that's going to be my next HMV) instead!
User avatar
wilfreeman
Jeep Legend
Jeep Legend
Posts: 1079
Joined: Sun Mar 12, 2006 6:00 pm
Location: Richburg, SC
Contact:

Post by wilfreeman »

Got out and adjusted the brake free play, carb and timing today - she starts first or second try every time now (might need a little choke if she sits for a while)! I also found a few more brake line leaks - man I must have left them all loose when installing last year. I retightened all the exhaust bolts too. There were a few other rattles I also traced to loose bolts.

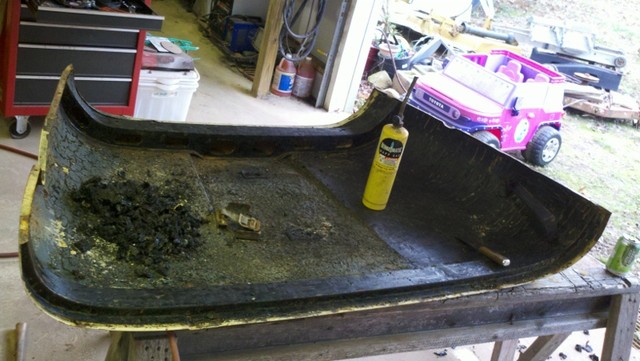
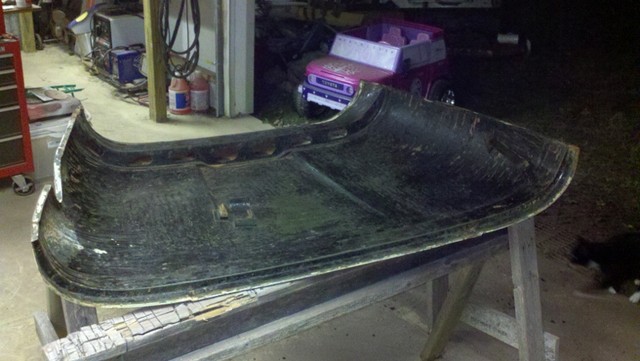
Then I decided to strip my hood of paint and undercoating. Found out that my "straight" hood wasn't much straighter than my original one. I'm sure it had 1/2 gal of bondo on it. I flipped it over and started on the undercoating - 1/4" thick and hard/cracked painted green. After about 2 hrs I had this:
Image

After I figured out that if you preheated the area you wanted to strip then keep the torch moving in front of the scraper that it went much faster. So after 3.5hrs I was finally finished (needs a little bit of cleaning up).
Image[/img]
User avatar
53a1
Jeep Enthusiast
Jeep Enthusiast
Posts: 586
Joined: Tue Jun 24, 2008 6:00 pm
Location: Kern Co.

Post by 53a1 »

Good job.

I just got done painting my hood & windshield. I also used propane to get the heavy stuff off then paint stripper to get the rest.
'53 M38A1 X2
User avatar
wilfreeman
Jeep Legend
Jeep Legend
Posts: 1079
Joined: Sun Mar 12, 2006 6:00 pm
Location: Richburg, SC
Contact:

Post by wilfreeman »

So paint stripper will take the last bit of tar off? I saw some stuff called Goof Off at Lowes today that might work too.
User avatar
53a1
Jeep Enthusiast
Jeep Enthusiast
Posts: 586
Joined: Tue Jun 24, 2008 6:00 pm
Location: Kern Co.

Post by 53a1 »

Yes the heavy duty stuff at Home Depot works very well on the last bit. Don't use it when the surface of the metal is hot or it boils off and basically does nothing. Once you get down to a tar "film" just sand the rest off with 60 grit.

If you are lucky and don't have rust past that point you can prime and paint. I sprayed mine down with Phosphoric Acid to prep any bare metal spots and I usually don't bother taking off all the paint if it's clear that solid paint remains.
'53 M38A1 X2
User avatar
wilfreeman
Jeep Legend
Jeep Legend
Posts: 1079
Joined: Sun Mar 12, 2006 6:00 pm
Location: Richburg, SC
Contact:

Post by wilfreeman »

Good info there - I'll have to go get some. Fortunately I do have good paint and no rust under there, but will have to get it straightened, as there are quite a few dents in it. Thanks for the info!
User avatar
53a1
Jeep Enthusiast
Jeep Enthusiast
Posts: 586
Joined: Tue Jun 24, 2008 6:00 pm
Location: Kern Co.

Post by 53a1 »

Looks good. Your ready for the stripper 8O

The USMC gunk is a PITA but you gotta hand it to them, the stuff really worked well! All the parts on my Jeep covered in the stuff had nice metal underneath. Luckilly it was on the entire bottom of my tub, frame, hood and fenders. My dad and I spent months getting the stuff off but that's better than welding in new metal.
'53 M38A1 X2
User avatar
wilfreeman
Jeep Legend
Jeep Legend
Posts: 1079
Joined: Sun Mar 12, 2006 6:00 pm
Location: Richburg, SC
Contact:

Post by wilfreeman »

Yes, it did work - the original paint under the undercoating with no rust proves that. I'm not 100% sure mine was a USMC jeep or not - still debating on that. The original tub had what looked like a layer of forest green under the final beige color (this was my parts jeep that I used the chassis from - the body was too far gone to salvage). The hood and fenders had undercoating, but I don't remember about the frame. There is no posi tag on the rear end, but it kindof feels like a locker (or it could just need adjusting) when moving around the yard. I pulled the cover on it last year but don't remember anything about the diff. The data plates show the responsible agency as Army, but I know that doesn't mean anything.
User avatar
wilfreeman
Jeep Legend
Jeep Legend
Posts: 1079
Joined: Sun Mar 12, 2006 6:00 pm
Location: Richburg, SC
Contact:

Post by wilfreeman »

Well, I was hoping my water pump rebuild kit would come in today, but no dice! :evil: Ordered on the 17th, hub nut socket was backordered 'til the 22nd - now it's the 28th - I go back to work on Thursday - maybe it will get here tomorrow.
So I decided to work on getting my MD Juan tank installed. I fitted it up on Saturday - all I needed to do was sand and paint. Then I read another post about the screw size on repro tanks and got me thinking about my sending unit not lining up. So today I got out and had to weld up ALL of the sending unit holes, because if I redrilled and tapped off of one hole, it wouldn't have been clocked right. While I was at it, I moved one of the tabs that I welded in the wrong place (because I measured off of the sending unit hile which is in the wrong place).
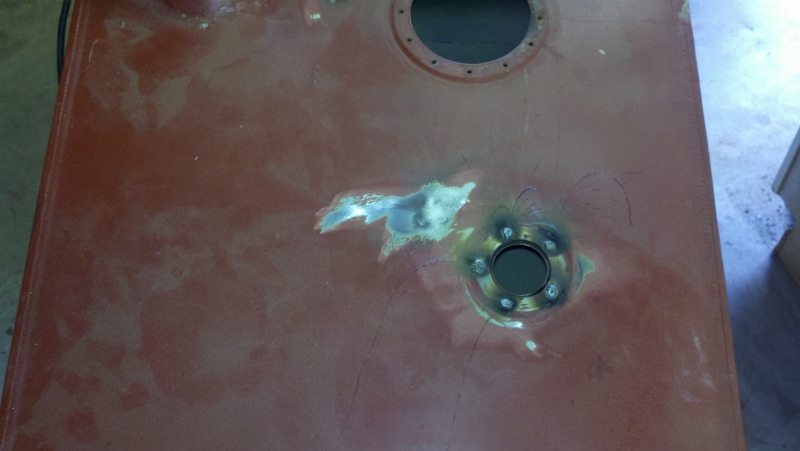
Image

Then I scuffed the tank down and sprayed a couple of coats on it - turned out pretty nice, so I can't complain. I had a little bit of paint left, so I scuffed my driver's seat frame down and put a fresh coat on it too.
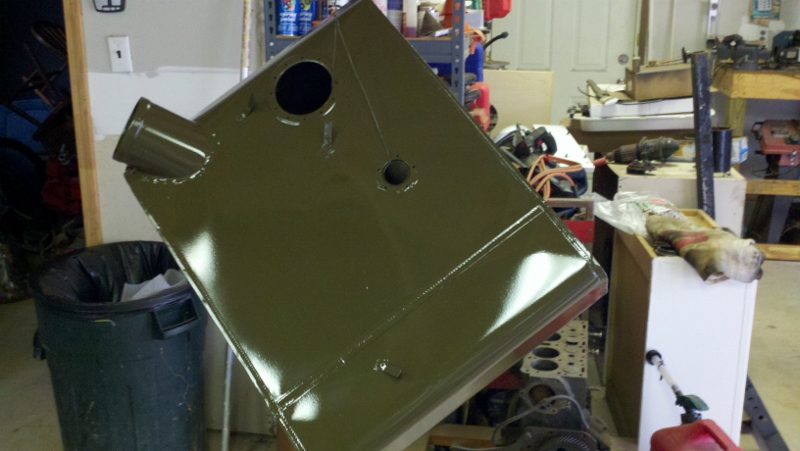
Image

After I finished that, I noticed my right wheel was turned noticeably more to the right than the left was. I got the tape measure out and did a quick alignment check - yep, about a half inch off! I threw the tie rod ends on when I was mocking up and never got back to it. So I pulled the tie rods off, centered the steering wheel, straightened the tires, adjusted the tie rod ends, and put it back together. Now I have about 1/16 - 1/8" toe in. I didn't check the specs, but it's close enough for now.

Later on in the afternoon, my tank was dry enough to handle (it got up to 75 deg today - the reason I HAD to get my tank painted today!), So I went ahead and put it in the jeep, strapped it down, and threw the seat on (in case I get my rebuild kit tomorrow and I want to drive it around :) ). Now to bend up the last of the fuel line and buy a new sending unit.
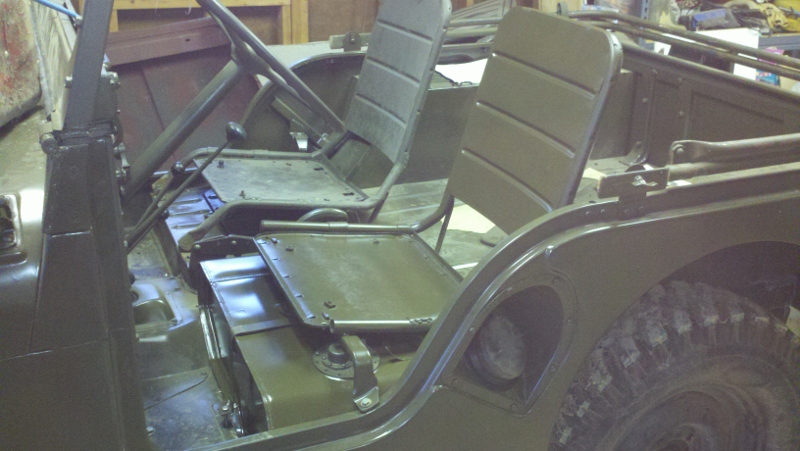
Image

I think she's coming along nicely. I hope this decent weather will hold out for a little while longer, because I'm almost there!

User avatar
evanso1975
Jeep Enthusiast
Jeep Enthusiast
Posts: 615
Joined: Sun May 09, 2010 6:00 pm
Location: North Yorkshire, UK

Post by evanso1975 »

That's looking great. So close now. :D

Did you have any major adjustments to make to get the repro tank to fit?
Owen

1951 US Air Force M38
1944 F-1 1/2-ton Airdrome Trailer
1940 C15 Chevrolet CMP 11-cab
1939 DKW KS200 Motorcycle
MVT # 19406
User avatar
wilfreeman
Jeep Legend
Jeep Legend
Posts: 1079
Joined: Sun Mar 12, 2006 6:00 pm
Location: Richburg, SC
Contact:

Post by wilfreeman »

Oh yeah - after putting in an MD Juan front floor pan (the whole front section) and rear panel, the tank just put a permenant bad taste in my mouth for MD Juan repop parts! The only replacement part that fit and looks correct is the rear floor pan from Classic Enterprise.

Here's a list of modifications I had to do for the tank to fit decently:
1) Drain hole was in the wrong place - had to cut the hole about 2" away from original drain location.
2) Filler neck isn't at the correct angle - no modifications because it still works with original flange. It is also smaller diameter than original - cap doesn't fit tight. It doesn't have the flange for the strainer or the place to clip the cap retainer chain.
3) The tank is over 1/2" taller and 1/2" wider so I had to straighten and re-bend the strap - now the strap has a 2 1/4" bolt in front and is about 1 1/2" from the floor.
4) Had to shim the driver's seat up 3/8" in th right rear to compensate for the increased height of the tank.
5) Sending unit doesn't go to the bottom of the tank because of the increased tank height - I am considering bending the float, or leaving as is and have a built in reserve.
6) Pickup doesn't reach the bottom of the tank - I will probably extend the line so that it will and so I will have that reserve capacity.
7) Sending unit hole location is about 3/4" off - it is located right where the strap goes across, so I had to move the strap over on the front.
8 - The sending unit screw holes didn't match up. Didn't matter because the only one that did would have had it clocked in the wrong direction. I had to weld up all of the holes and dril and tap new ones so that the sending unit would be clocked correctly. Pickup holes are drilled correctly (how can they do one perfectly and the other completely off?).
9) There were no tabs welded on to secure the fuel line and wiring harness - had to cut and weld all 3 of those.
10) The tank is pretty close to the door sill - it will probably rub when the tank gets seated in good, so I will have to do something with that. Probably just put a piece of welting there.

As you can tell, for a $400 "reproduction" (or was it just called a replacement) tank, I am VERY unhappy! If a company is going to reproduce something, at least get the main stuff close. It's like they did this stuff on purpose - I can see maybe a few mm off, but 2" on the drain plug, 3/4" on the sender location and 1/2" in height AND width - c'mon now!
Post Reply