Page 2 of 3
Posted: Sun Feb 09, 2020 5:43 pm
by 4x4M38
Hey Ron, the bell housing, tranny and transfer are now pressurized now with the late version.
That hole is for the late version vacuum line system T-Brass at bell housing, 143481. The late system runs a line across the transfer to the tee, then forward to the fuel pump. The tranny and transfer are internally connected.
Have a look at page 72 in Ryan’s book or Harold’s fording ventilation pages under the CJV35 downloads pages.
You are gonna need that neat decal now regarding the drain plug being stowed in the glove box!!
If you find a cheap supply of those brackets let me know.
Bz
Posted: Sun Feb 09, 2020 6:49 pm
by RonD2
Thank Brian. Will do.
Posted: Sun Feb 09, 2020 9:39 pm
by wesk
No need to hunt all over the internet. I have Harold's illustrations in my photo album under M38 fuel system sub-album M38 Vent & Fording system.
http://www.willysmjeeps.com/v2/modules. ... _album.php
129-Tooth Flywheel
Posted: Mon Feb 10, 2020 9:13 am
by ocwd
I probably have a 129-tooth flywheel. You can have it if you want. You just have to pay shipping from California. It's a very heavy boat anchor. Let me know and i'll pull it out of the shed and check the teeth for you.
Dave
Posted: Mon Feb 10, 2020 11:54 am
by RonD2
Hi Dave,
Thanks for the offer! I bit the bullet a couple of days ago and have one inbound from Texas.
Posted: Sat Feb 15, 2020 11:39 pm
by RonD2
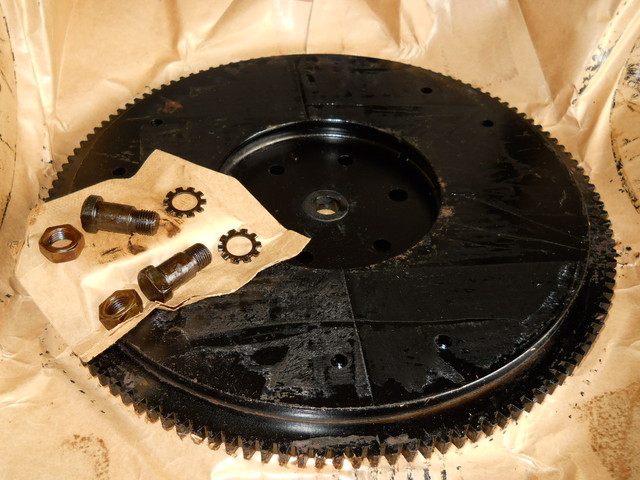
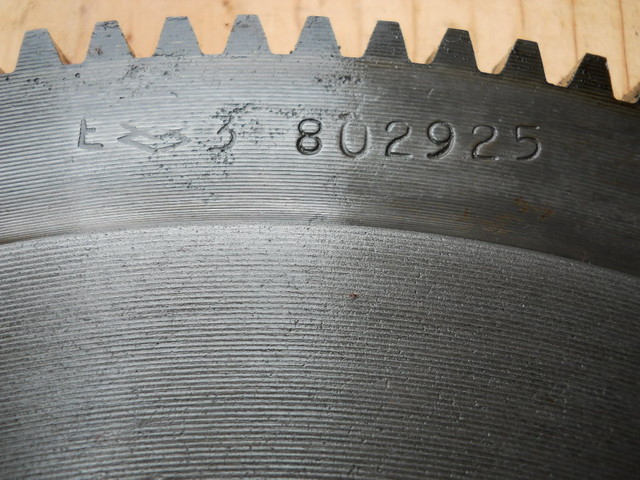
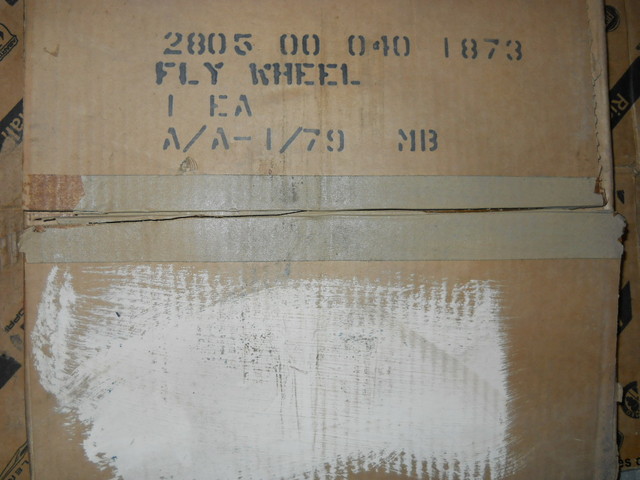
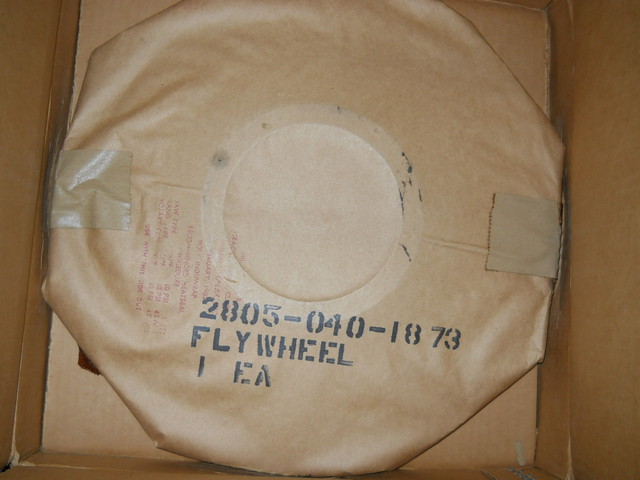
NOS 129 tooth flywheel kit. It never ceases to amaze me opening a box containing NOS parts that were probably made more than 50 years ago. Thanks to Brent @ BMJP !
Posted: Sun Feb 16, 2020 12:04 am
by wesk
Now that you have everyone salivating where's the new flywheel with all that preservative on it!?!
Posted: Sun Feb 16, 2020 12:09 am
by RonD2
I used my last quart of diesel cleaning the cosmoline off the NOS rear engine plate today. Have to get more. Will post a photo later!
Posted: Tue Mar 17, 2020 11:05 am
by RonD2
Posted: Tue Mar 17, 2020 11:18 am
by RonD2
So far, this little flywheel conversion exercise (with postage) has entailed
---NOS 129-tooth flywheel $160
---Take-off late bell housing $60
---NOS clutch inspection cover and gasket $30
---NOS rear engine plate $40
---NOS engine plate brackets (3) $45
---Take-off set of bell housing mounting bolts (incl 2 NOS dowel bolts) $25
---Working take-off MDM-6005 starter $60
---NOS Filko SD-32 starter drive $40
Kind of reminds me of starting a remodel on the bathroom and ending up in the kitchen.....


Posted: Tue Mar 17, 2020 11:48 am
by wesk
Need to remember and take photo how he marks them for orientation.
The easiest method is to after you have checked the engine TDC #1 on compression and the the correct timing mark is in the timing window or aligned on the front crank pulley then pull the old flywheel and have them index the dowel bolt holes to match old flywheel. That is if you have the original flywheel or if the original flywheel aligned correctly on your test before teardown or if you even checked the original flywheel for proper timing mark alignment before you tore it down. Most flywheels I have purchased either already had tapered or straight dowel holes drilled and timing marks on the flywheel already. I don't recall ever getting a flywheel with no dowel holes drilled (all 6 holes exactly the same) or no timing marks in place.
Posted: Tue Mar 17, 2020 1:29 pm
by RonD2
Thanks Wes, I appreciate the advice but what started this mess was a bad flywheel, see photos and your comments at top of post. After the decision to switch over from early 97-tooth with tapered dowel bolt holes to the correct 129-tooth, and with an already disassembled engine, I could see no reason to look back at it for any reason other than making a shop stool out of it.
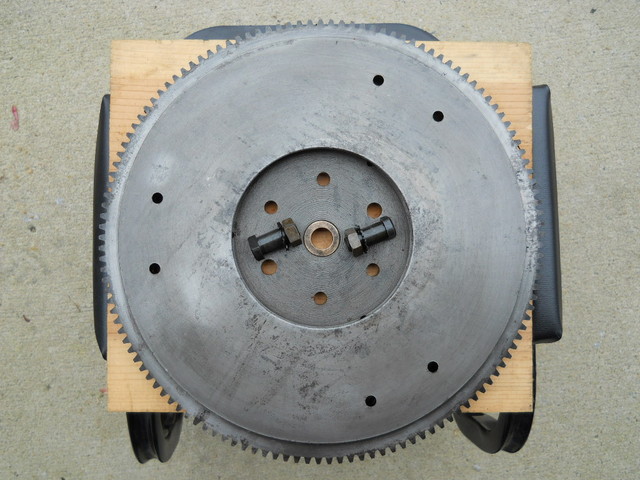
This NOS flywheel out of the box has 4 properly sized bolt holes and 2 larger holes (see photo) that right now won't accept the 1/2-20 straight dowel bolts until the flywheel gets mated to the crankshaft flange at the machine shop and he drills them together at the same time. At least that's the way I read the manual.
Once the machinist mates them together, and then balances them together, I figured it would be no sweat for him to stamp orienting marks on both the crankshaft flange and flywheel for future reference during assembly. I bet he does it without asking anyway, he's that good. I just need to remember to ask to see the marks and photo them.
I see no timing marks on this NOS flywheel and it doesn't surprise me. Why bother marking it before installing it? It can be properly installed one of two ways (180-degrees apart), and that only matters once it's balanced and mated to the crank then installed in the motor. After he marks it, I believe these marks will serve only to mate them as balanced, and have nothing at all to do with timing --- which will now be done at the front of the motor with the timing pointer, assuming I can assemble the rest of the motor correctly.
Am I off base? I believe you taught me well.

Posted: Tue Mar 17, 2020 5:31 pm
by wesk
Which end of the engine are your current timing marks?
Posted: Tue Mar 17, 2020 5:47 pm
by RonD2
The rear end. On the 97-tooth flywheel, visible through the timing hole cover on the early rear engine plate that was bolted to the early bell housing.
None of which are currently assembled to the motor, and all of which are of no further use to me after I assemble the motor with the new components.
I figure to try and sell the bell housing and rear engine plate cheap to somebody who can use them for a CJ2A.
Posted: Tue Mar 17, 2020 10:08 pm
by wesk
Which of the three front type timing mark setups have you purchased?