Page 2 of 2
Posted: Sun Jan 25, 2015 7:34 pm
by RICKG
You are Right-on w/the frame fab mods. NICE. Whadya wanna do next?
Lemme know.
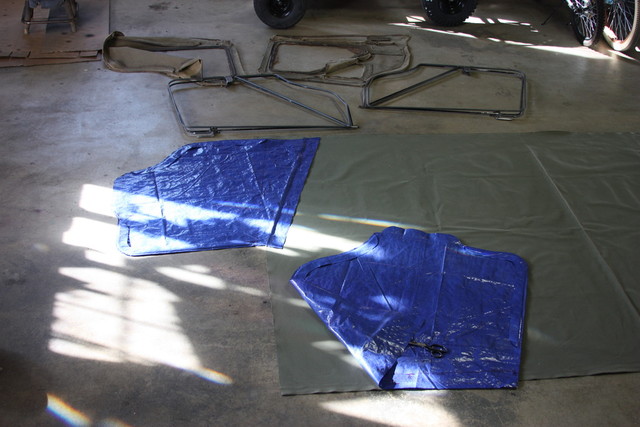
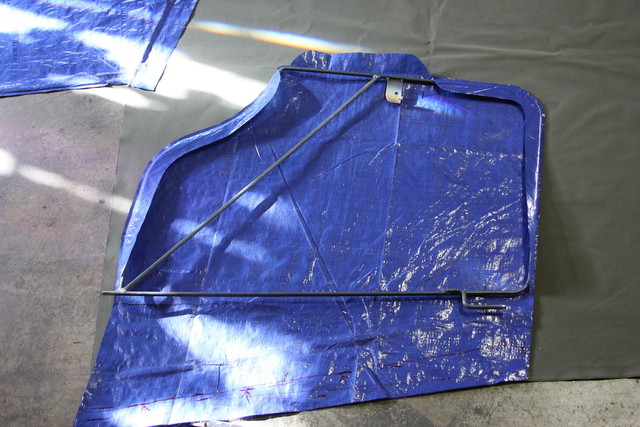
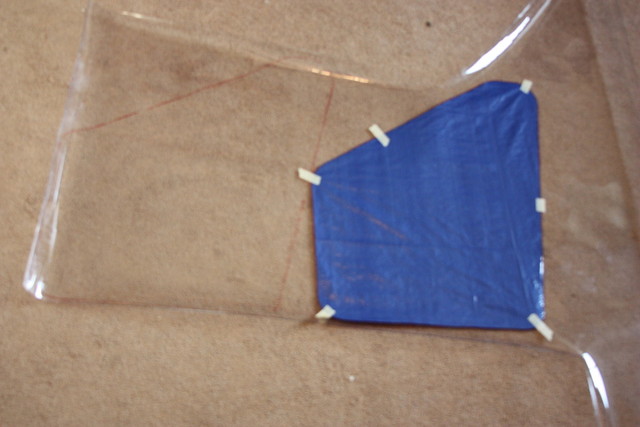
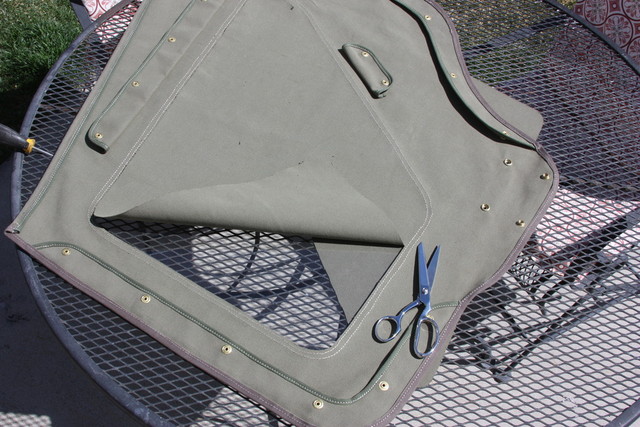
Posted: Sat Apr 04, 2015 7:56 pm
by Bretto
Posted: Sat Apr 04, 2015 8:43 pm
by wesk
Real nice looking work Bretto!

Posted: Sun Apr 05, 2015 8:33 am
by RICKG
Way to go there brother! A regular gol-dang Betsy Ross you are

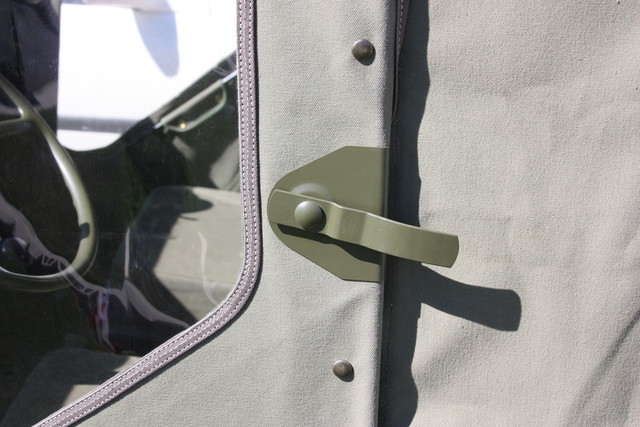
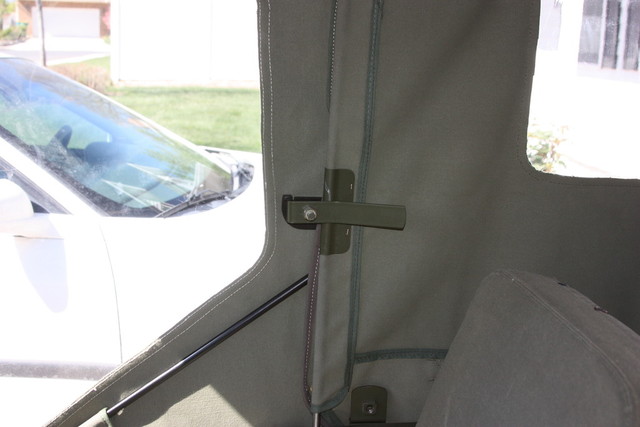
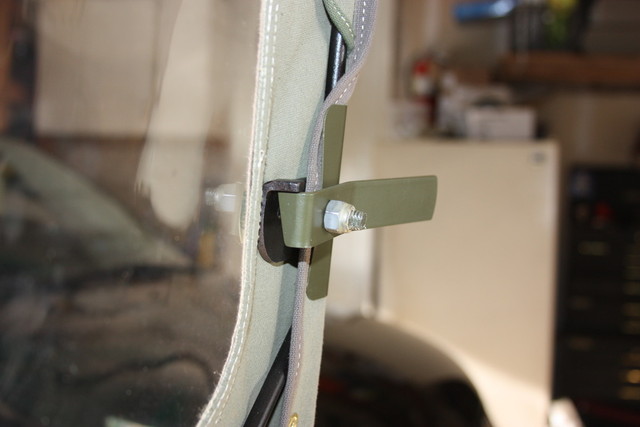
BTW I run my thumbturn from the tub interior thru the bow into the nut
on the bracket. I believe (but am not certain) that is correct. You'll notice
the hole in the tub accommodates the flat on the thumbturn for a positive
fastening of the bow..
Posted: Sun Apr 05, 2015 11:00 am
by Bretto
RICKG wrote:
BTW I run my thumbturn from the tub interior thru the bow into the nut
on the bracket. I believe (but am not certain) that is correct.
It never occurred to me to try it that way. I think i have just seen pics of it on the exterior and figured that was how it was. However I see it all the time how my side curtains are bulged out from it and I hadn't thought about reversing it to the interior! Think I might move it in. I'm sure you are right in that's how it its supposed to be, that would explain how you would be able to use the tire guard bracket on the passenger side and the thumbscrew at the same time. I had always wondered that, thinking it would be in the way....duh.

Happy Easter
Posted: Mon Apr 06, 2015 7:31 am
by 4x4M38
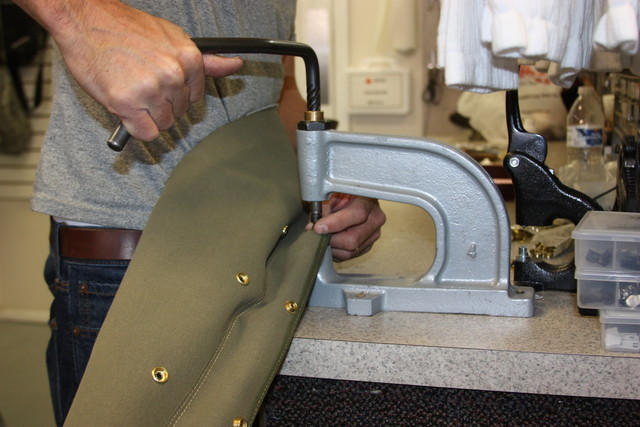
Beautiful work Brett.
Who's doing the sewing and what are they using?
Posted: Mon Apr 06, 2015 8:36 am
by RICKG
Bretto wrote:
I think i have just seen pics of it on the exterior and figured that was how it was.
Ya, the cover foto on the M38 reference guide shows the thumbturn and bow to the ext of the bracket..
Posted: Mon Apr 06, 2015 3:55 pm
by Bretto
4x4M38 wrote:Beautiful work Brett.
Who's doing the sewing and what are they using?
Yours truly on a old sturdy Juki
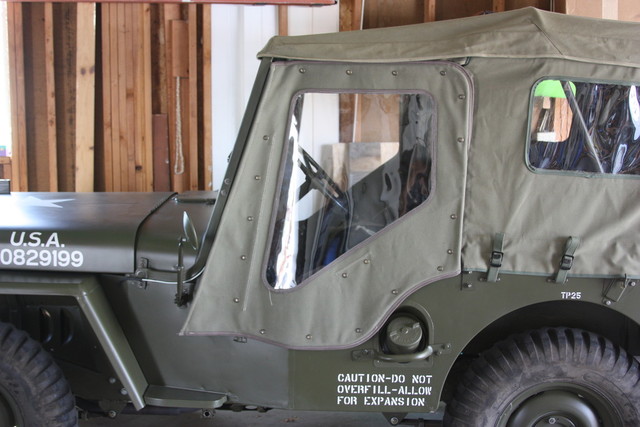
Posted: Sat Apr 18, 2015 7:31 pm
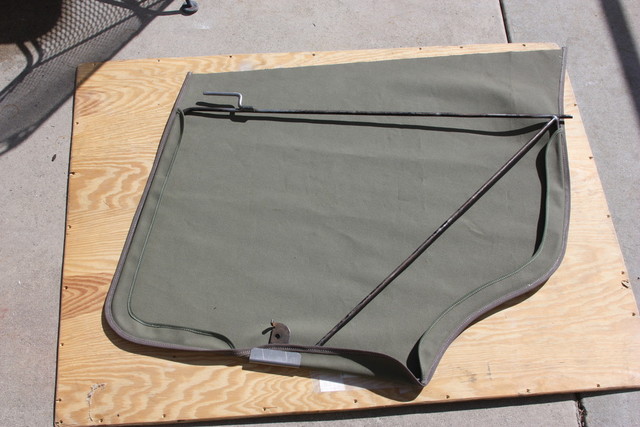
by Bretto
Posted: Sun Apr 19, 2015 8:18 am
by RICKG
Overall I gotta say nice work on the door project all the way from the frames to skins
Ya man the complete enclosure has it's time and place.
The tradeoffs-blind spots, amplified drive train noise are a pain but you get used to it. Last weekend was nice weather-pulled and stored the top and went for an afternoon ride, it was like being set free!!
Again, your talents were on full display on this project.. Later Bro..
Posted: Sun Apr 19, 2015 6:31 pm
by Bretto
Thanks, it means a lot.
Posted: Mon Apr 20, 2015 11:10 am
by aforests
Wow, very impressive work. Great job!


 [/b]
[/b]