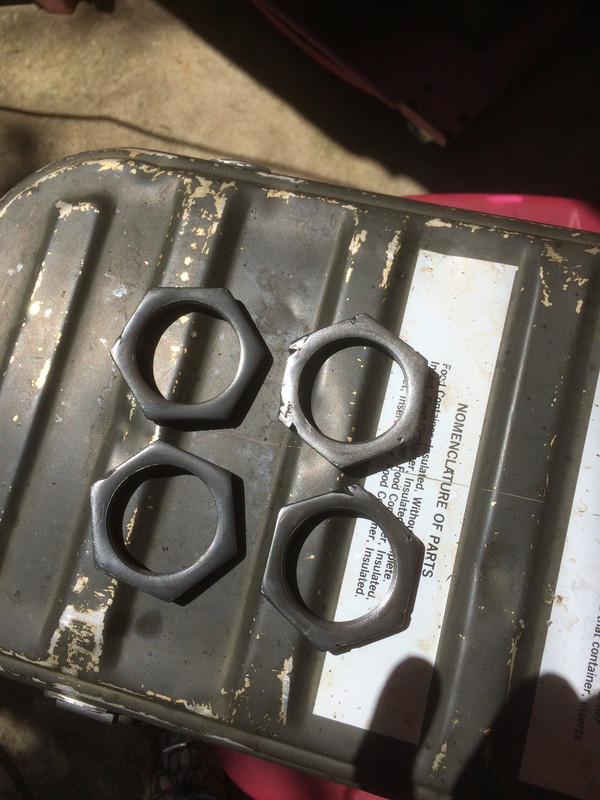
Ok, here we go! Started today with a review of my TM over coffee. Part of this image is cut off. Click on it if you want to read it. The reason I have posted this is to indicate the shim pack we'll be starting with. 30 + 10 + 5 + 3 = 48 (thousandths). Let's just call it 48 because if you're like me, when you start hearing "thousandths" your eyes start to glaze over. 48 is good enough for this discussion. In my case, I started with shims amounting to two 10s and nine 3s for a total of 47. I ordered a set of shims and they gave me a whole bunch of 3s which is perfectly OK because we will be taking away or replacing shims until we reach the desired results.
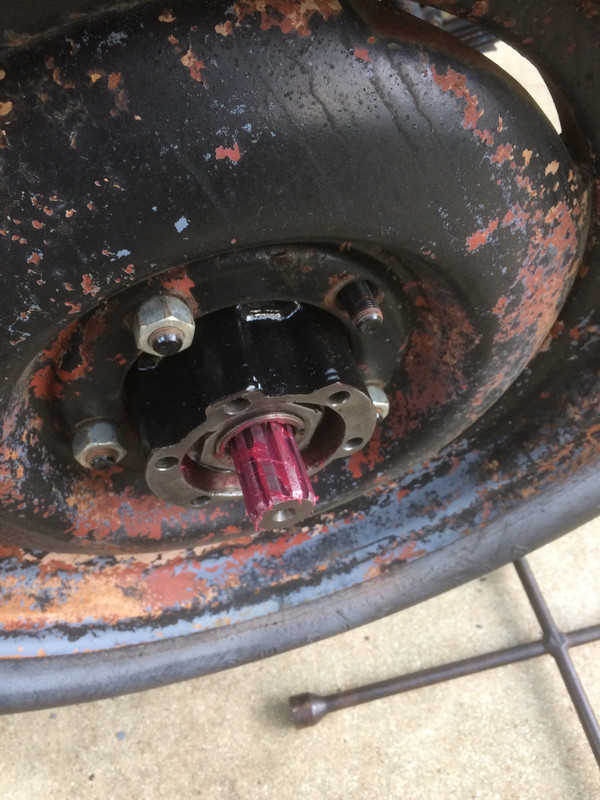
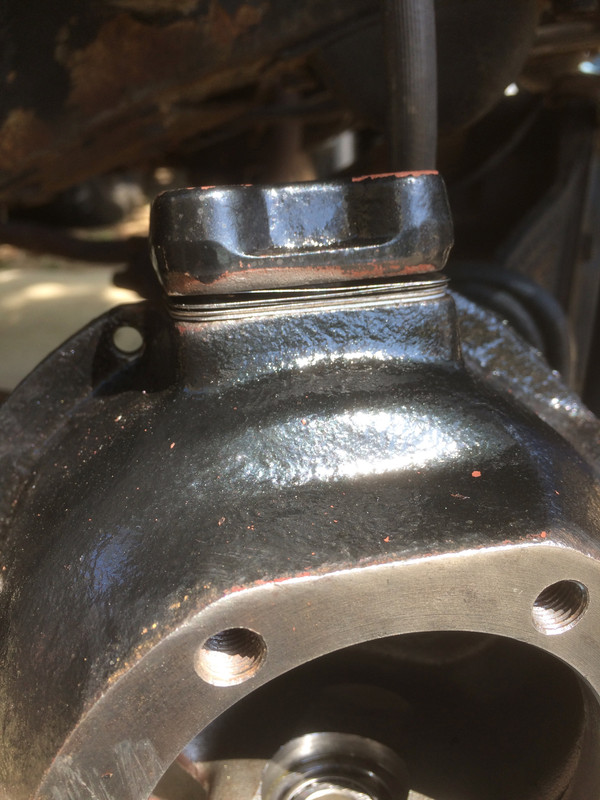
The purpose of these shims is to act as spacing. Their presence under the TOP steering knuckle flange cap (and
only the top cap on the M38) creates a specific distance between the inner faces of the steering knuckle flange caps and these caps not only serve to create a fixed point upon which each kingpin bearing cone will live relative to the steering knuckle, but also exert a certain amount of
pressure through those bearings and onto the bearing race which is situated on the cup at the end of the axle tube. That pressure is a farmboy's way of describing "pre-load". The fewer shims, the shorter the distance between the top and bottom steering knuckle flange caps and the result is more bearing pre-load exerted upon the bearing cones and onto the bearing race.
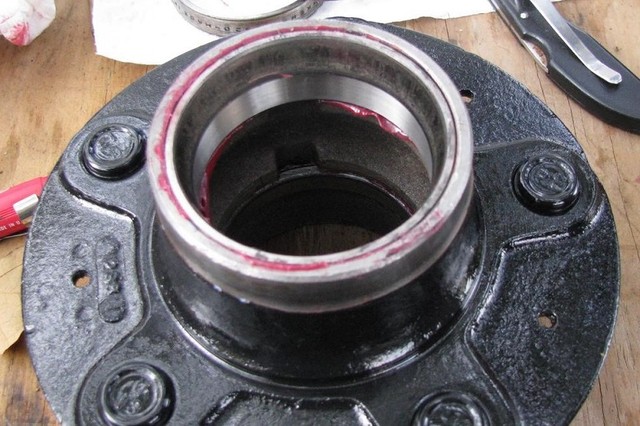
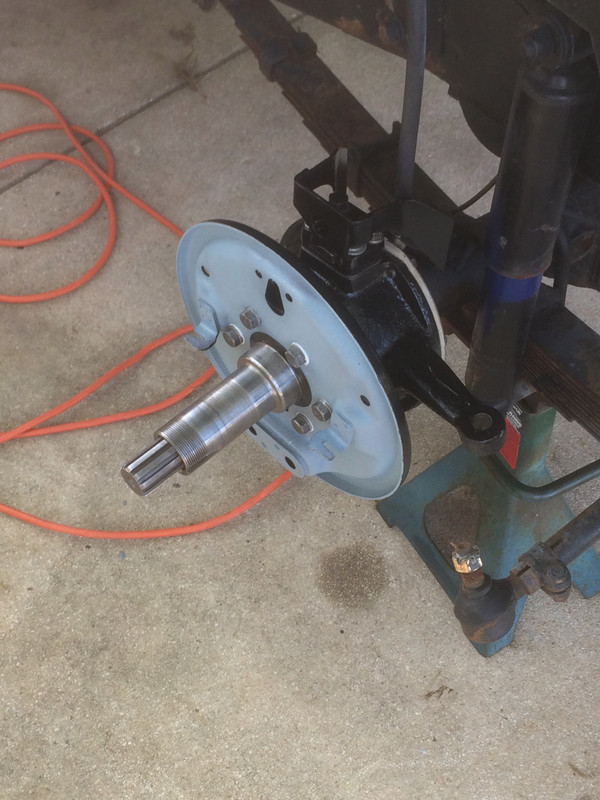
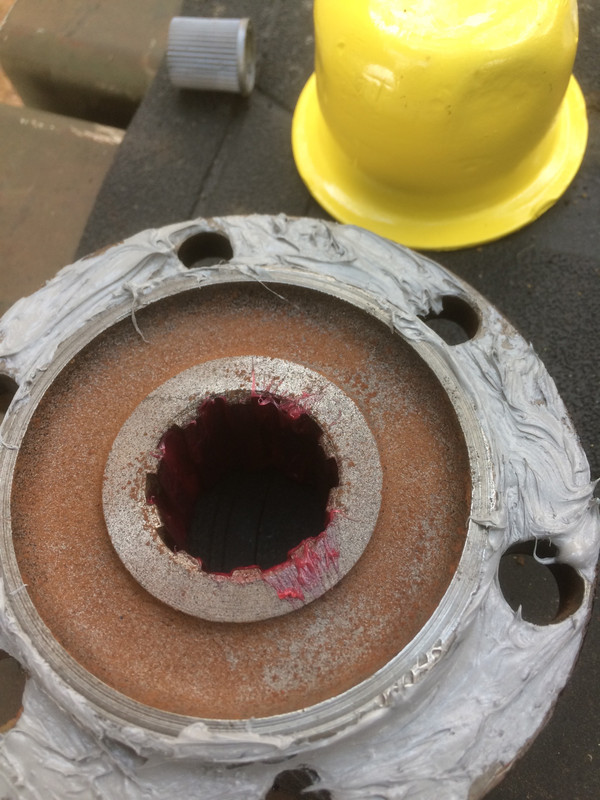
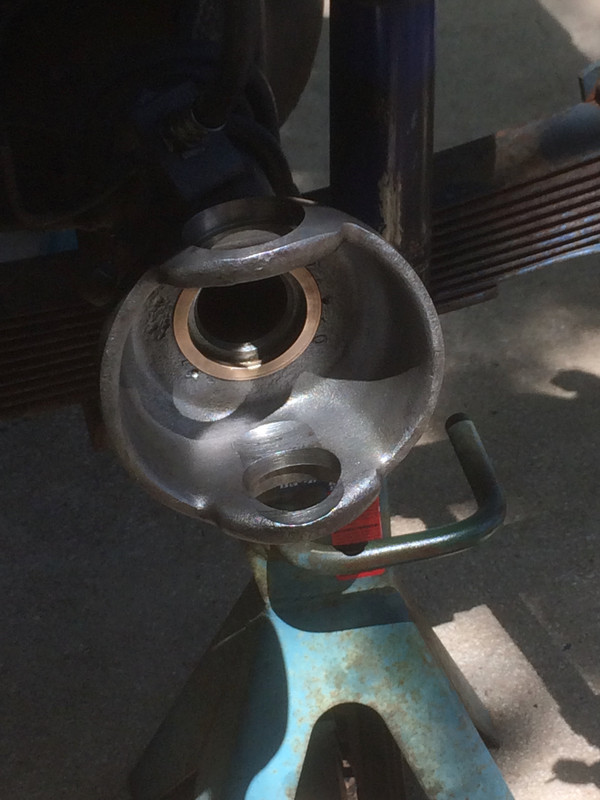
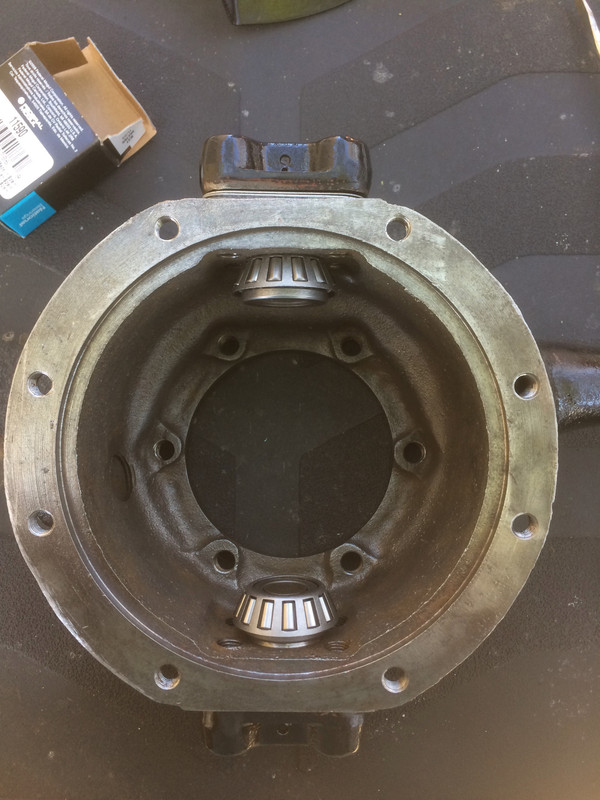
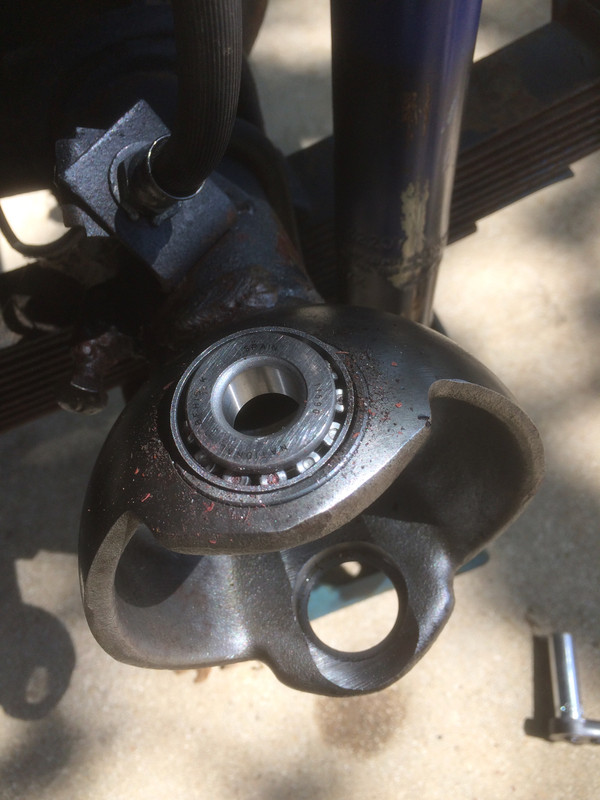
Here is the foundation we are going to be building upon today. Clean, free of debris, and about to have new bearing races installed and seated
fully. Free of debris means
entirely free of debris, grease,
anything that takes up an appreciable amount of space. If there's junk in the bottom of the recesses for the bearing races you cannot get them fully seated and that will affect
everything because we are talking about adjusting pre-load by taking out shims measured in very minute amounts (thousandths) so, take whatever time it takes to get this bit clean. This is the first big trap when renewing this part of an old Jeep. Have it clean and have those bearing races seated fully and you'll be A-OK.
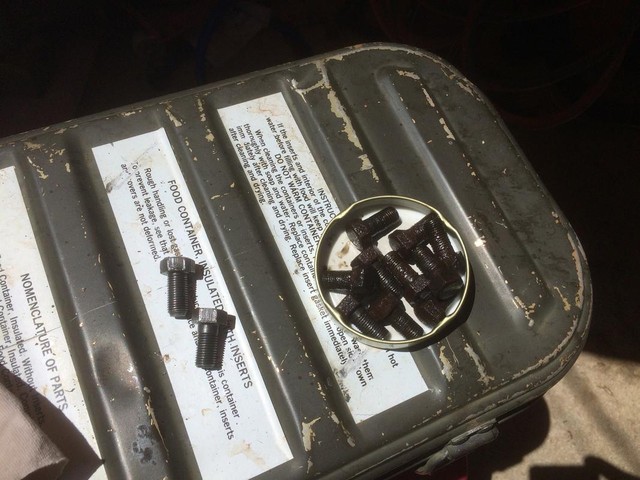
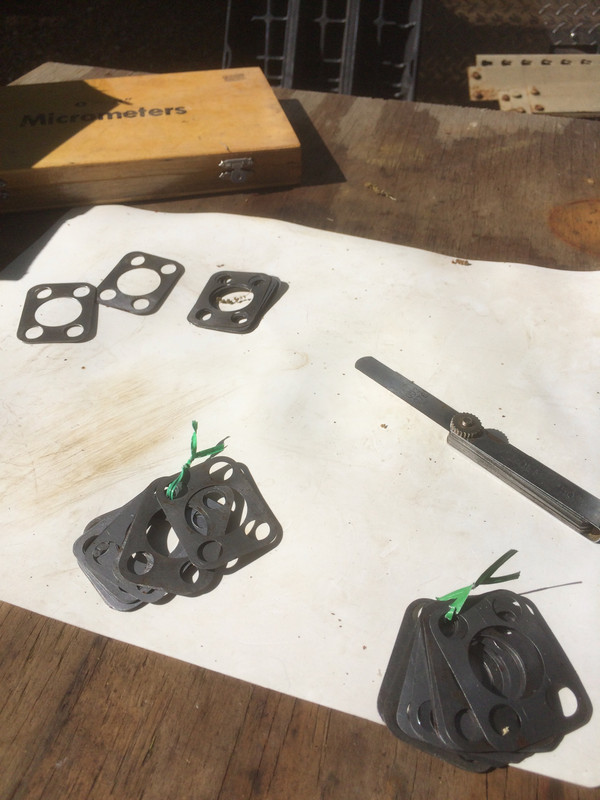
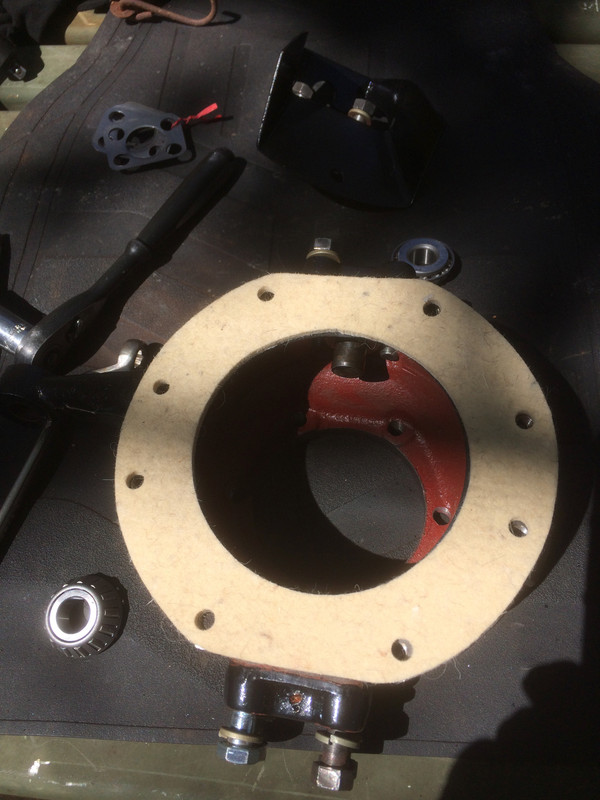
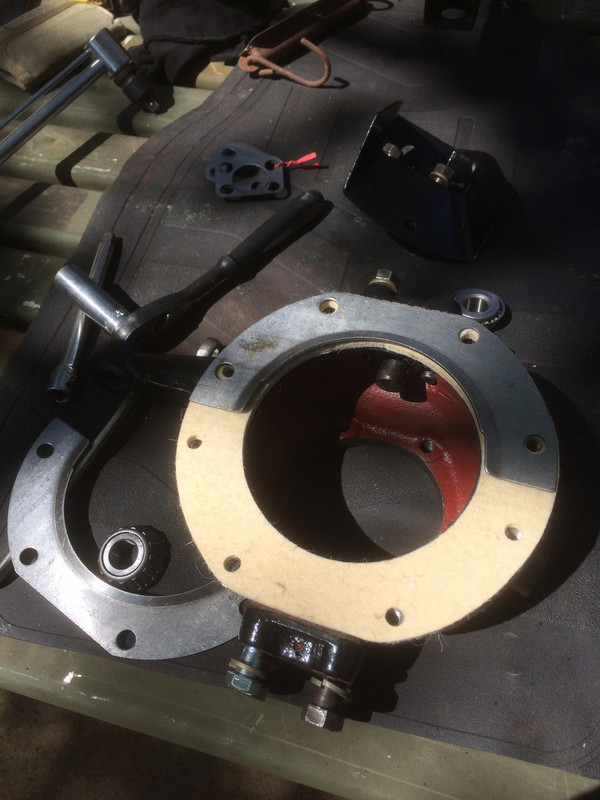
Shims, and lots of them! I started out with a micrometer then went to a feeler gauge, laying it and each shim side by side and ran a fingernail across the joint. I quickly found out most all of these were 3s. The 10s are obviously thicker and easy to spot.
When you are working with these, don't get too hung up on what is what thickness. This is not rocket science. It is the result that counts and the acceptable range for the pre-load upon the king pin bearings is
very broad and ultimately, a matter of what your preference is. Our simple goal will be to end up in the acceptable range
AND with equal pre-load on both sides. However, equal pre-load is not necessarily established by using the exact same number and size of shims on both sides,
particularly when we are working on an older vehicle which has had who-knows-what done to it. You may recall, I've replaced a steering knuckle casting on one side so there's one possibility for variance right there.
Green twist ties tell me I have established two matching shim packs to begin working with; one for each side.
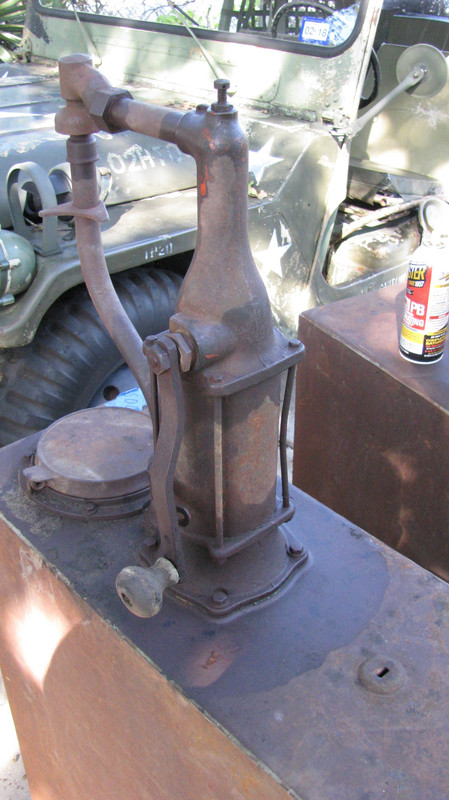
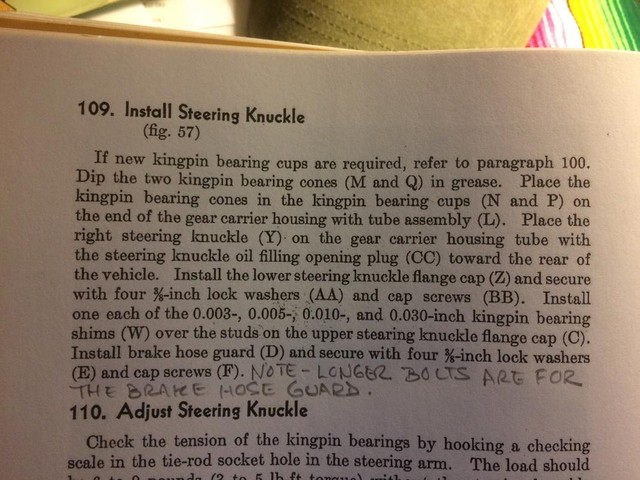
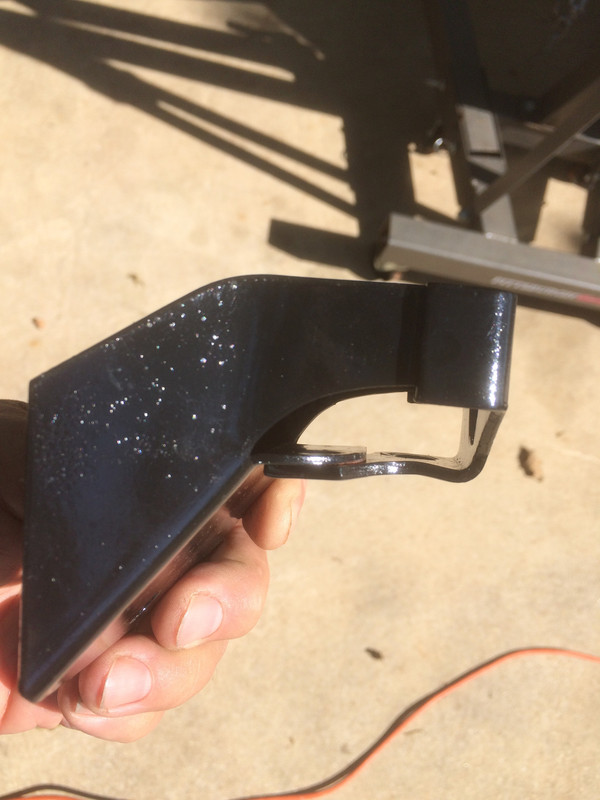
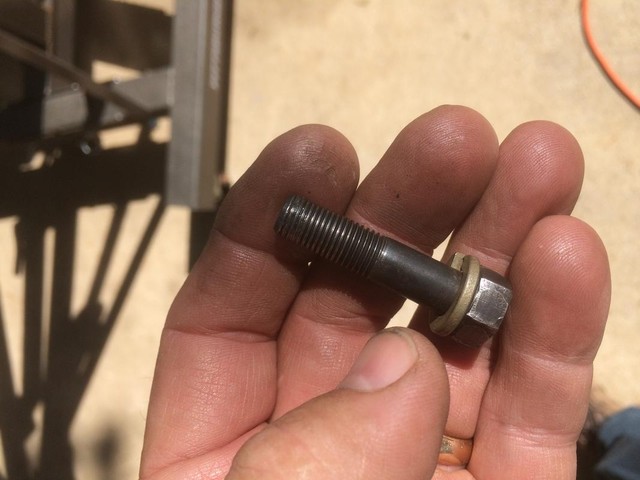
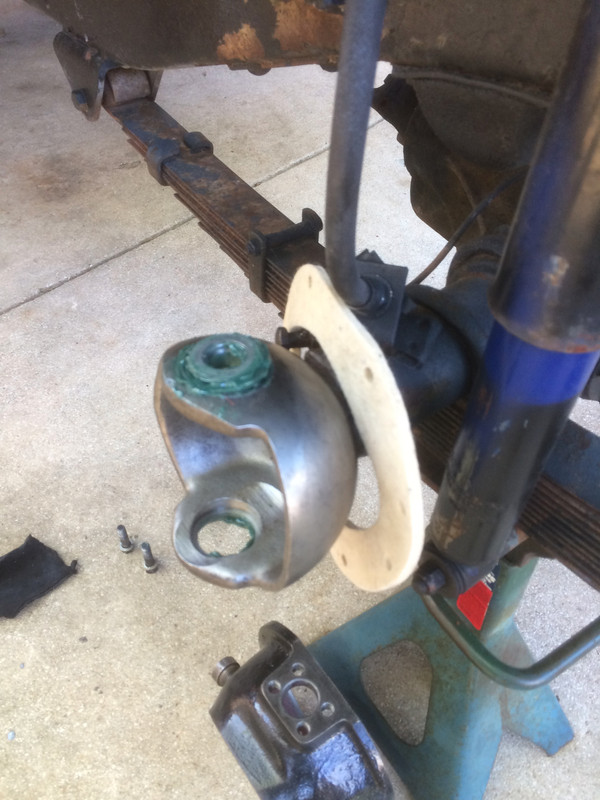
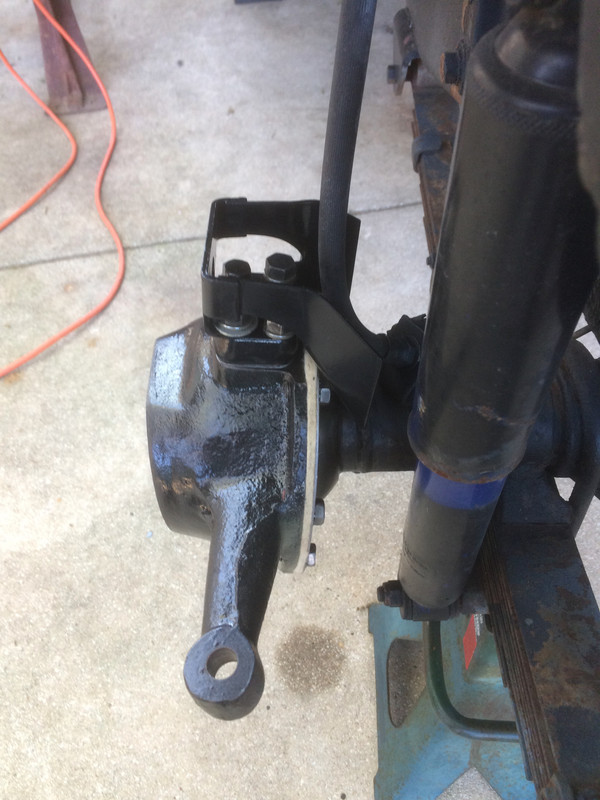
Here is the brake hose guard shown in profile. This goes on top of the top steering knuckle flange with the sloping bit toward the center of the vehicle. Only two bolts pass through this guard. I want to revisit this right now because it is VERY important. The TM is in ERROR on the matter of which bolts are used to secure this guard. You MUST use the LONGER bolts to secure it.
You must NOT use the longer bolts in any other position other than the brake hose guard. If you are just coming into this here and now, read my earlier, more detailed posts on the matter. In this photo you can see that one part of the guard is almost twice as thick as the other owing to the manner of its construction.
Make up the difference by putting a flat washer on the bolt holding the single-thickness side.
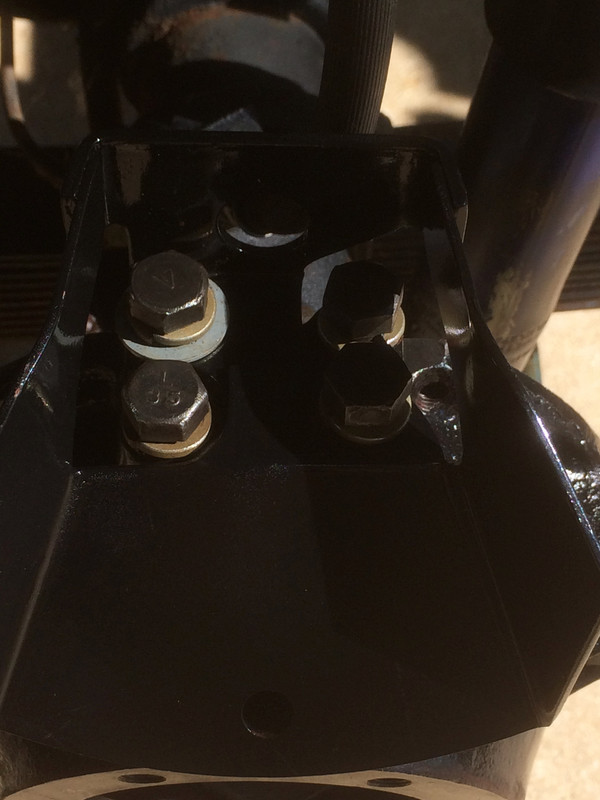
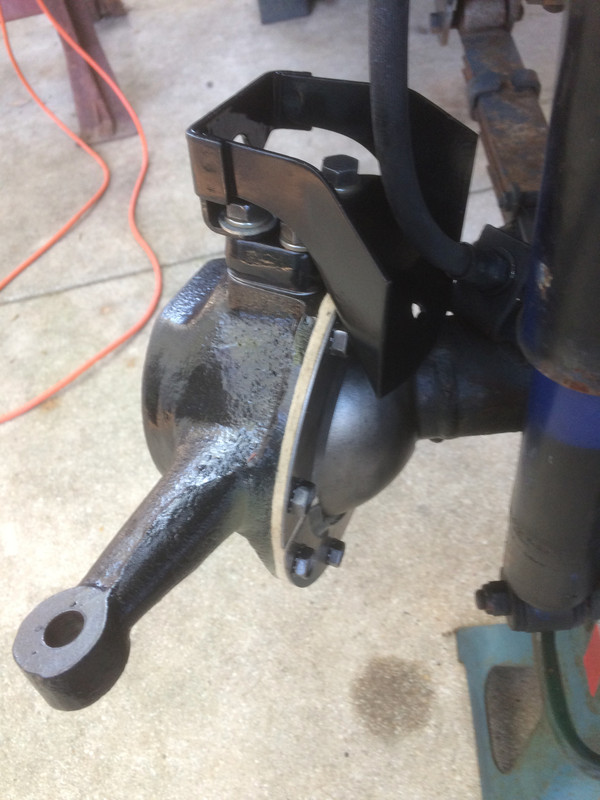
Take note - here you will see I have installed the hose guard 180 degrees out of phase with the way it should be! DUH!

This is what happens when I'm not being paid for my time!

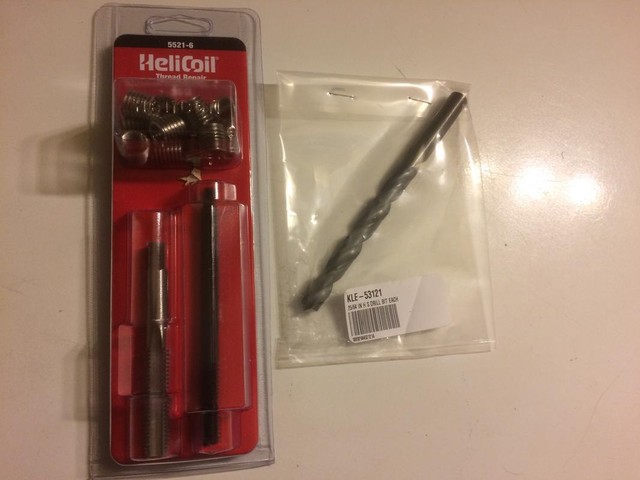
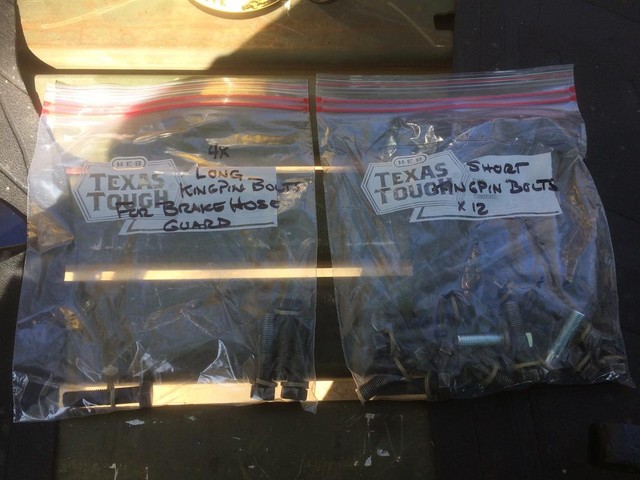
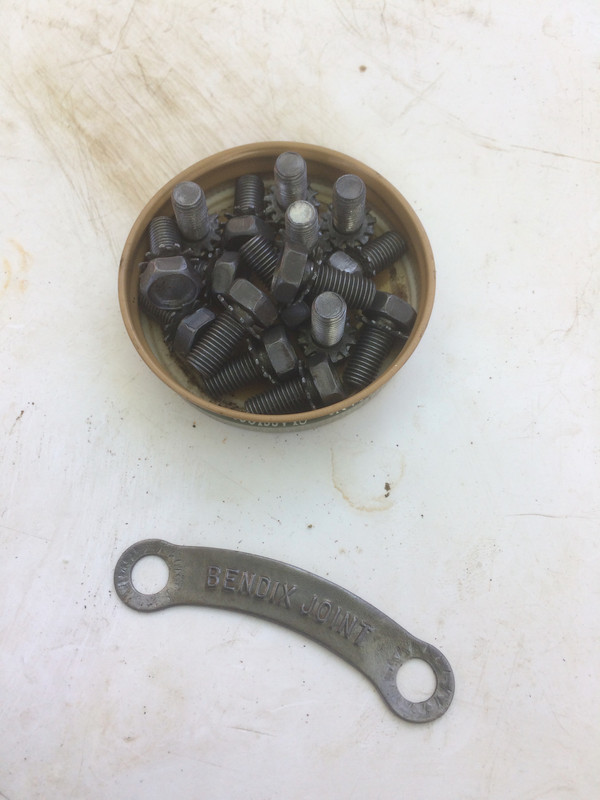
Hardware, bagged and sorted and one or two new bolts to replace those that were stretched. All of these have brand new lock-washers. New hardware is cheap.
Get some!
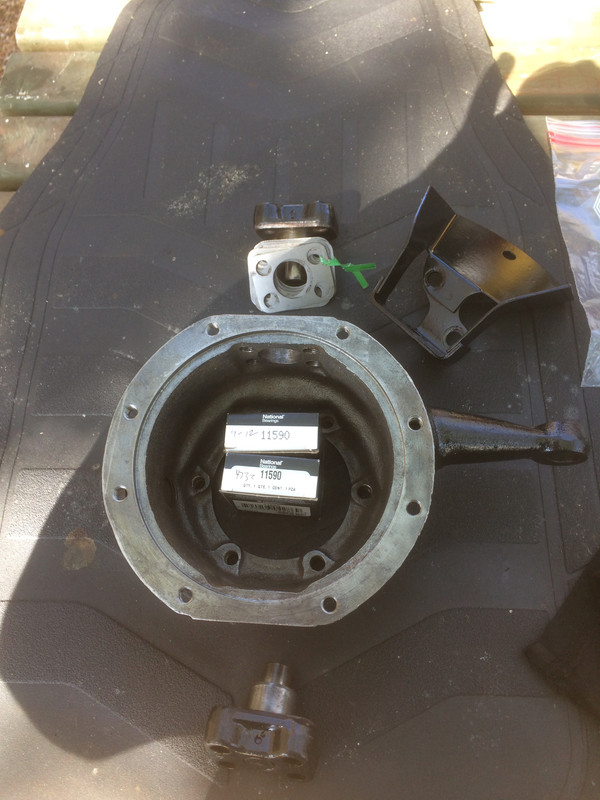
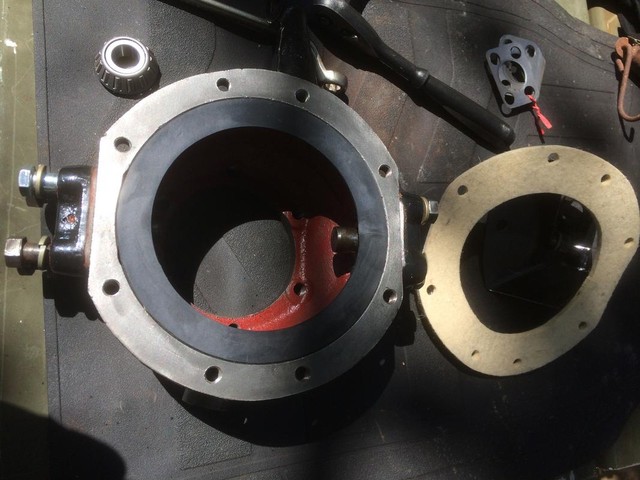
Here's the morning layout of parts in a logical fashion. Trouble is lurking in one of those 11590 bearing boxes because some nitwit returned parts and probably thought it would be cute to put a bearing race in a bearing box. Yes, I bought these from a reputable supplier whose reputation also got damaged because they didn't check it either. Finally, I got screwed when they shipped this to me (and charged me for it). So, here I am, all ready to get to work and I'm missing one @#$%&* bearing! The lesson here is a simple one. When you receive the parts you ordered, open EVERYTHING and check. Not catching this earlier is MY fault and this screw-up cost me $20 and several hours to source a replacement locally.
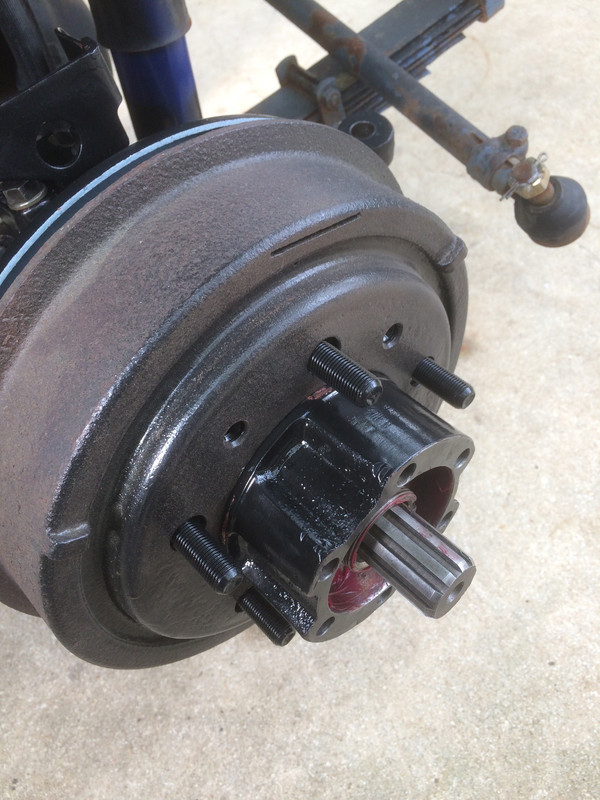
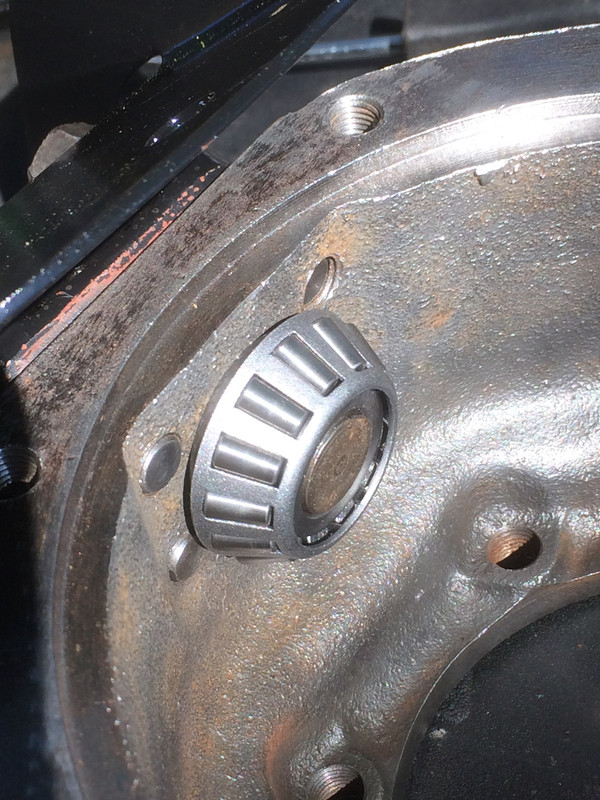
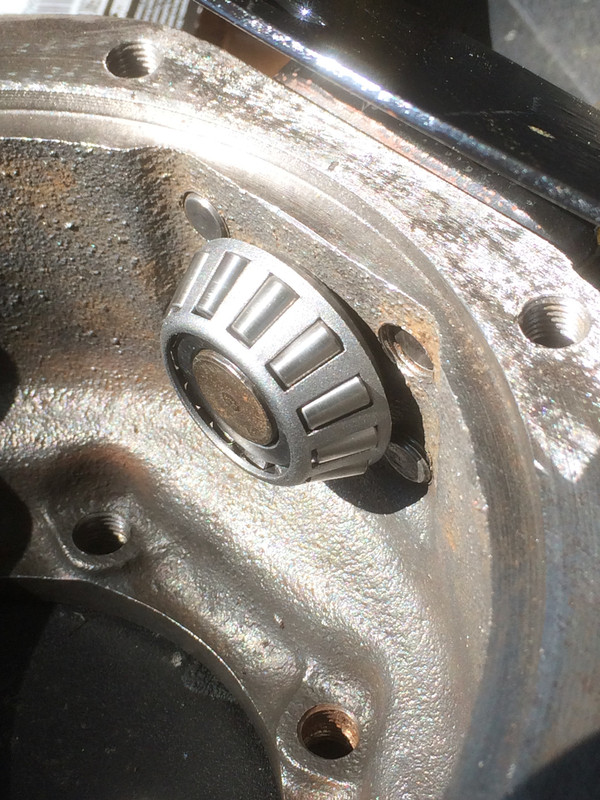
Ok, my bad. In this photo, I've got the top bearing flipped over and facing the wrong way but you should still be able to get the point. Everything you see here (and more) is suspended upon that nice shiny cup at the end of the axle tube by means of these two tiny little bearing cones and nothing more. Getting through all the banging and bashing that these vehicles endure depends upon two little conical bearings. So, the next time you're watching a video of guys enjoying their flat fender jeeps on the rocks at Moab, or an old clip of the U.S. Army guys boinking over a test track in a Jeep, think of the tremendous stresses that can be exerted upon a well-engineered (and yet very small) collection of metal parts.
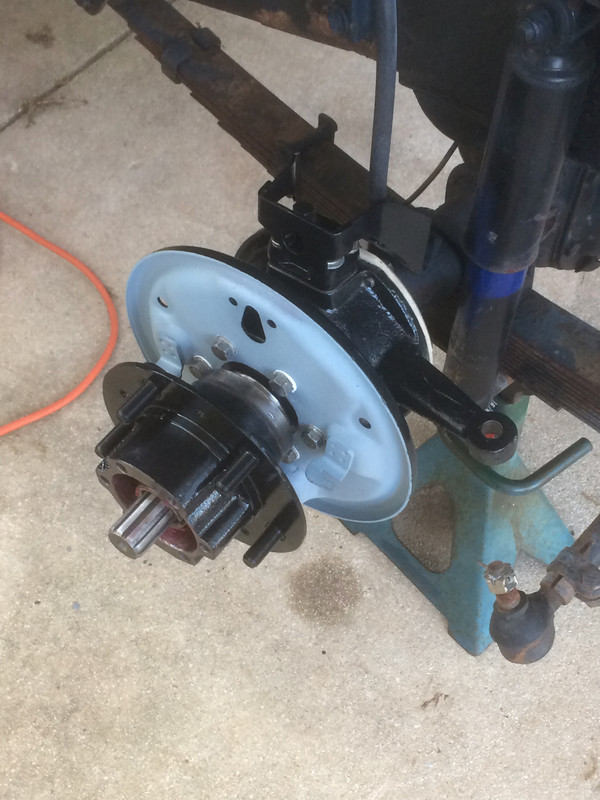
Here's a shot of the top assembled without shims but without each bolt tightened down. IF everything were tightened down and IF all the bolts were in the right places and IF there were NO shims in place, you would see 1-1/2 turns of thread protruding past the inside face of the steering knuckle and guess what...a shim pack valued at 48 just happens to be about equal to 1-1/2 turns of thread. Starting to make sense?
Ok, so I chased out all the bolt holes with a tap yesterday. This bolt was offering some resistance and you can see why. Trouble in the first four turns of thread and arguably as many as 13 turns. This is one of those jobs where getting the correct preload is a matter of assembling and disassembling many, many times. Having bolts and bolt holes that are true and correct is a HUGE bonus and makes a tedious job ever so much easier.
Here's a photo of shims in place with the shims oriented in such a way that I can pluck the skinny shims off with ease while we sneak up on a proper pre-load.
The matter of finding the correct number of shims to establish proper pre-load goes like this -
1. WITHOUT making any installation of the oil seals and WITHOUT packing the bearings, install your steering knuckle and it's bearings in its entirety.
2. Install the bottom steering knuckle flange caps and torque them to spec (I am using 30 lb-ft of torque and will wrap everything up with 35). The bottom steering knuckle flange will remain in place and undisturbed throughout this process.
3. Install your complete top assembly with hose guard (and that extra flat washer) and your shims. The top will be where all the adjusting takes place.
4. While you are going through the process of working out just how many shims you need to remove, tighten the top bolts down to snug, rather than to specifications. It is quicker, easier and will help speed you through the process of getting close to that optimal pre-load.
5. Make your checks for adequate pre-load, disassembling and taking away shims, then reassembling and rechecking until you are getting in the ball park. But, while you are doing this, remember that proper torque will add substantially to the final pre-load.
6. When you begin to feel your are getting close, you can start checking with properly torqued bolts.
What
is adequate preload and how do we check for it? The TM calls for 6-9 pounds of pull checked at the hole for the tie-rod end. This pounds of pull is for where the steering knuckle just begins to move, not
during movement. There are lots of fancy pull-scales for this purpose. I used an antique scale from the turn of the century. Whatever you use, use the same device on both sides.
Generally speaking, if you are moving a properly pre-loaded steering knuckle by hand (one that does not have its grease seals or anything else installed, you will find that it is mildly stiff and pivots with some resistance. What you do NOT want is a steering knuckle that pivots in the breeze. The mechanical advantage provided by the rest of your steering (such as the steering box and the leverage of the bell crank) balances against the resistance achieved by proper pre-load. That is why we are going to all the trouble of getting this right. It will pay huge dividends when it comes to enjoying the truck. Any prospective buyer will be seeing a lot of value when he test drives your truck and finds the steering to be smooth and responsive because as we know, these old flat fenders are notorious for having sketchy steering. Getting
this job right is a bedrock principle to having good steering.
When you've determined the proper number of shims to get that steering knuckle moving with the resistance you find acceptable, remove everything and double check your bearings, ensuring there is no damage from all this fiddling around. I know what you're going to ask. What was my final total shim thickness? Well, I'm not going to tell you but is was far, far less than 48 thousandths. I watched a very reliable source on YouTube do one that required NO shims! So there can be some very substantial differences between trucks. How many attempts before I got to where I was happy with the results? Nine times on the right side where I started and eight on the left. Seems like a lot, but good prep makes it far easier.
My best advice? If you get into one of these, follow the steps until you get things the way you want them to be and so long as both sides are mildly stiff and match reasonably well. If you do
that, you will have good results.
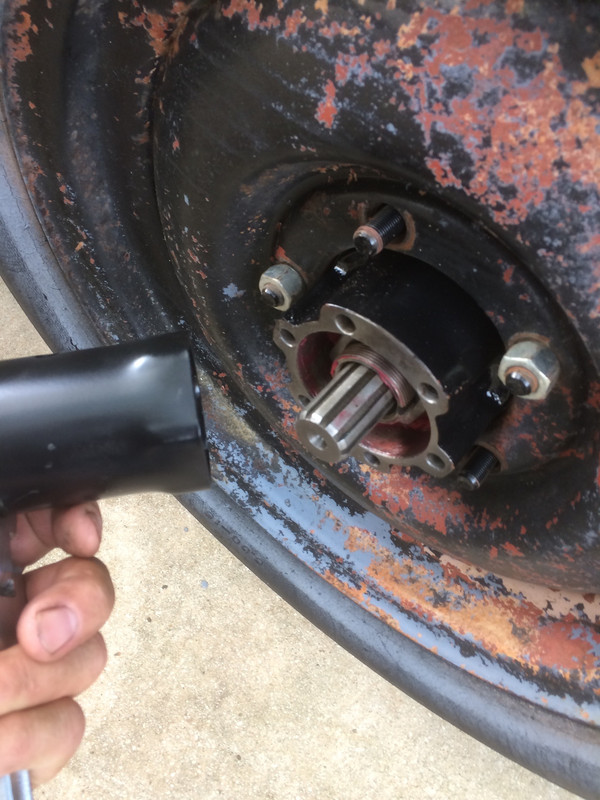
In this photo, you can see one of the reasons we don't do this job with packed bearings. See all the junk that migrated down onto it while I was futzing around with shims? Flecks of paint and whatnot, all of which need to be removed before final assembly.
Checking the new grease seal for fit. So much easier to confirm fit on the work bench rather than to having to struggle with it while it's mounted on the truck. That shiny surface needs to be painted! Since I'm waiting for another bearing to be brought up, I'll use that time to get them coated.
Checking the felt sweeper to ensure those bolt holes line up.
Checking the retaining plates to ensure their bolt holes line up.
Cleaned up the original hardware for the seal kits and the identifier for the steering axle joint.
Prep for final installation. The felt sweeper goes on, over the cup and then the rubber grease seal (which is a split ring). Gentle pressure will allow you to work the split open end over the axle tube. DON'T bend it - just flex it. When the steering knuckle is in place, work the grease seal into place much as you would put a tire on a rim. Work it around until it all fits. If you took the time to fit it on the work bench this is a relatively easy task. However, if it still doesn't fit you may have to trim the ends where they meet at the split. Keep the split in the grease seal at the top, 12 o'clock position. Then, lay the felt sweeper over the rubber grease seal and the retainer over that and run your retaining bolts in, finger tight.
The felt wiper doesn't need to be oiled, though I suppose you could put some silicone on it. The bottom line is, don't put anything on your felt that will attract or hold dirt. I elected to install mine dry.
Do not over-tighten the retaining bolts for the seal retainer. Don't tighten to the point where you deform the retainer. Run them in equally. You will be able to see the threads as they protrude through the casting and in this way, judge how equal your bolts have been drawn down.
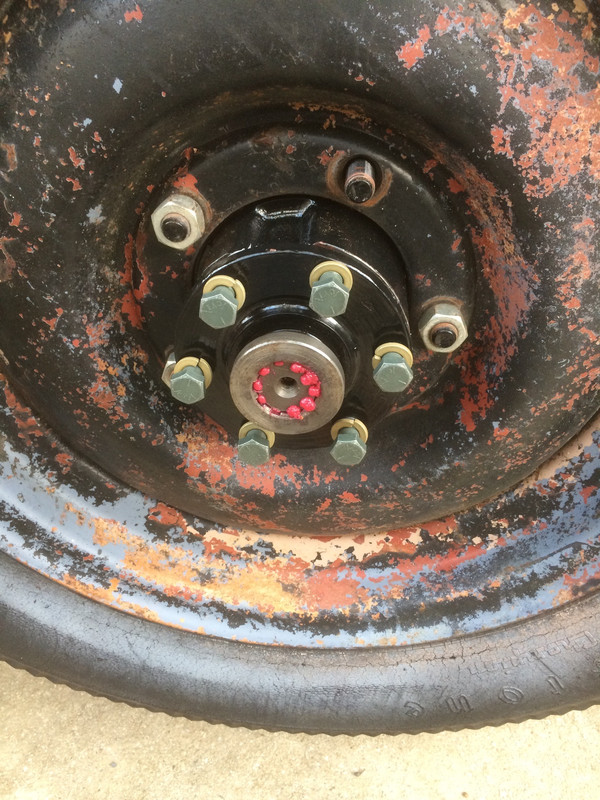
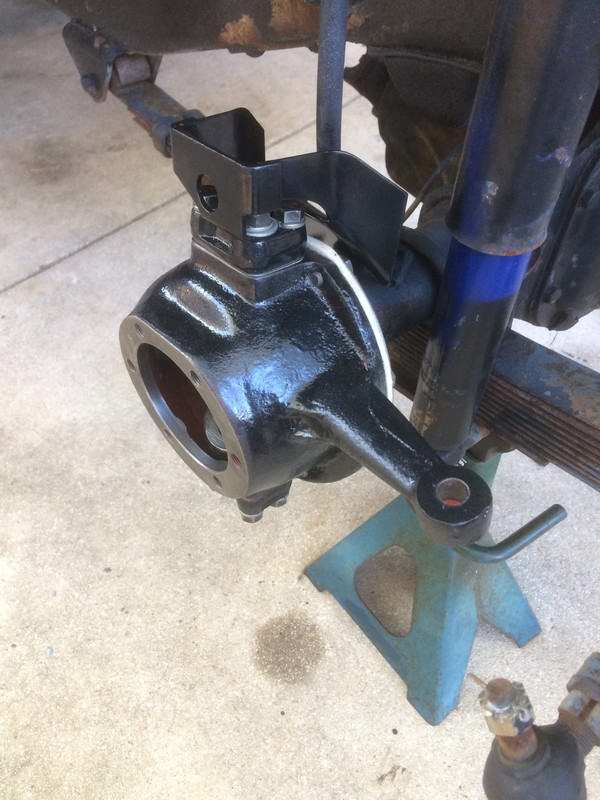
Finally, all back together (brake hose guard facing the correct direction

). You will recall that the TM instructs us to set our pre-load without the grease seal installed. Here's a problem I may be facing and a question I do not yet have an answer to. These are a new-style civilian grease seal being put to work on a very old military truck. With these new style seals installed, the energy necessary to swivel the steering knuckle is roughly 33% more than without them installed and I don't know what is "normal" for these so I intend to just roll with it as the steering knuckles are still moving in what I would characterize as the high side of the mildly stiff, rather than
really stiff. But my original pre-load is right so I really have very little to worry about. Perhaps with some metal preservative (silicone) on the cup, the grease seals will start moving more easily across the surface of the cup.
Look at that glaringly white felt! I would have preferred they would have made these felt sweepers from a darker material!
Hope someone finds this useful.
Cheers,
TJ