Page 5 of 8
Posted: Mon May 24, 2010 9:42 pm
by 53a1
Paint stripper works great but expensive.
Posted: Tue Jun 29, 2010 8:34 am
by 53a1
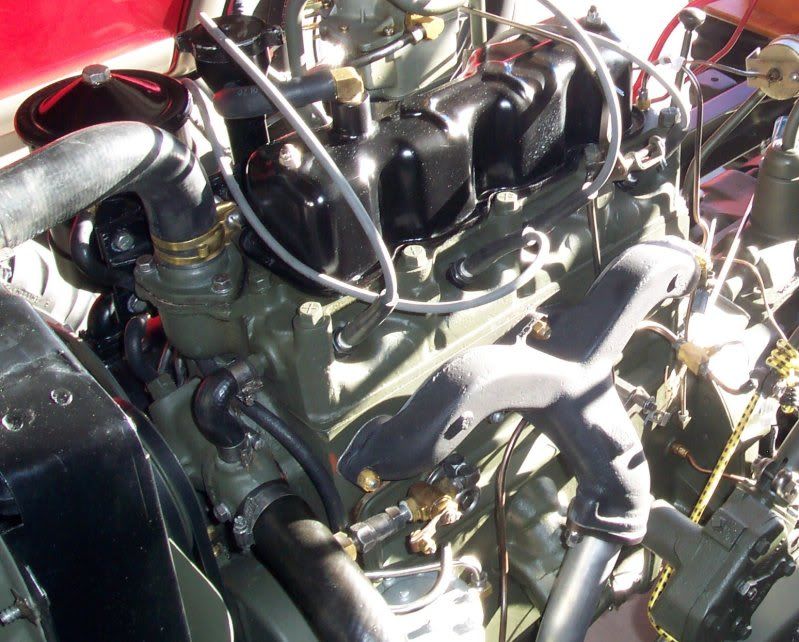
Installed exhaust pipe and muffler. Exaust down pipe is from Midwest and center pipe is NOS. Muffler was on the jeep when I got it. I sand blasted muffler and used Duplo Flat Aluminum from Autozone. Exhaust manifold is painted in Duplo high temp flat black.
Not sure if the attachment of the muffler to rear cross member is correct but it fits very nice so I kept it as-is.

copper tubing
Posted: Wed Jun 30, 2010 7:47 am
by ocwd
Nice work on the vent lines Dave. Looks like you used copper tubing. Was it easy to bend and where did you buy it?
Posted: Thu Jul 01, 2010 4:41 pm
by 53a1
I used original tubing off an a1. I cleaned it on the wire wheel.
Tubing
Posted: Thu Jul 01, 2010 9:24 pm
by ocwd
Lucky.
Posted: Fri Jul 02, 2010 12:16 pm
by 53a1
One tip I discovered.
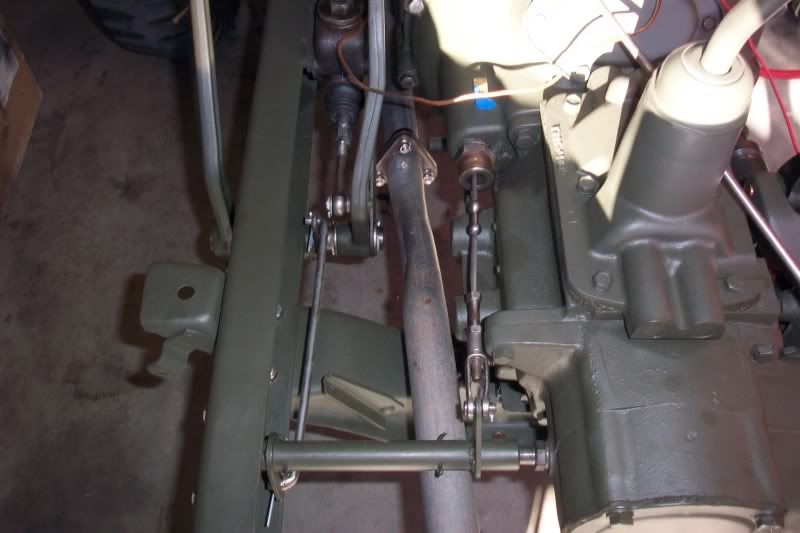
The fuel line had a hole worn in it from rubbing on the fan belt. I tig welded the hole shut. Sometimes things can be salvaged.
The clutch linkage is the same story. The linkage holes were worn to an elliptical shape so I welded and re drilled.
Posted: Fri Jul 02, 2010 7:12 pm
by 53a1
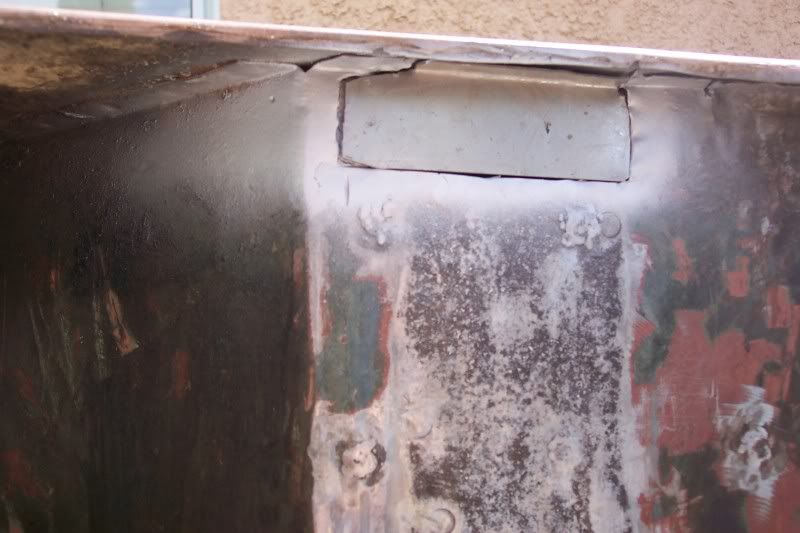
Removed rusted hat channels and patched some rusted out areas and role bar holes.
Posted: Sat Jul 10, 2010 4:36 pm
by 53a1
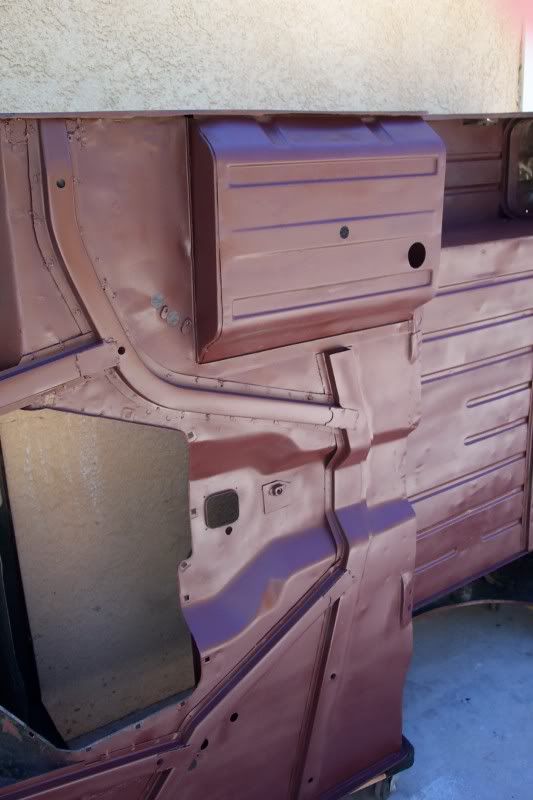
Before I painted the channels I coated a piece of sheet metal with Rustolium high temp 2000 degree primer. I ran a bead from bare metal and over the paint and it only burned off at the bead. The rest of the paint was still solid. I rubbed with scotch bright and it didn't peel or flake. I'm going to top coat it with the same brand.
I'm painted the inside of my hat channels and will paint the sheet metal on tub before I spot weld channels on. I did the same on the repair pieces I made before they get welded in. The Aluminum color paint looks just like sheet metal.
The black pitting is result of the phosphoric acid. The sheet metal was pitted but still solid.

Posted: Sun Aug 01, 2010 9:13 pm
by 53a1
Finished welding in the new MWM hat channels. Hat channels fit as well as they look. Once again thanks to MWM.
I have so many hours into this tub reversing damage due to age, the elements and bubba. This is by far the most labor intensive part of the project. And to think that my tub wasnt' that bad... my hats off to you guys who replace major sections.

Hat Channels
Posted: Tue Aug 03, 2010 7:50 am
by ocwd
Did you use a spot weld cutter to remove the hat channels? I noticed that there aren't any holes where the hat channels were. Every time i've removed body panels, I make holes all the way through the panels.
Posted: Tue Aug 03, 2010 11:12 am
by 53a1
Hi Dave.
I used a spot weld remover from Harbor Freight and it worked really well. After the old channel is removed you have to grind off the tabs. No need to drill through the floor.
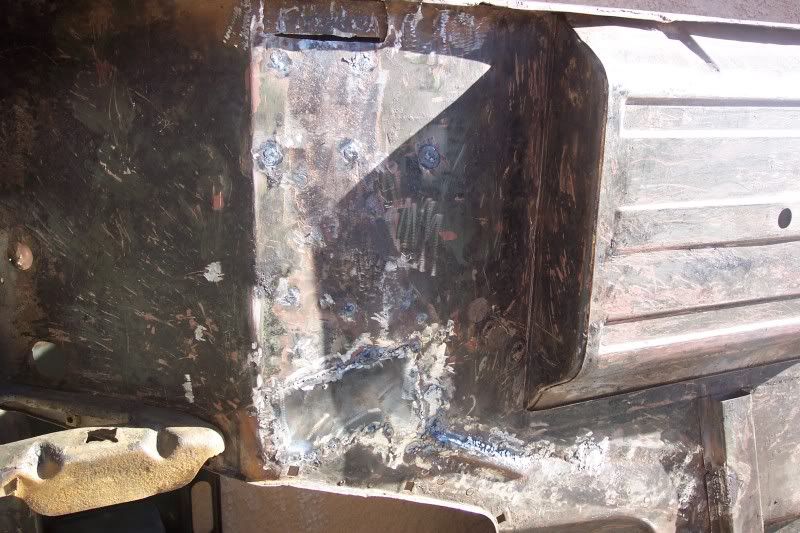
I had to weld in four patch pieces and the hat channels and that was about it. Not pretty but a good solid floor now.
Posted: Sat Aug 14, 2010 5:47 pm
by 53a1
Just when I thought I was done I found another damaged area. The hood was folded back at some point and left a huge separation in the metal. The previous fix was a few pounds of Bondo and rust so I torched off the old Bondo, cut out the section and welded in a new section as you can see. A skim of Bondo should finish it up.

Posted: Sun Aug 22, 2010 2:07 pm
by 53a1
Posted: Mon Sep 06, 2010 11:22 am
by 53a1
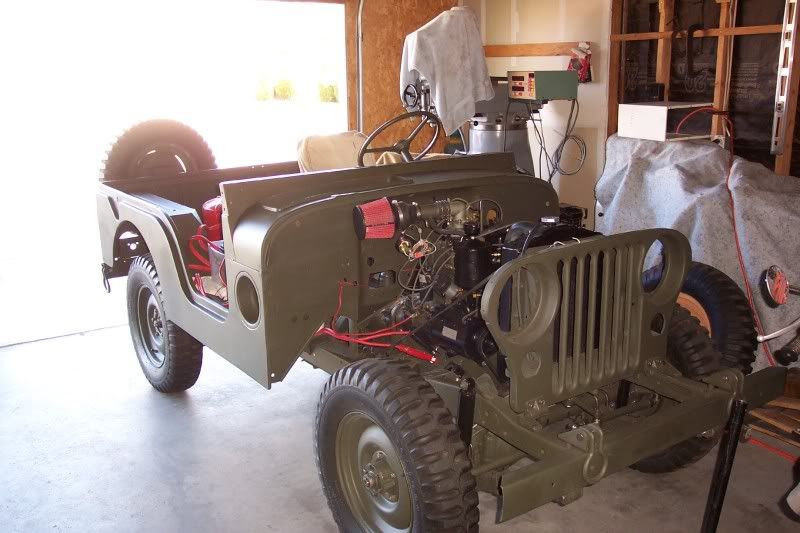
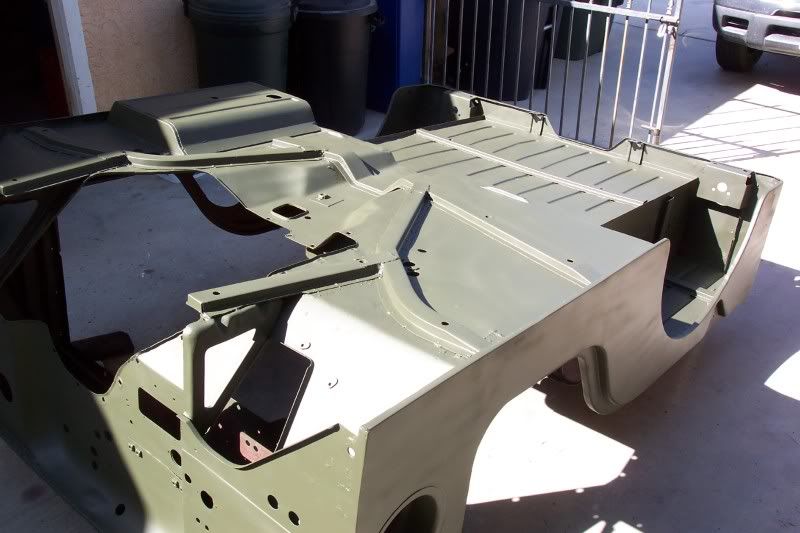
Two years later and I'm finally done with body work and bottom is painted. I'll flip it over next weekend and paint the top.
Posted: Mon Sep 13, 2010 9:50 am
by 53a1
Finished painting the tub. Hat channel bolt holes lined up perfectly with frame so that was a relief. Glad I went flat because the flaws in my bodywork really show up when you have the tub mounted and jeep sitting in the driveway.
Took it on a ride down the street and it drives nice.