Page 6 of 21
More Progress
Posted: Fri May 28, 2010 8:22 am
by ocwd
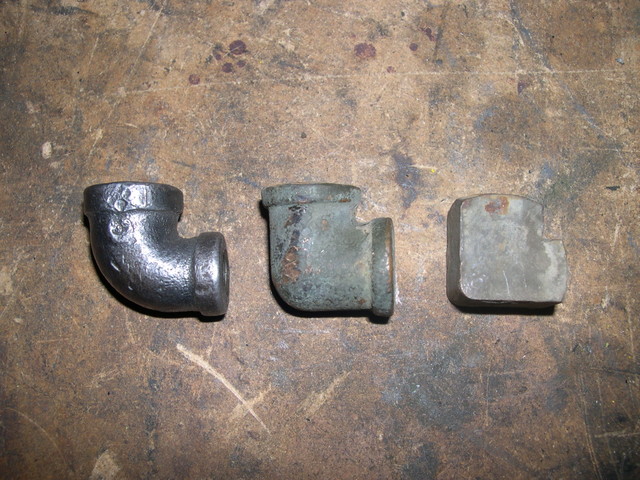
Thanks guys. I have found 3 types of brass reducing 90 fittings in my stash of fittings. All came from the same purchase of surplus USMC M38A1 parts (mostly A1 parts). I am guessing that the two on the left are correct for use with the oil sending unit and the one on the right goes some where on the venting system. Has any one seen these fittings that can shed some light on correctness?

Center Exhaust & Muffler
Posted: Sat Jun 05, 2010 5:52 pm
by ocwd
Posted: Sat Jun 05, 2010 7:19 pm
by 53a1
Hey Dave.
I just installed the exhaust pipe I got from you on my A1 and ran into the same problem using the same MW Military down pipe you are using. The MW Military down pipe is a nice unit and this is no big deal. I've read that even the original didn't fit perfect.
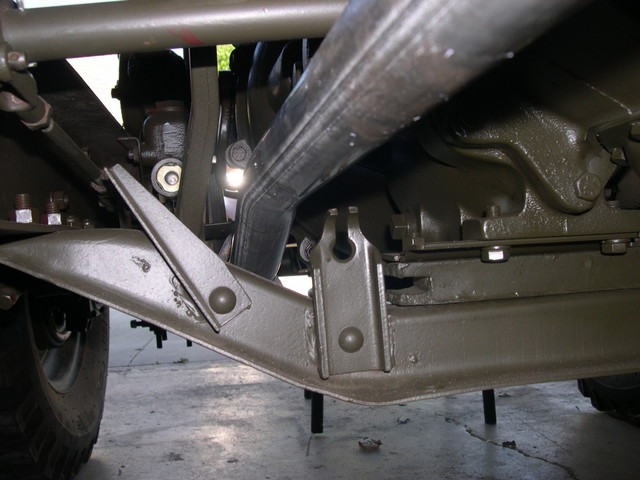
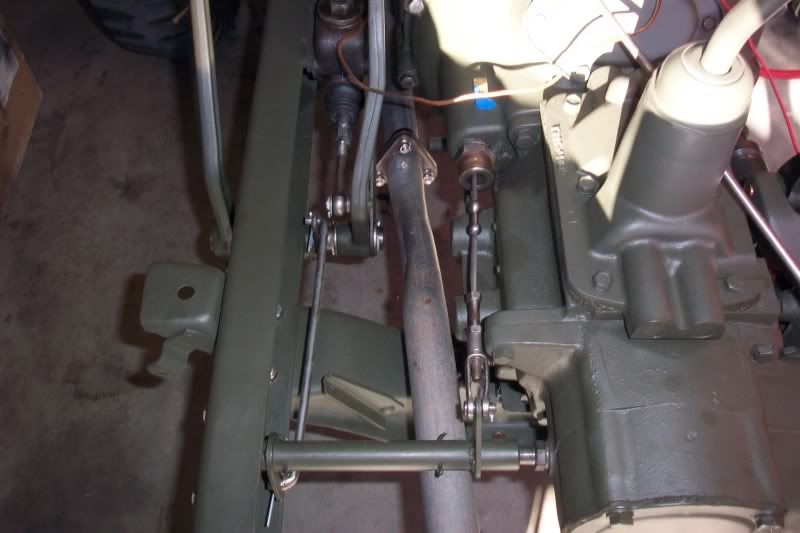
I installed the u tube to the manifold and put a block of wood between the u tube and the brake master cyl and bent it over to the driver side by hand but it looks like yours doesn't need that. To be honest yours looks like it is fitting very nice. Clamp it all down and when it heats up the stresses should be eliminated.
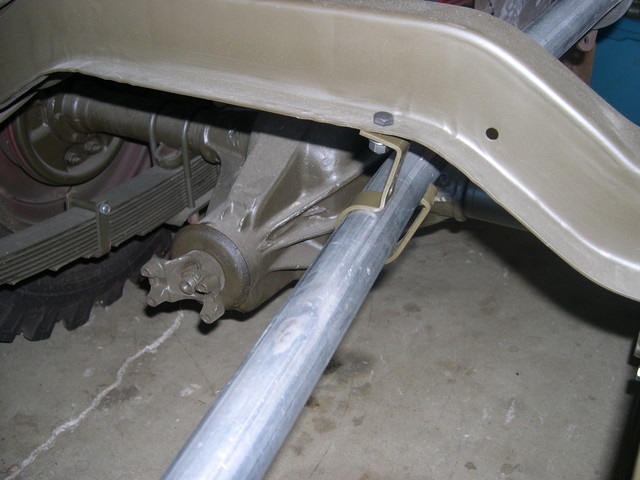
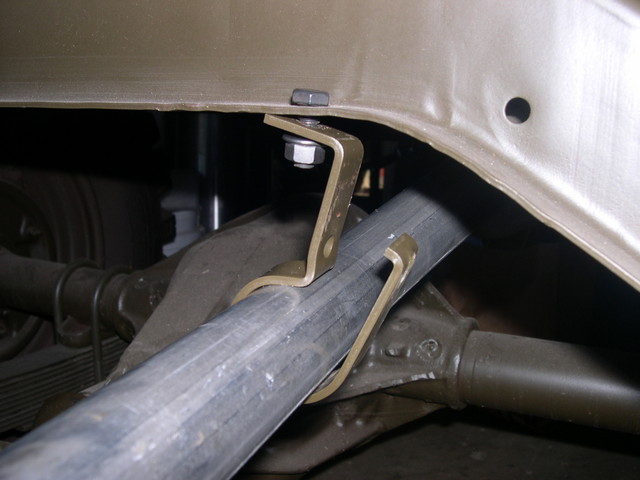
You have the mount bracket installed just fine. A bolt goes through the clamp that holds pip to the mount. Use an all metal self locking nuts and stainless bolts. If you have to pull the center pipe over a little to get it to line up that is no big deal. It's not going to be a perfect fit and if you have to pull things and inch or two I wouldn't worry about it. You just want to make sure you have proper clearance going over the trans mount which I see you do.
I'll snap a picture if my camera is still working.
Posted: Sat Jun 05, 2010 7:52 pm
by 53a1
Center Exhaust & Muffler
Posted: Sat Jun 05, 2010 10:45 pm
by ocwd
Thanks for the info and pictures Dave. I was using steel nuts and bolts with lock washers but I will switch to stainless and lock nuts.
I had a pretty good run over the past two weeks and made some progress. I will be working on the front bumper after the exhaust is done. The front bumper needs some straightening but it is solid.
Posted: Sat Jun 05, 2010 10:54 pm
by 53a1
I used stainless but this is not original. You can use what you have and it will work fine.
bolts
Posted: Sun Jun 06, 2010 7:13 am
by ocwd
I think stainless is a good idea for the bolts that hold the pipes together. I'll leave the others as I will be painting them. I am told that the paint on the brackets is going to char anyway so I am not really worried about it. Where did you buy your muffler Dave?
Posted: Sun Jun 06, 2010 10:42 am
by 53a1
The muffler came with the Jeep. I sand blasted it and painted it with high temp primer and Duplo flat Aluminum color paint from Autozone. The center pipe I got from you is zink coated and the MW Military u-pipe is Aluminum coated so I didn't paint those parts.
Posted: Sun Jun 06, 2010 11:00 am
by wesk
The 1/8" Pipe nipple between the block and the reducer elbow is only 1" long. The 1/8" to 1/4" P elbow was black iron. In your photo of the three elbows it would be the far left one. You can paint it black or find a natural gas black iron elbow.
Posted: Sun Jun 06, 2010 11:22 am
by 53a1
And to give MW Military the credit they deserve, the NOS center pipe could be the item that needs to be bent a little to fit not the MW Military u-pipe.
The Midwest u-pipe is very high quality in my opinion.
I bought an off shore pipe, two radiator hoses from Surplus Jeep Parts and it was all a total pile of S*IT. To top it off I had to pay shipping to return ALL items because nothing fit so basically I will not buy anything from overseas unless I have to so MW has most of my business.
Oil Pressure Fittings
Posted: Sun Jun 06, 2010 12:18 pm
by ocwd
Ha, I guessed wrong on the 90 elbow. I picked the center one. I have 3 of those and they are all from the same parts run.
I originally purchased off-shore pipes as well. I never did try and fit them in place as they look cheap. The center exhaust and u-pipe are both from MW. My muffler is an import. When I called MWM they told me that there really is not a good reproduction muffler on the market.
So far I have not purchased anything from Surplus City Jeeps Parts. They seam to be expensive.
Posted: Sun Jun 06, 2010 12:24 pm
by wesk
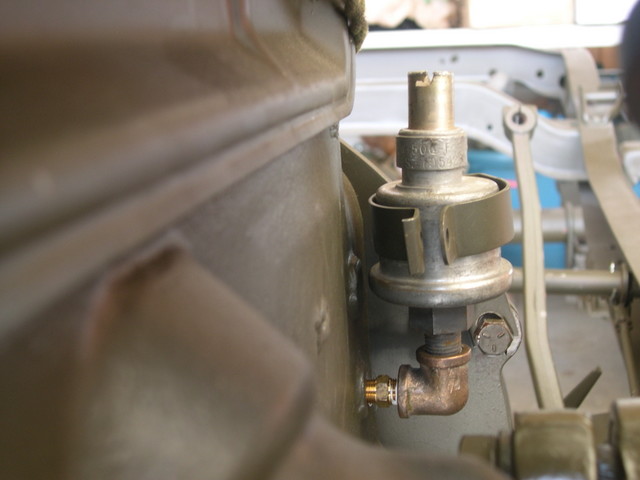
That 3" pipe nipple is also way too long. You could never fit the sender in it's mounting bracket using that nipple. The nipple must be 1" to allow the sender to mount properly in it's bracket.

OP Sender
Posted: Sun Jun 06, 2010 3:56 pm
by ocwd
Thanks Wes. I stuck that 3" nipple in there just to show which end is which. Here is a picture of where I am at on the OP sender. I put a coat of black paint on the other style cast elbow as mentioned above because I plan on switching them out. My OP sender mount bracket does not appear to be lining up very well with the sender. It is a repro from MWM. I think that it may be the elbow as the two are slightly different. I did finally find a 1" nipple at a local ACE Hardware.
Center Exhaust & Muffler
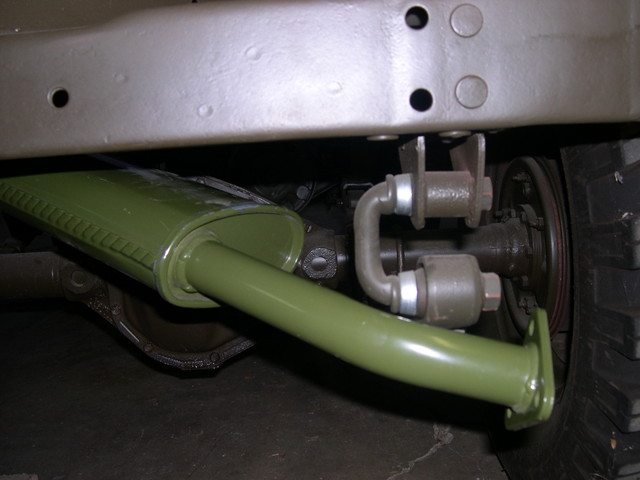
Posted: Sun Jun 06, 2010 9:27 pm
by ocwd
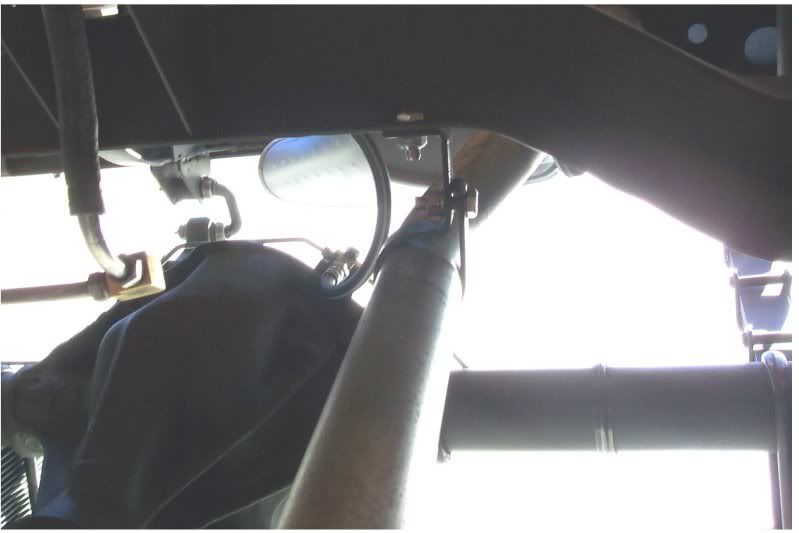
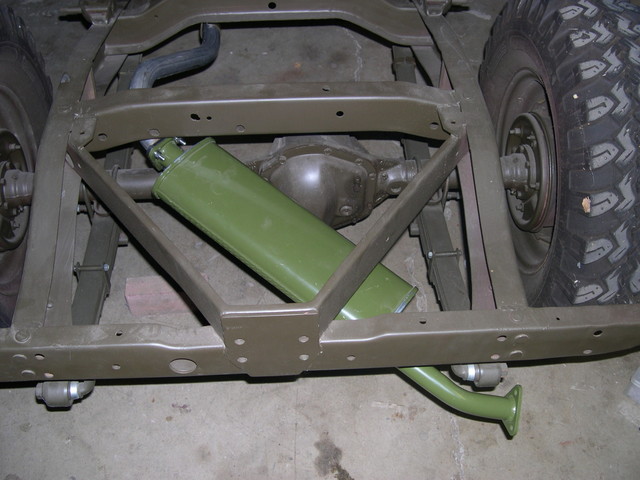
Well, here is my cheap muffler probably made in China. Check out how far it points down. I measured about 3.5" between the tail pipe end of the muffler and the rear cross member. The center exhaust pipe is bolted in nice and tight. I am still afraid to pull that thing up to strap it on.
Posted: Mon Jun 07, 2010 2:06 pm
by 53a1
Dave,
That looks way to off to be pulled back into position. I thought you were talking about the picture of the center pipe mount when I said to do that.
I hate to say it but that exit pipe looks like it needs to be cut, twisted and re-welded.
If you have a mig welder it wouldn't be that hard but you shouldn't have to fix a new part.