Page 6 of 8
tailgate latch repair
Posted: Fri Aug 07, 2015 3:52 pm
by 4x4M38
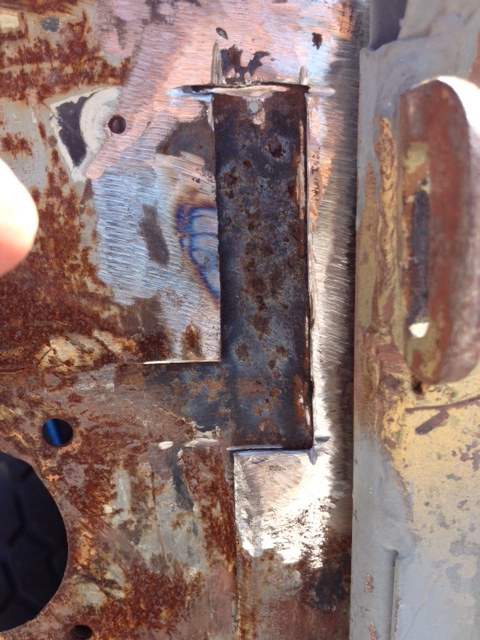
Bubba decided since he used the tailgate for a barbecue rack or maybe something to drive out of the mudhole, and was useless as a tailgate, those latches sticking out just got in the way. Out comes the plasma....
 http://willysmjeeps.com/v2/modules/gall ... _left.jpeg
 http://willysmjeeps.com/v2/modules/gall ... right.jpeg
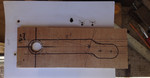
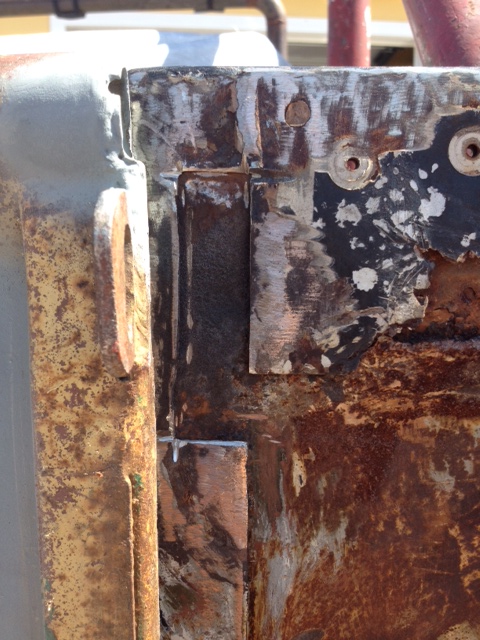
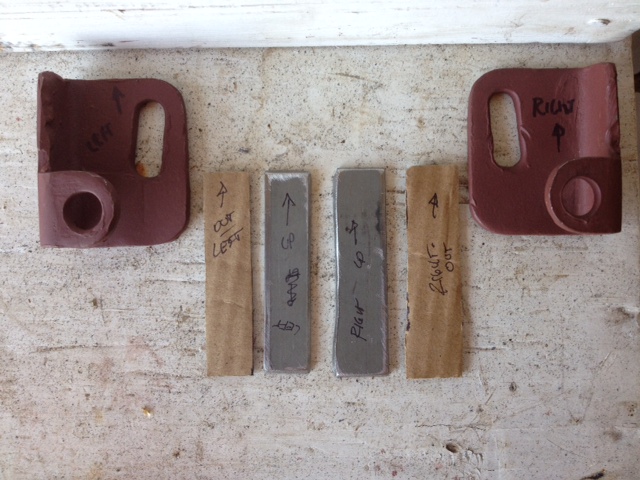
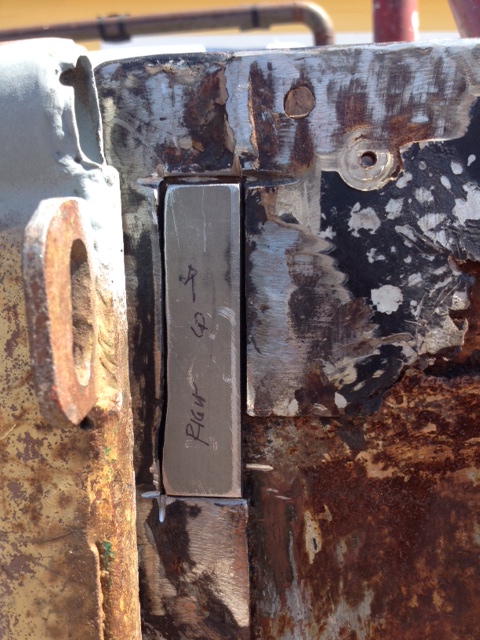
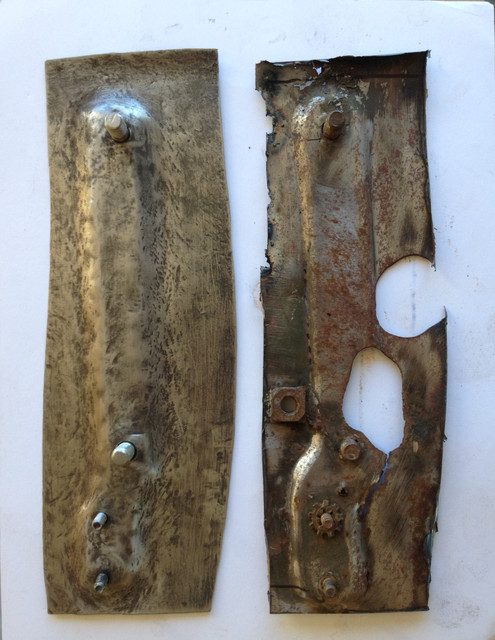
So patches had to be made. Seeing the state of the rest of the surround and knowing the latches purchased on Ebay were really heavy, I decided to make the patches from 1/8" to keep from burning through the thinner 18 gauge.
 http://willysmjeeps.com/v2/modules/gall ... parts.jpeg
Patch fitted and ready to be welded to surround.
 http://willysmjeeps.com/v2/modules/gall ... right.jpeg
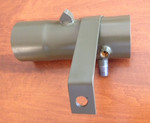
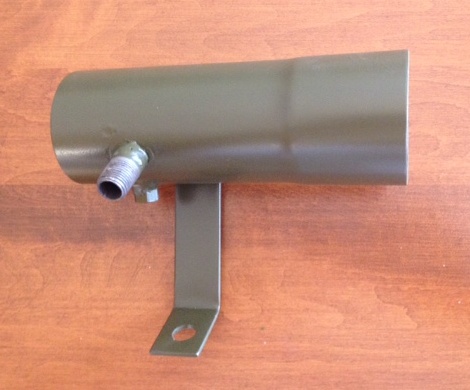
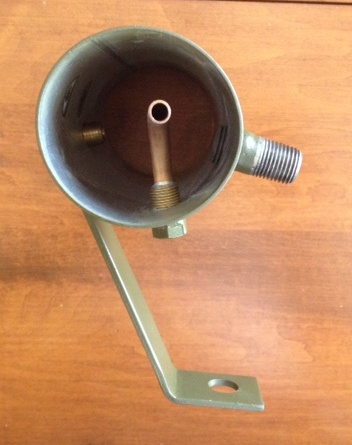
crossover pipe
Posted: Fri Aug 14, 2015 4:38 pm
by 4x4M38
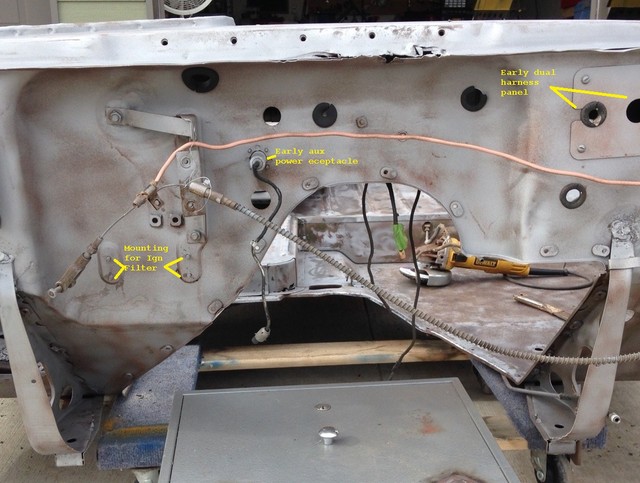
cowl receptacle
Posted: Thu Feb 04, 2016 10:12 am
by 4x4M38
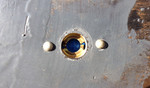
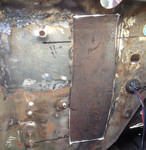
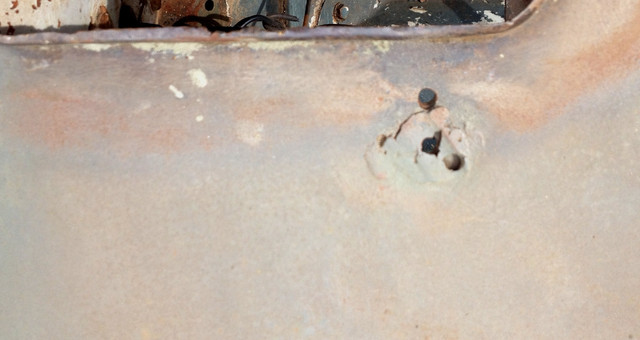
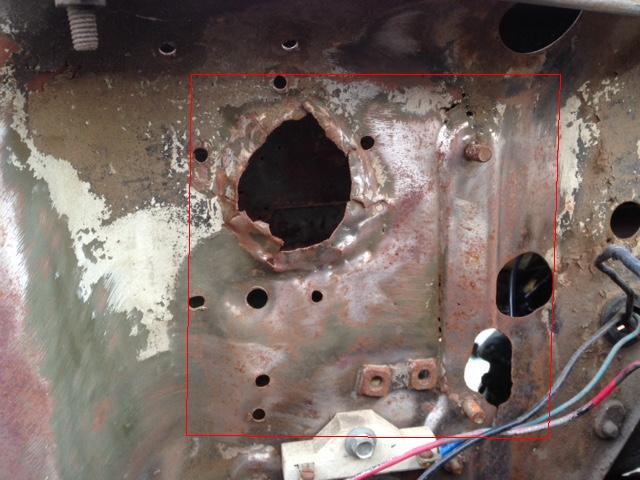
My cowl receptacles had been blown out, replaced by washers welded under existing sheet metal. Corresponding additional holes in the battery box lid had to be drilled to install bolts through the lid and cowl. Nasty mess, all of it.
I did not attempt anything until I found some replacement receptacles on Ebay:
 http://willysmjeeps.com/v2/modules/gall ... .sized.jpg
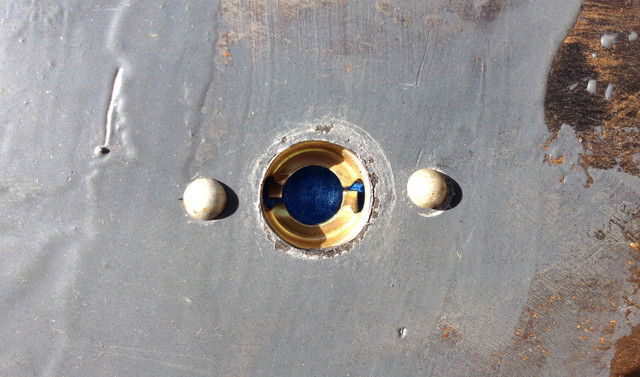
Note these have a raised area around the mounting hole but it is on the inside where it won't be seen, and will need just a bit longer rivet. I have since found correct, flat receptacles but had these already bought. I needed two and bought ten, if anyone needs any.
Kind of hard to see, but this was Bubba's fix. The other side was much worse:
 http://willysmjeeps.com/v2/modules/gall ... .sized.jpg
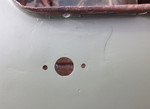
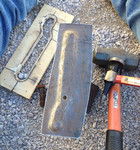
First thing, clean, remove the washer from underneath, and patch:
 http://willysmjeeps.com/v2/modules/gall ... .sized.jpg
Next mark and drill for the new receptacle using the now-repaired lid. The original holes were there. Test fit the receptacle:
 http://willysmjeeps.com/v2/modules/gall ... .sized.jpg
All cleaned up, primed, sanded, and waiting on final finish before installing and painting the new receptacles:
 http://willysmjeeps.com/v2/modules/gall ... .sized.jpg
Posted: Mon Feb 08, 2016 8:19 am
by 4x4M38
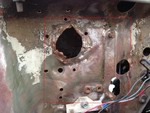
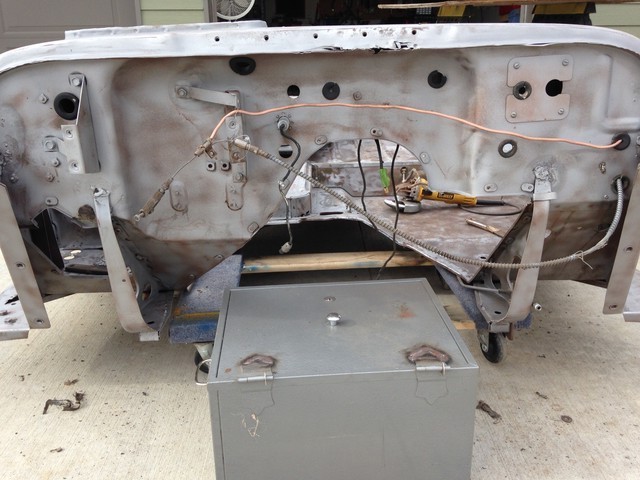
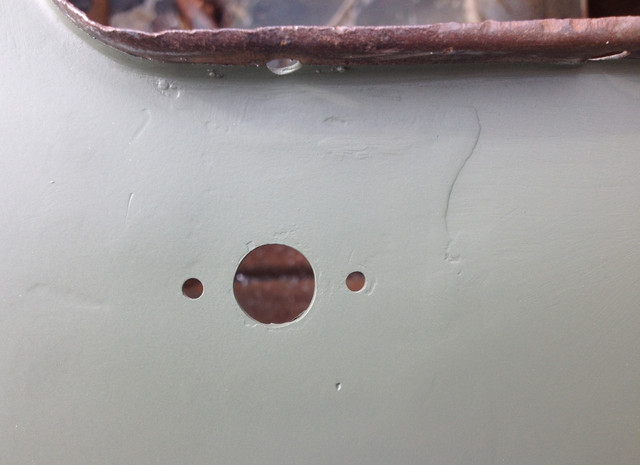
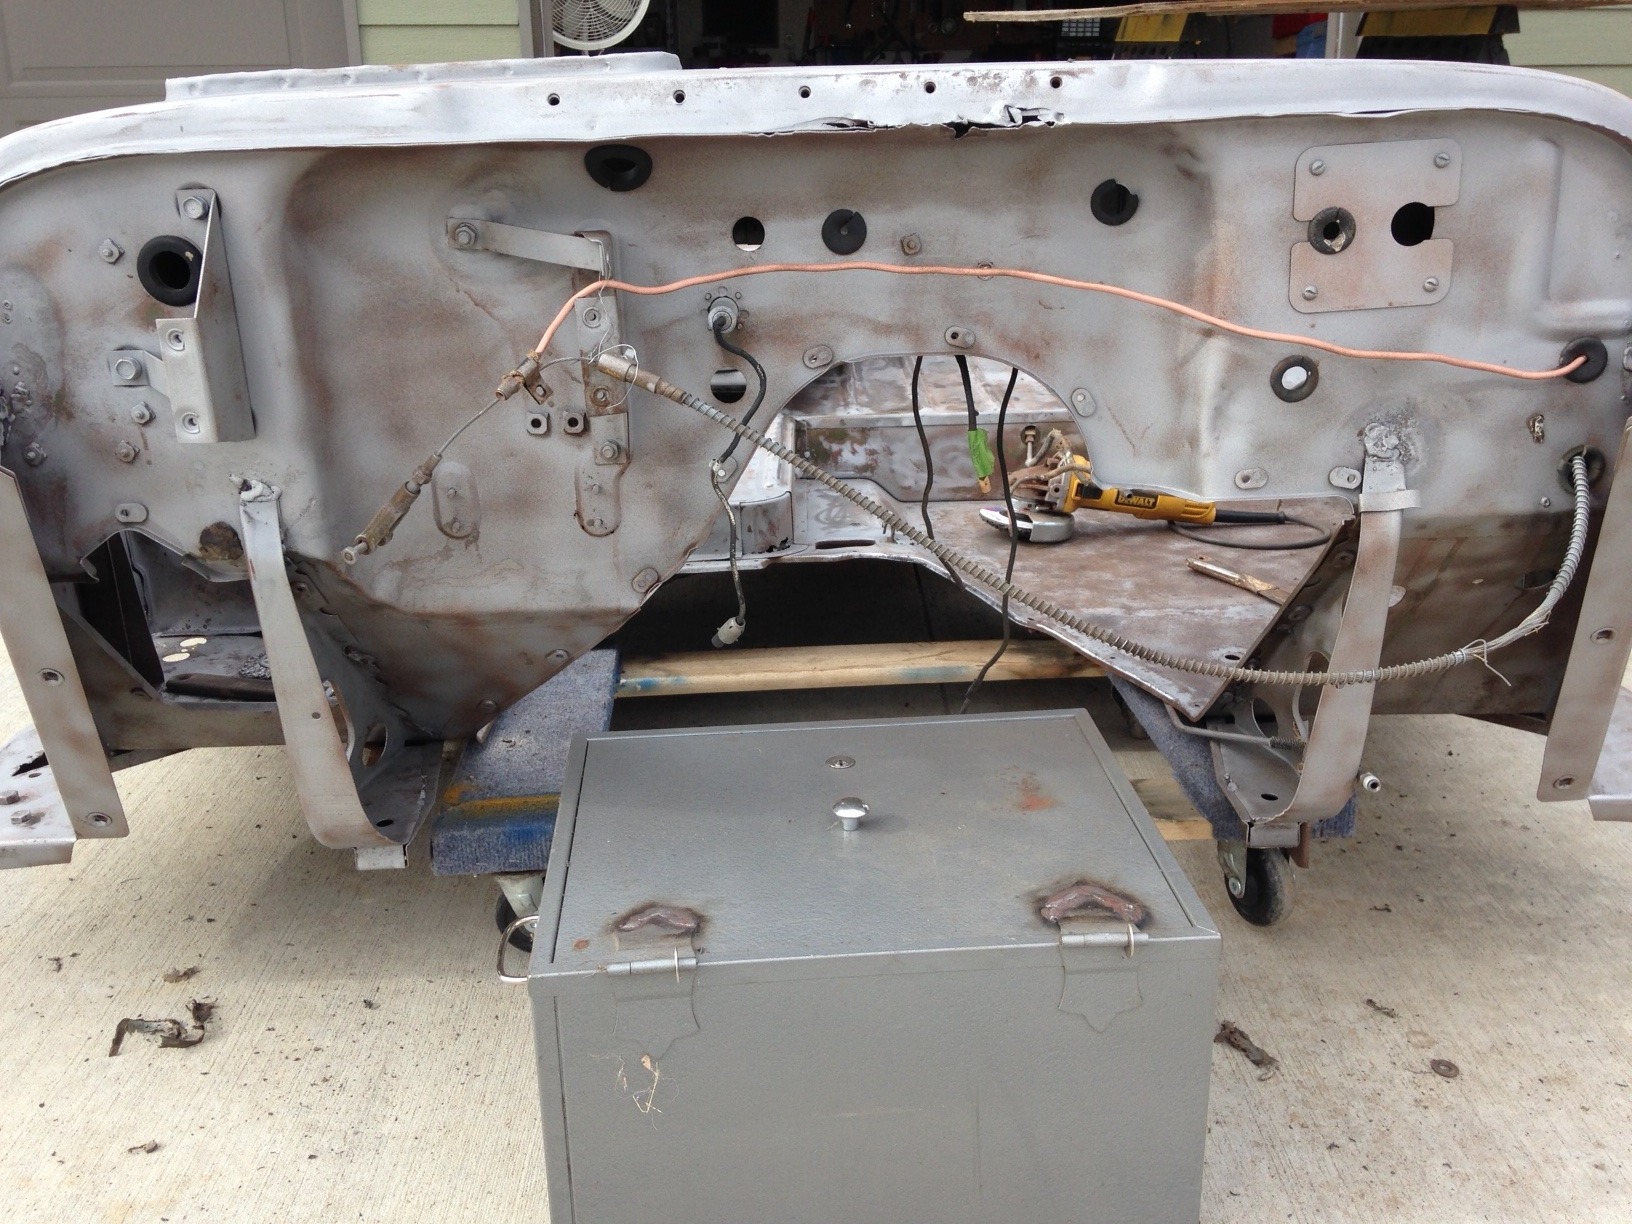
This is how I found my firewall. Have already removed the 60's chrome air cleaner bolted through that hole into the passenger compartment. Going to tackle the problem in two steps.
 http://willysmjeeps.com/v2/modules/gall ... cutout.jpg
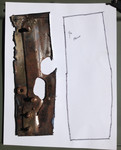
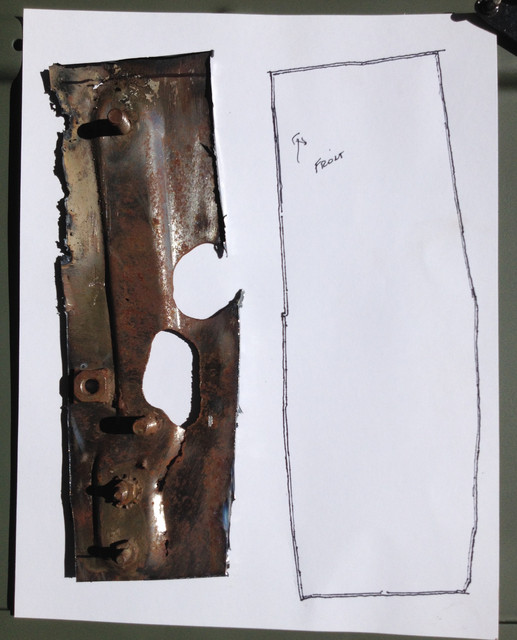
Cut out the hole and made a blank to fit. Had to radius the upper edge.
 http://willysmjeeps.com/v2/modules/gall ... .sized.jpg
Patch fits. Always good.
 http://willysmjeeps.com/v2/modules/gall ... .sized.jpg
Took a lot of courage, but I did it...
 http://willysmjeeps.com/v2/modules/gall ... .sized.jpg
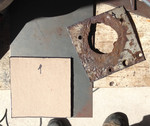
Now to make a replacement piece.
 http://willysmjeeps.com/v2/modules/gall ... .sized.jpg
And needed a form.
 http://willysmjeeps.com/v2/modules/gall ... .sized.jpg
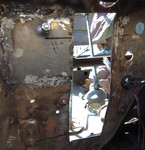
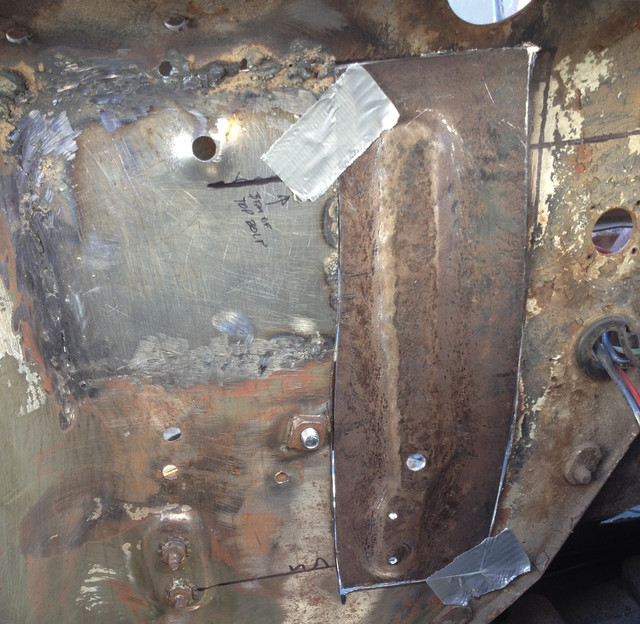
Patch fits, now on to the metal work..
 http://willysmjeeps.com/v2/modules/gall ... .sized.jpg
It's rough, but will look better.
 http://willysmjeeps.com/v2/modules/gall ... .thumb.jpg
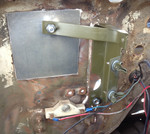
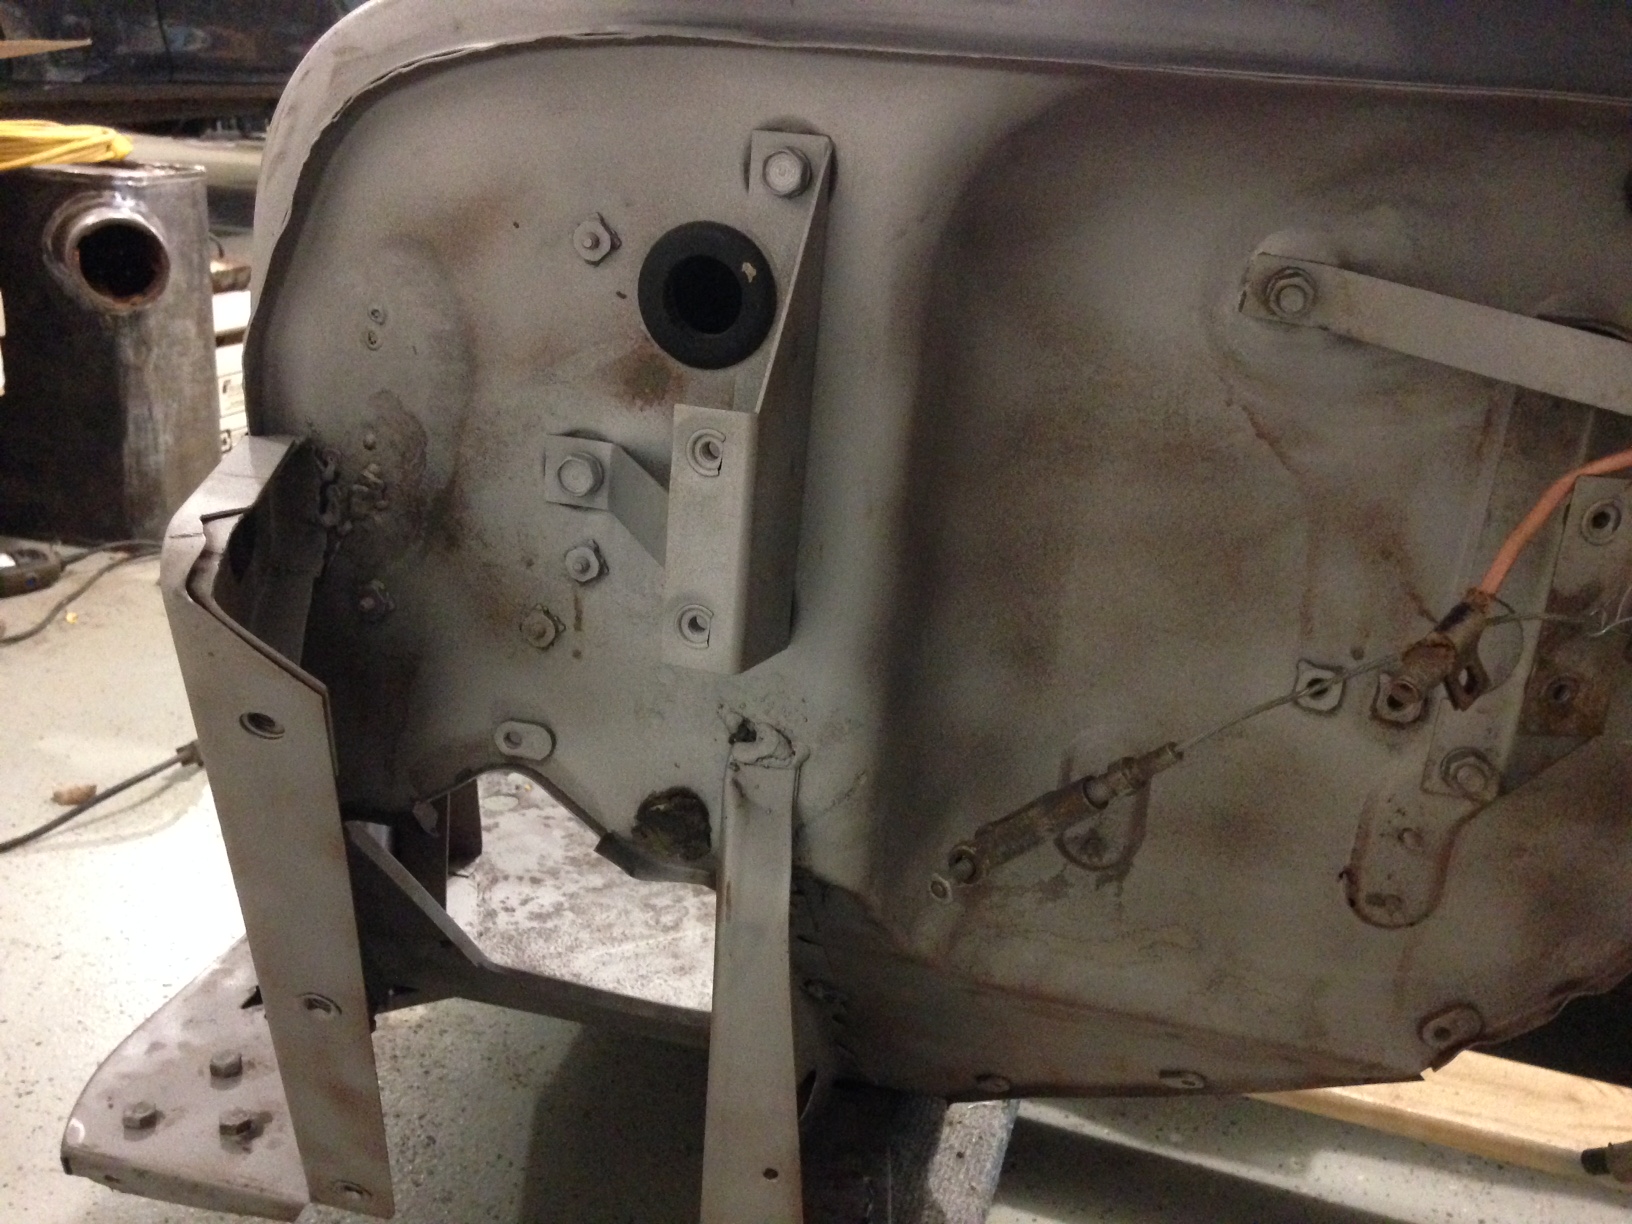
Mocked up in place.
 http://willysmjeeps.com/v2/modules/gall ... .sized.jpg
Need to finish some metal work, then tack in place.
I have a hole where the right top bracket bolt goes, and will use the lower left bracket hole to find the top left hole. Then weld in the 5/16 screws, weld in the 10/24 screws, the left battery box nut, then make it all look nice. Good thing is especially with my skills, is it's all behind the air cleaner and cowl battery box!
Oh, and patch some more Bubba holes......
Posted: Mon Feb 08, 2016 11:07 am
by aforests
Posted: Mon Feb 08, 2016 11:47 am
by wesk
Aaron,
Excellent photos. Would you have a nicely squared full view? Both before and after resto would be nice without any cables or tubes hanging on the front.
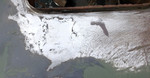
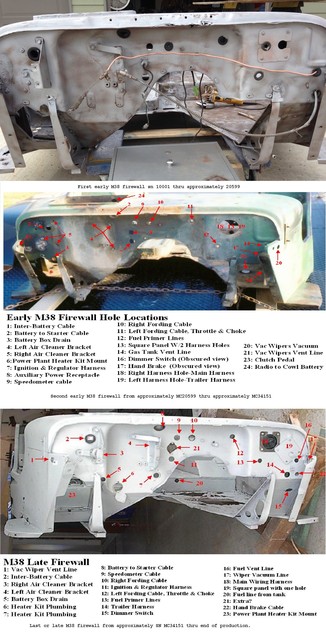
Here's a quickly put together comparison of the early, middle and late M38 firewalls.
Posted: Mon Feb 08, 2016 11:56 am
by aforests
I will get some better pics tonight when I get home.
Aaron
Posted: Mon Feb 08, 2016 12:00 pm
by wesk
Great. Just add them to your album. I can find them there.
Posted: Mon Feb 08, 2016 1:05 pm
by 4x4M38
Great job, Guys!
Thanks for the photos Aaron!
Oh, Man, I still have some more holes to fill.....
Posted: Tue Feb 09, 2016 9:59 am
by aforests
Current photos of my firewall are now uploaded to my photo album for those interested. If you would like hi resolution photos, let me know and I'll email them to you.
Posted: Tue Feb 09, 2016 10:06 am
by 4x4M38
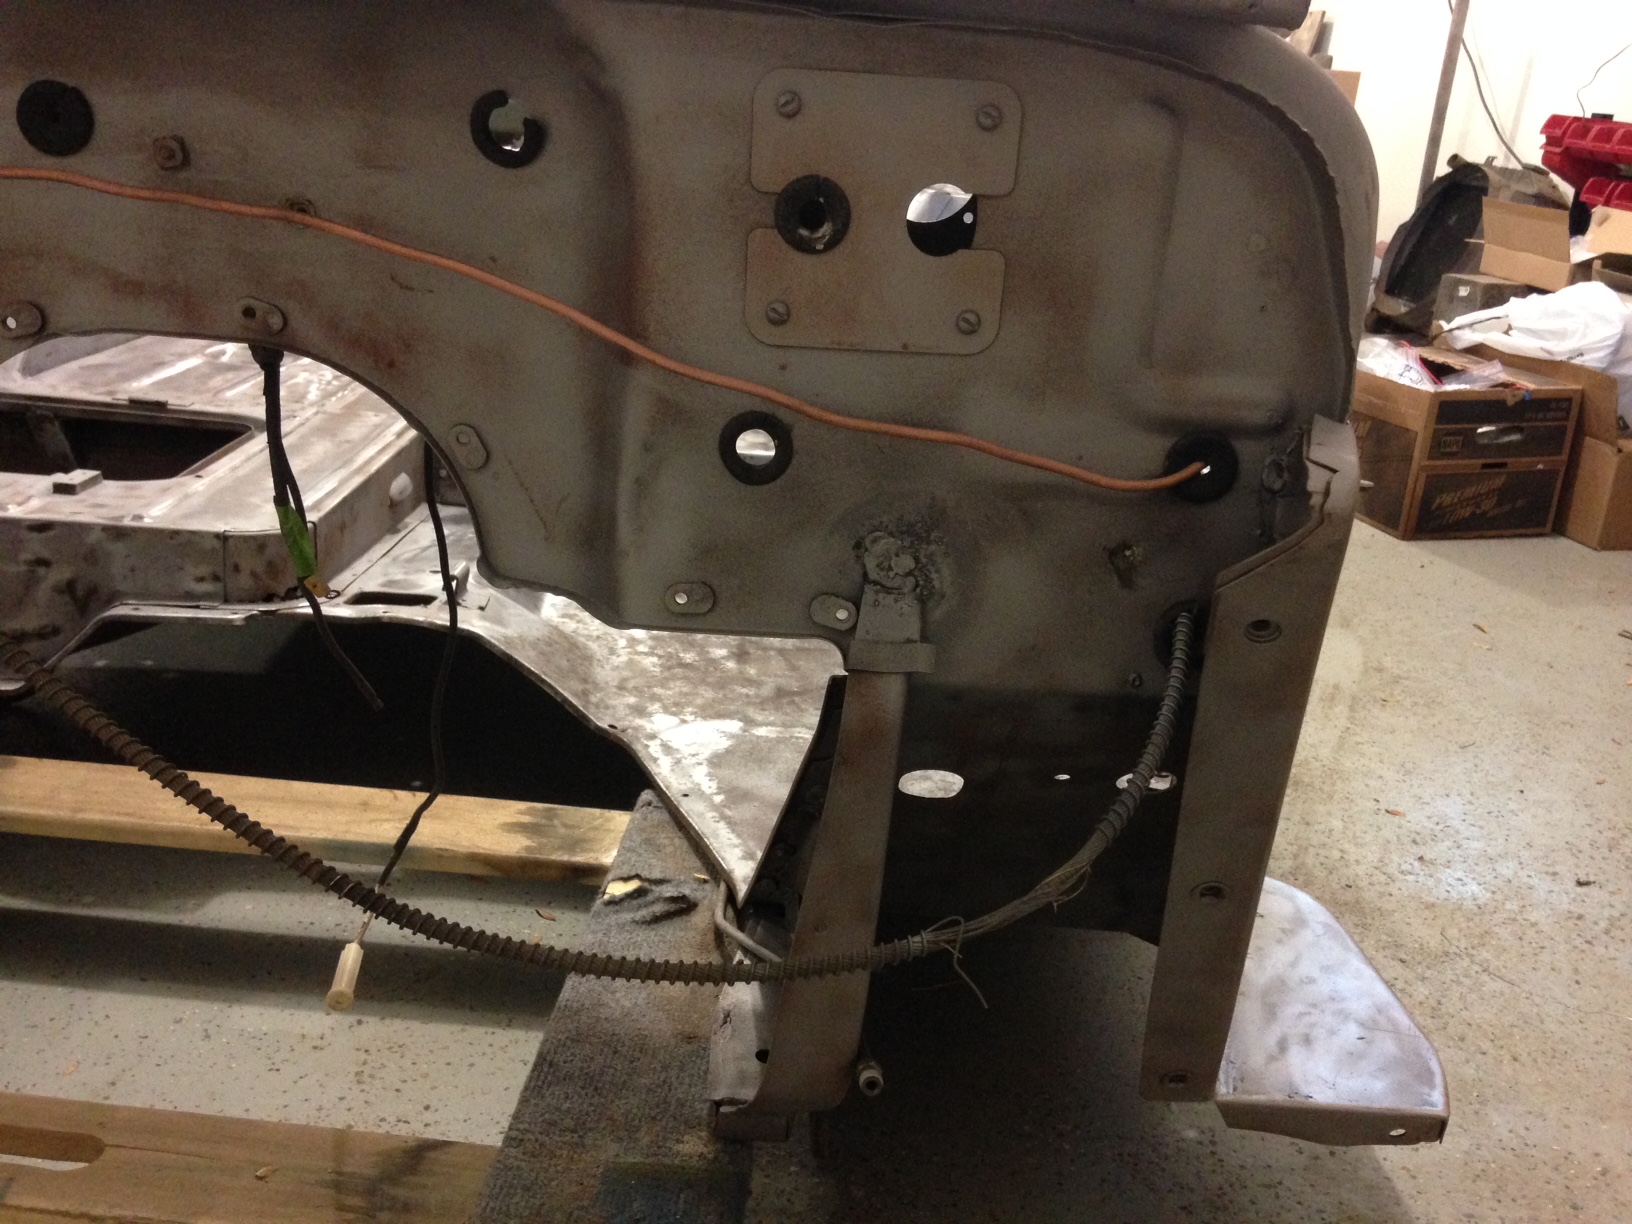
Pic of the patch piece. Still need to add the weld nut for the battery box.
 http://willysmjeeps.com/v2/modules/gall ... .sized.jpg
I would have preferred to patch the holes, but there is literally nothing to weld to. It's paper thin at best.
Before and after. Still have to finish stitching the joints, cleaning up the bubble gum (I'm no welder), and filling a few more Bubba holes. Main thing is the bolts are welded in, and the raised area is straight enough for the air cleaner bracket to sit on.
 http://willysmjeeps.com/v2/modules/gall ... .sized.jpg
Still, looks like progress.
firewall repair
Posted: Tue Mar 15, 2016 3:01 pm
by 4x4M38
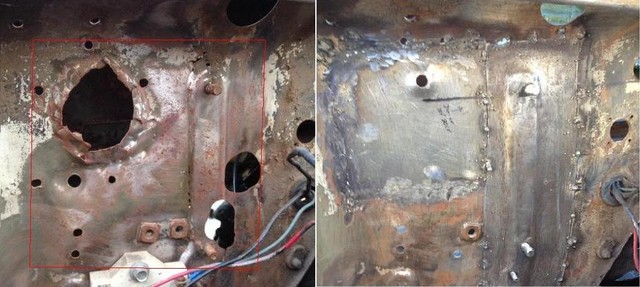
So, before and after. Again, I'm no welder, but I've learned a lot. Good news is most of the ugly will be behind the air cleaner and battery box.
Still, it is movement in the right direction. A big step, as I can now finish cleaning up and repainting under the cowl and back of the firewall, install the cowl battery box, finish the top of the cowl, and most importantly, install the air cleaner! Yay!
http://willysmjeeps.com/v2/modules/gall ... cutout.jpg
 http://willysmjeeps.com/v2/modules/gall ... inted.jpeg
Posted: Tue Mar 15, 2016 7:54 pm
by Saberr
Nice job, Thats a LOT of work. I know so becouse i've had to do a lot of patching on my body as well. Takes a long time to do well.
Posted: Tue Mar 15, 2016 8:31 pm
by aforests
Nice job, looking good!
Posted: Tue Mar 15, 2016 8:45 pm
by 4x4M38
Thanks Guys.


