1 - “ to have someone that actually worked on these and repaired/adjusted them would be interesting.” Ryan
I was about to say, “I’m your huckleberry” but that would be an over the top accomplishment for a New-be. I do intend to tackle some obvious stuff and go as far as prudence allows.
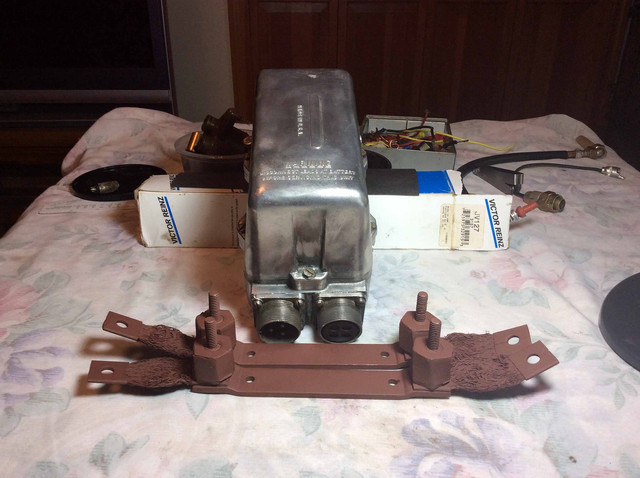
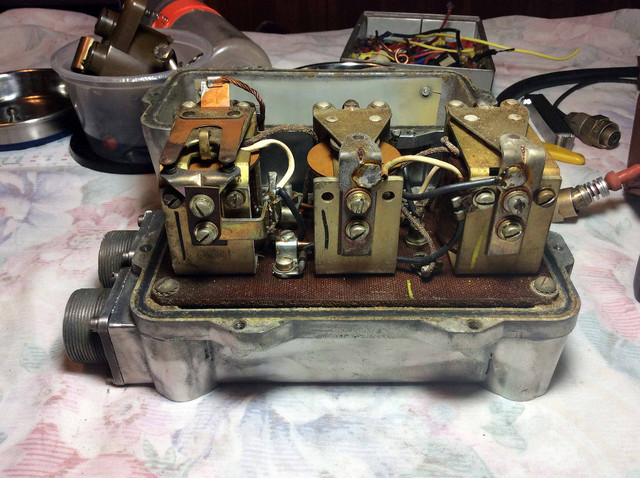
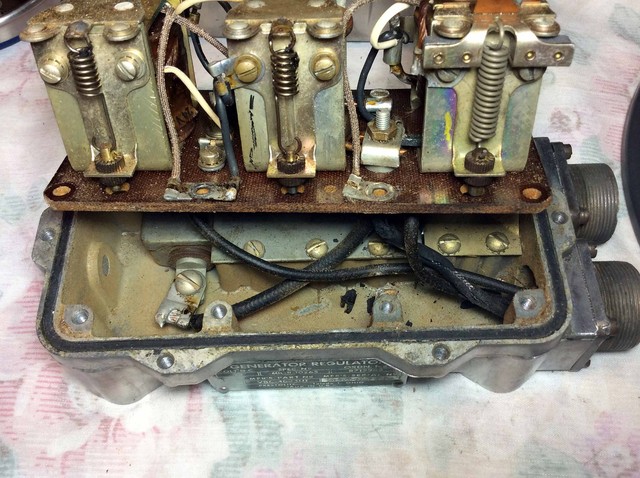
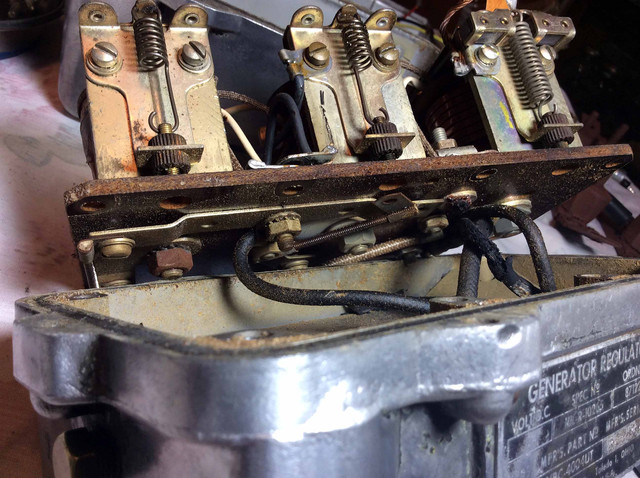
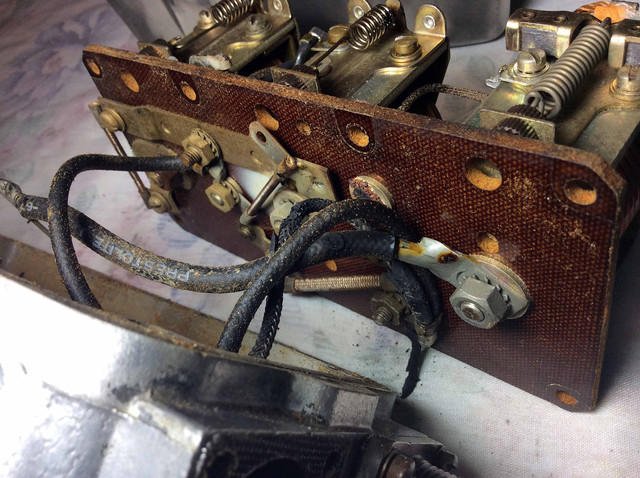
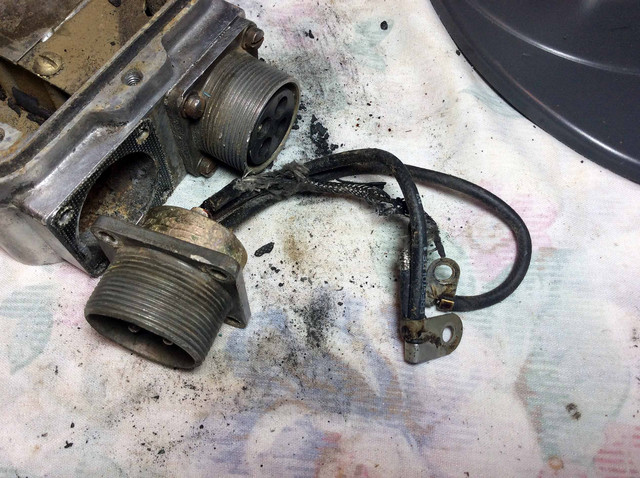
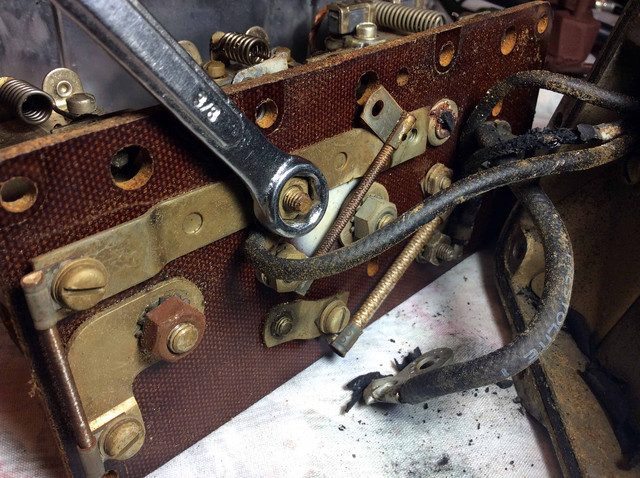
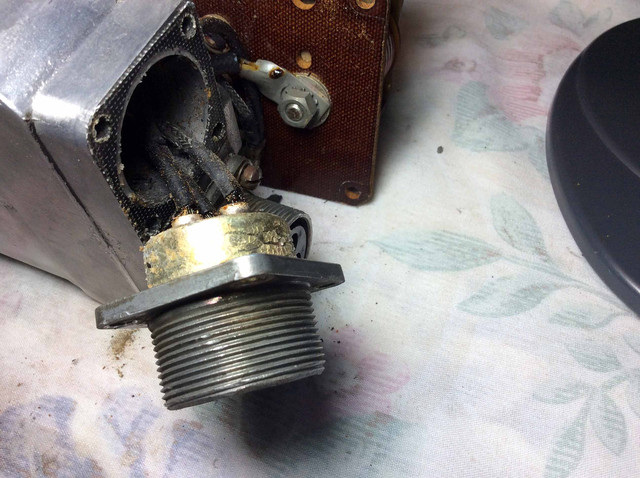
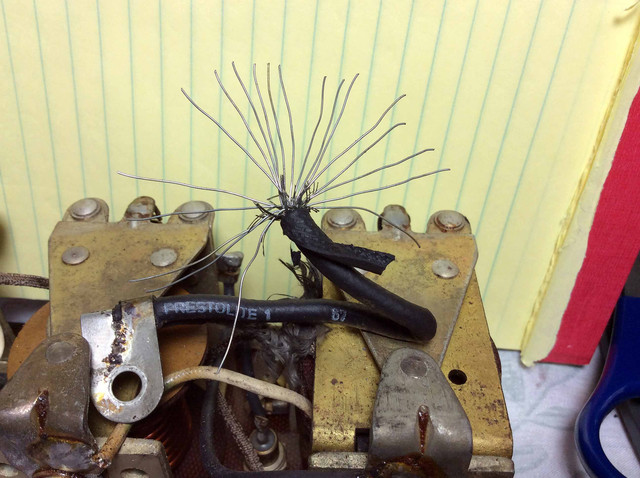
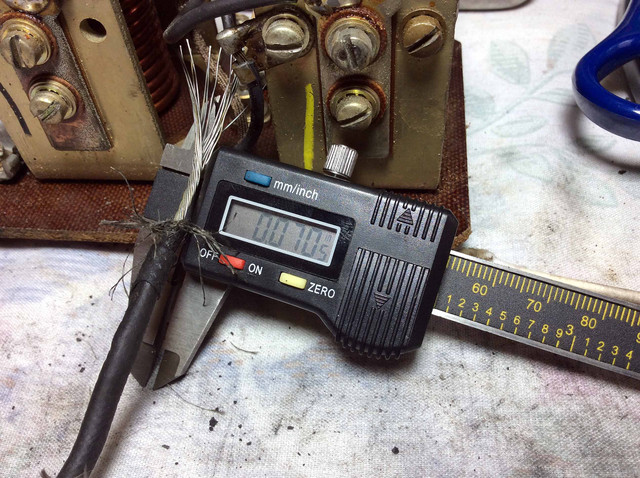
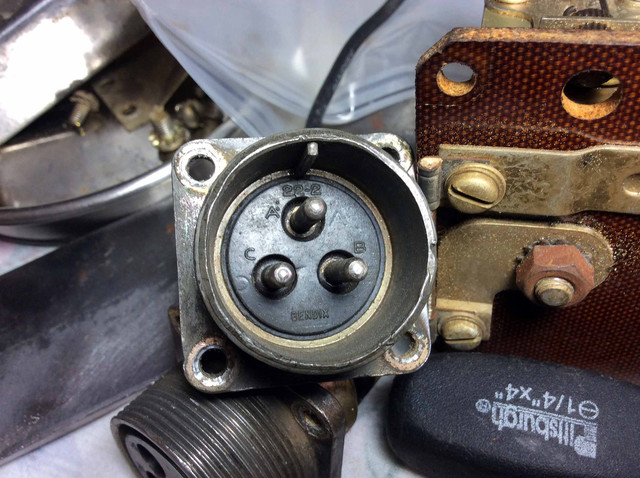
* So first let’s take a look at those fried wires. (See above pics)
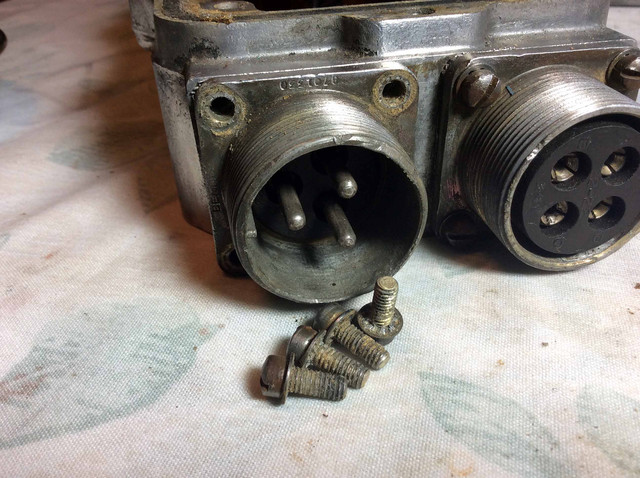
2 - The manual describes a lengthy process that involves removing the three ‘pins’ and grommet..... but is that really necessary? It’s just three burned wires. The ‘plug’ looks OK. So.
1 - I have worked on these regulators since my first 24V M38A1 I purchased in 1986. I worked on their predecessor used in the MB's GPW's since 1971 in my GPW. The important things to make sure you do not get into trouble are:
A - Use the correct manuals. Beg, borrow or steal them but you will not be very successful at repairing/adjusting these heavy voltage regulators without them. In this case TM 9-1825B 1952 Ed., TM 9-1825E 1952 Ed., and the operator's and parts manuals for the applicable vehicle.
B - REMOVE BATTERY CABLE DURING YOUR REPAIR ATTEMPTS. This is especially important during the acts of removing and installing the metal lid. A simple clumsy moment with 24V's can leave you running from the smoke and having one helluva repair bill!!! Only connect the cable when the manual tells you too.
C - The early Prestolite/Autolite civilian service manuals have a ton of info concerning these regulators and they also published excellent training guides so keep your eyes open.
D - There are several very good basic electrical training guides on the shelf. There are super Autolite/Prestolite guides manuals available quite reasonable if you'll just set down and quiz google for a few minutes.
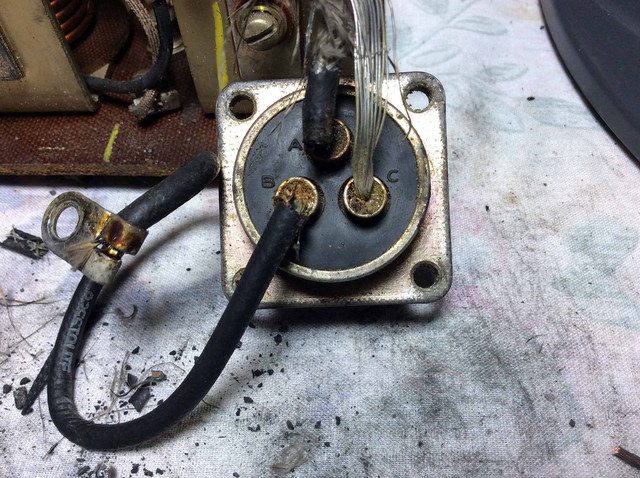
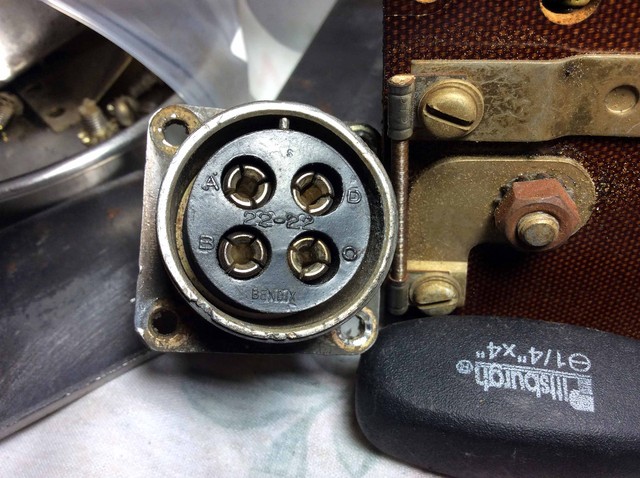
2 - Lesson one in electrical repair. The more you interrupt an electrical wire the poorer it will perform and the more often it will give you grief. Electrical connectors or Cannon Plugs as their usually called are handy devices and if you learn the HOW TO first the doing it becomes easy and quick. It seldom takes me more than 5 or 10 minutes to re-pin a 3 pin cannon plug with the correct tools in front of me. Most of these plugs use either crimp style pins or solder pins. Usually your choice. Remember that selecting a specific wire gauge is the end of the selecting process. The selecting process starts with the wire's environment, materials, run length, allowable voltage drop, and effects of amperage carrying on heat buildup. There are many manuals available dedicated to wire selection entirely. Again, take a moment and let your fingers do the walking. If you haven't noticed yet TM 9-1825E addresses re-pinning these plugs and you can find wire charts in my photo albums.
Try not using the word "MILITARY" when describing your electrical devices to a prospective repair shop. You'd be surprised at how much they really already know about these regulators but many shops just view them as time consuming due to their waterproof construction and special military requirements and thus not that profitable to them. I can assure you they have seen plenty of 24V equipment in big vehicles and emergency vehicles.
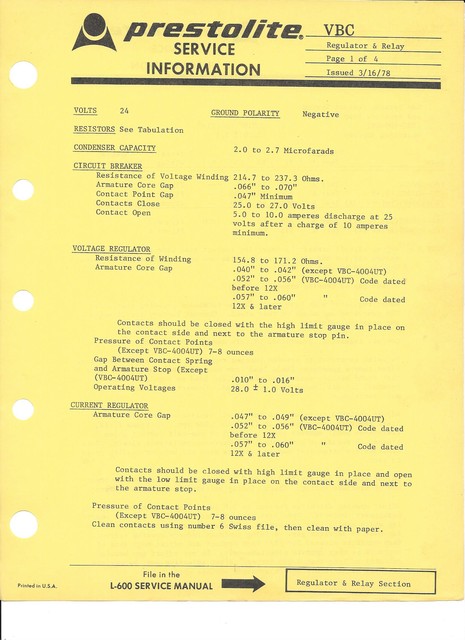
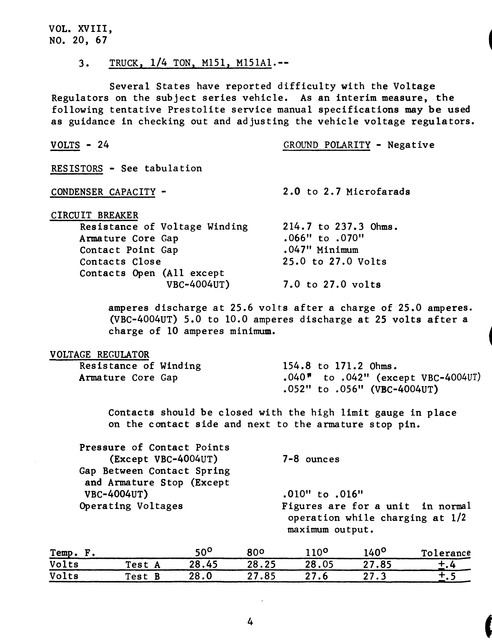
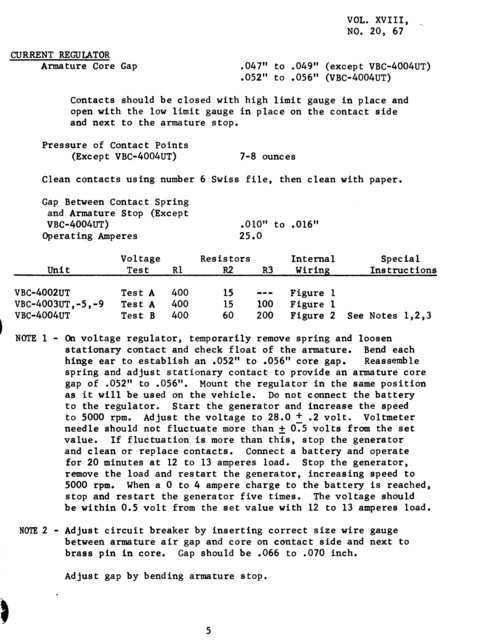
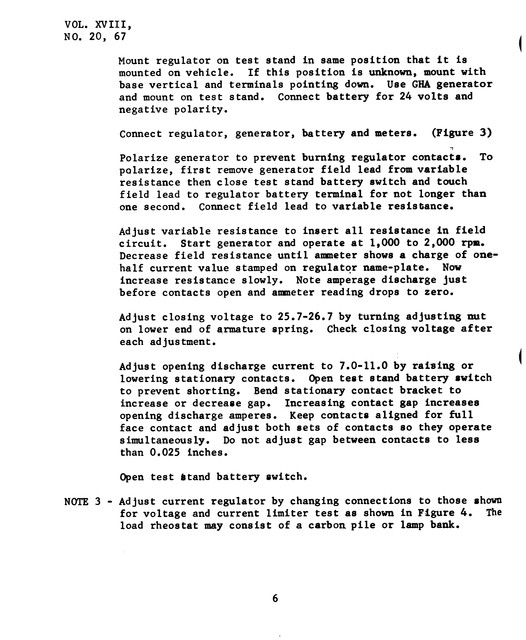
Now I have a tremendous amount of data and pubs available to me but I am still unable to find a documents substitution allowance for the VBC-4004UT to replace the VBC-4002UT and VBC-4003UT regulators. If you review my civilian Prestolite Manual exerpts below you can see that the 4004 differs considerably from the the other two.
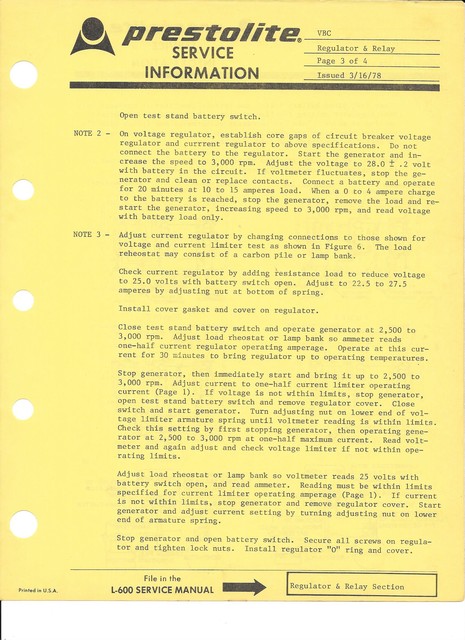
A quick comparison of the white page early 1967 preliminary Prestolite spec sheet with the 11 years later yellow page 1978 edition should make it obvious the superseding 1978 edition should be used today.
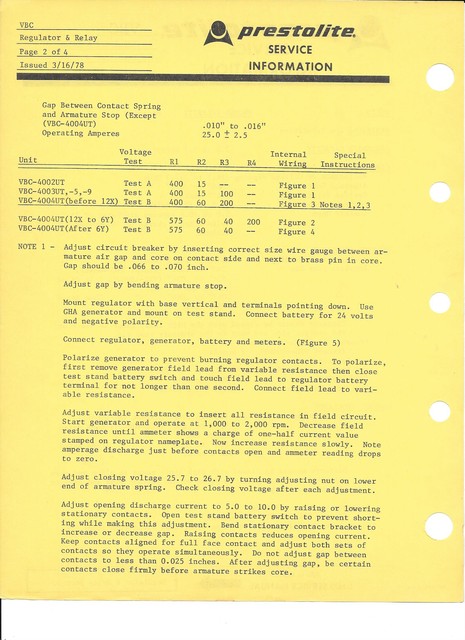
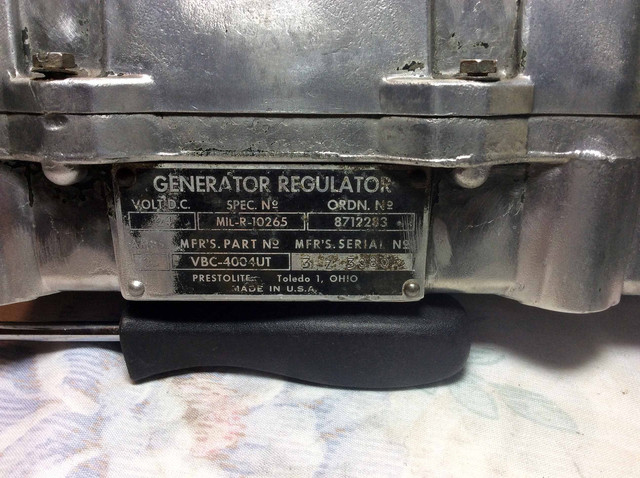
Don, What is the Amp rating on the left side of your regulator's ID plate? Disregard, I chopped it out of your original photo and got it large enough to read:
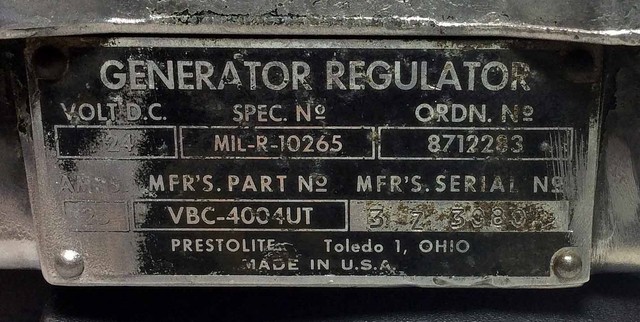
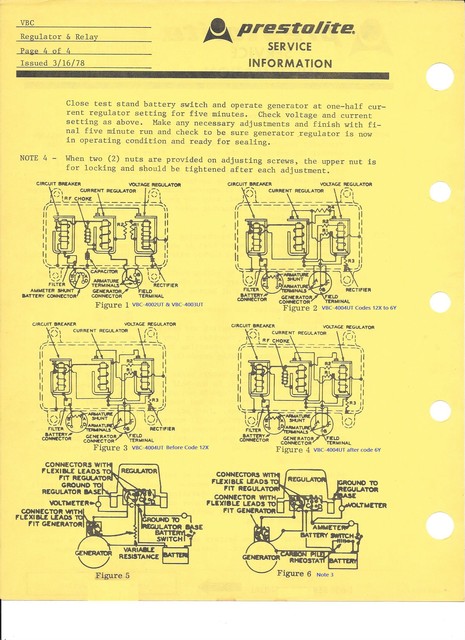
That 3Z serial puts your regulatory as listed on page 2 of the Prestolite spec sheet in the 12X to 6Y group.
![Image]()