Page 1 of 2
Gun rack mounting holes
Posted: Tue Dec 31, 2013 2:04 pm
by Bretto
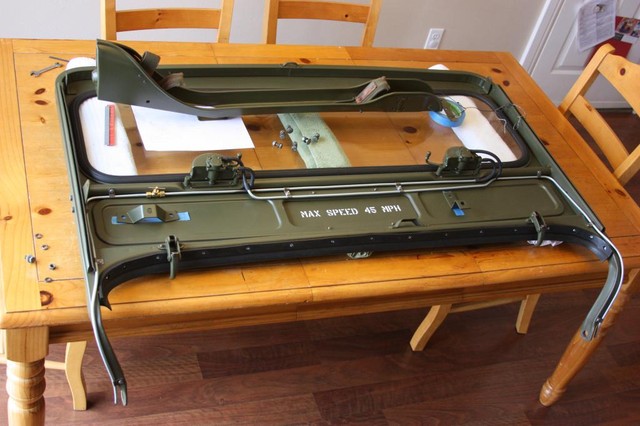
I was graciously offered a great deal on a rifle rack from Oilleaker (John). I am almost to the point of mounting it but some goofnut

welded the holes up on the windshield frame. Does or could someone provide a map and measurement of where the four holes for the center and right brackets are? The pillar holes are still present.
I think however if I weren't able to get what I need, I could mount the brackets to the rack and find the holes that way but it would be nice to have them exactly where they should be.
I also have to say thanks to RickG for the pillar bracket to.

Thanks all,
Brett
Posted: Tue Dec 31, 2013 2:20 pm
by RICKG
Goofnut?? You're bein a little rough on yourself Bro. We all pull
a "DO'H!!" now and then.
I saw the before and after pics of the scabbards and
gotta say "Well Done".
I'll get some prelim coordinates this PM, and with the brackets
on the scabbard you should nail it dead on.
Posted: Tue Dec 31, 2013 5:58 pm
by oilleaker1
If Rick fails you,

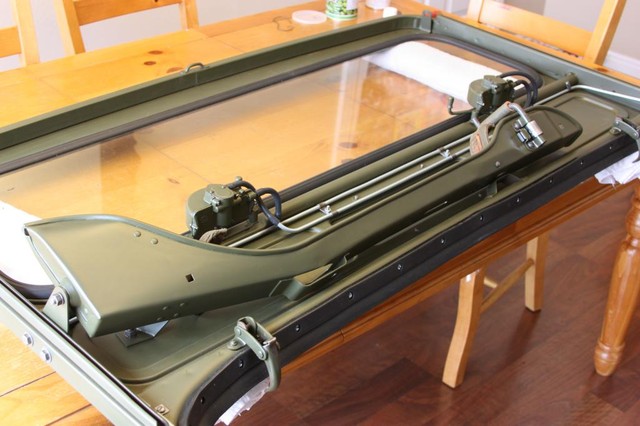
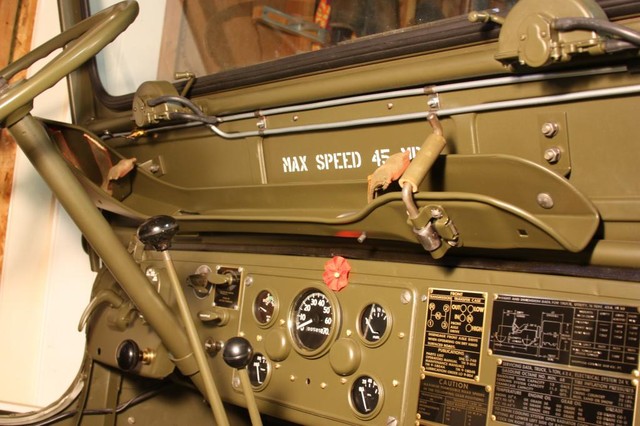
, I can back you up. I doubt you will be left hanging. I too, want to say good job on the racks. If you guys need brought up to speed, Bubba cut the middle of the two rifle racks and turned up the edges and welded a flat metal cap on the top edges. We assume they were to allow a scoped rifle into each rack. They both were then painted fire engine red. YUK!!!!!!!! Anyway they are saved from certain death and brought back to Green Disease specs. A job well done. They sure look good filled up with real M1's! John
Posted: Wed Jan 01, 2014 9:01 am
by Bretto
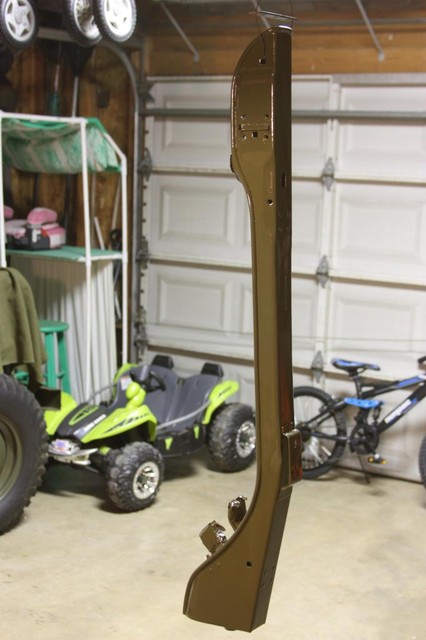
No hurry.
Here is the handy work.

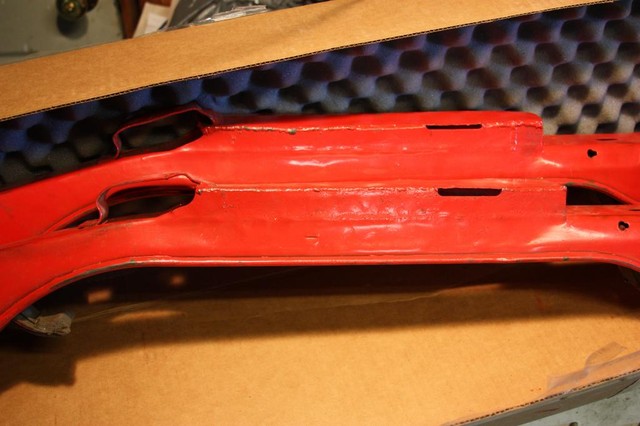
Paint is still wet
Posted: Wed Jan 01, 2014 11:59 am
by RICKG
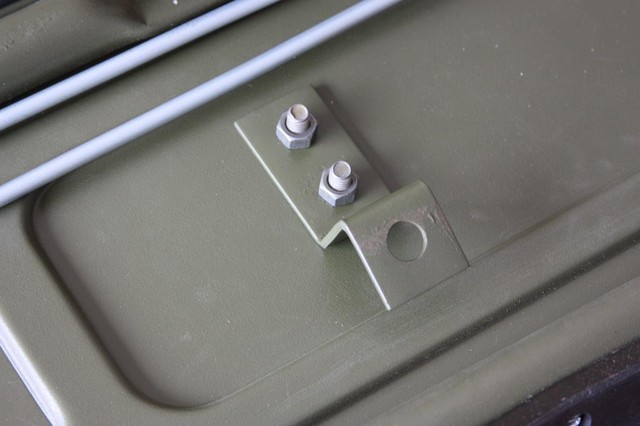
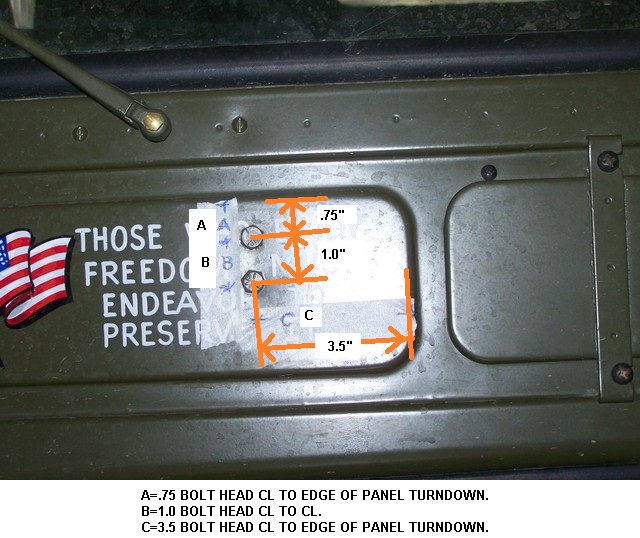
Sorry for the poor fotos.
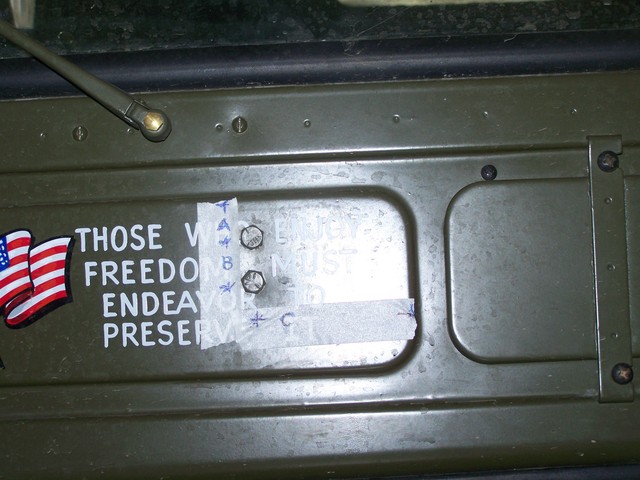
A=.75 BOLT HEAD CL TO EDGE OF PANEL TURNDOWN.
B=1.0 BOLT HEAD CL TO CL.
C=3.5 BOLT HEAD CL TO EDGE OF PANEL TURNDOWN.
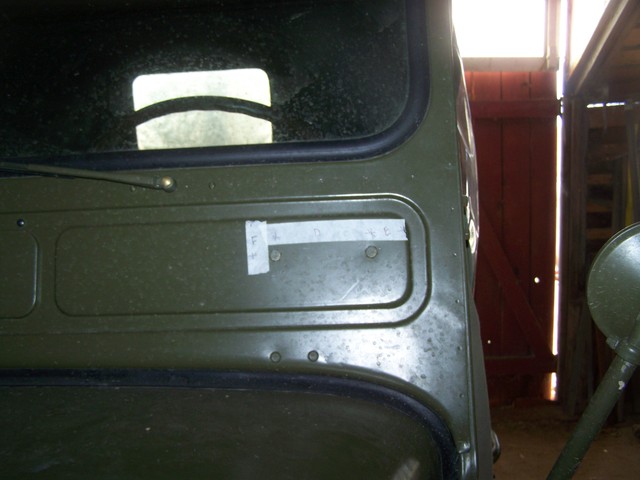
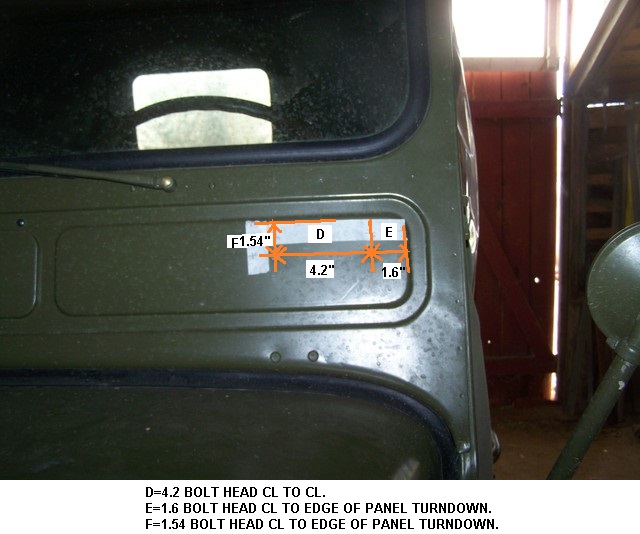
D=4.2 BOLT HEAD CL TO CL.
E=1.6 BOLT HEAD CL TO EDGE OF PANEL TURNDOWN.
F=1.54 BOLT HEAD CL TO EDGE OF PANEL TURNDOWN.
Note to Wes, if you feel these dims will be of benefit to others
feel free to clean them up and post to your frame hole album.
Posted: Wed Jan 01, 2014 12:57 pm
by wesk
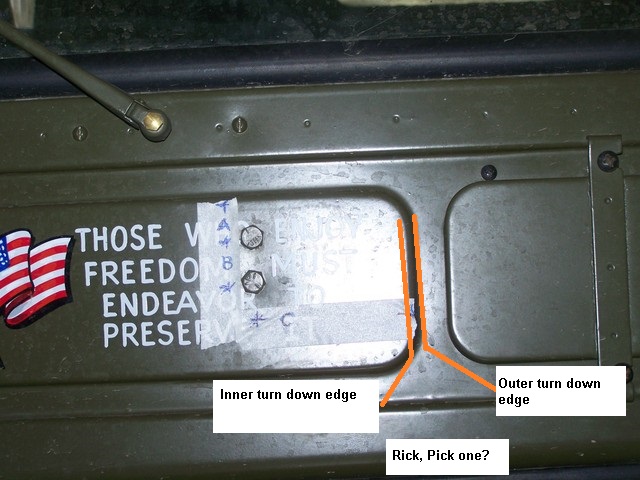
Love to rick but I need an answer to one question first?
Posted: Wed Jan 01, 2014 7:05 pm
by RICKG
That would be INNER turn down edge Wes.
Posted: Wed Jan 01, 2014 7:44 pm
by Bretto
Thanks buddy!
Posted: Wed Jan 01, 2014 10:41 pm
by wesk
There you go!
Posted: Thu Jan 02, 2014 8:22 am
by Bretto
Excellent collaboration. Good to see these were added in your technical vault of pics Wes.
Posted: Tue Jan 07, 2014 6:39 pm
by Bretto
Posted: Wed Jan 08, 2014 12:52 am
by evanso1975
Great job!
Posted: Wed Jan 08, 2014 12:58 am
by wesk
Nice work. Interesting how the different lighting changes the paint color from green/grayish to brown/olivish.
Posted: Wed Jan 08, 2014 8:30 am
by RICKG
NICE!! Stay tuned for Bretto's next project:
From scratch fabrication of Carbine, Cal 30, M-1..
Posted: Wed Jan 08, 2014 10:00 am
by Bretto
Im not that good.