Page 1 of 1
FRONT BLACKOUT LIGHT
Posted: Fri Oct 03, 2014 12:03 am
by kilroy583
DOES ANYONE KNOW IF IT IS POSSIBLE TO CHANGE THE FRONT BLACKOUT LIGHT TO A SERVICE/TURN INDICATOR OR JUST A TURN INDICATOR? I ADDED THE EXTRA WIRES BUT I ONLY HAVE ONE WIRE FROM THE ORIGINAL BLACKOUT LIGHT. IT IS EASY TO FIND THE REPLACEMENT LENSE BUT CANT SEEM TO FIND INTERNAL PARTS.
THANK YOU FOR ANY INPUT
Posted: Fri Oct 03, 2014 6:44 am
by Bretto
Anything is possible but it would be a custom job. I assume you are you talking about the grill markers. I did it it to mine but you'll have to replace the guts with a 2 conductor socket if you want dual function. I just got them at the local autoparts shop. If you are still setup with 24v, it might be hard to find dual filament bulbs. If you dig thru my photopage link, you can see how I did it.
Brett
turn signal
Posted: Fri Oct 03, 2014 5:06 pm
by timjuhl
I replaced the innards with a unit modified from a back up light socket
http://shop.advanceautoparts.com/p/bwd- ... amp+socket#
I bent the ears over and drilled them to allow the unit to be mounted inside the base of the blackout lamp.
For the lens, I simply removed the blackout mask (leaving a clear lens) and used an amber bulb. I now have both turn signals and running lights.
Tim
Posted: Sun Oct 05, 2014 9:21 pm
by kilroy583
Thank you very much Tim and Brett! I had some ideas but not like yours which I like better, great pics. I now have a plan and the info I needed.
by the way nice jeep.
Chris
Posted: Thu Oct 30, 2014 11:31 pm
by kilroy583
So if anyone is wondering how to do this without loosing your front blackout lights and keeping the 24v system take a look at the pictures I posted in the photo gallery section. I did not want to trash my blackout lights. Bought a (Bay 15D socket,1157 lamp dual element 24 volt military lamp and a flat amber replacement lens for a car) on e-bay. I had purchased two extra blackout lights for this project.
I cut two flat sections out of the amber lens that fit into the blackout light cover.The lens I purchased had enough flat area to cut out two pieces.
I removed the existing military lamp socket drilled out the mounting bracket a little larger and soldered the new (Bay15D) socket in place. All the original interior parts were used except for the socket. There are multiple ways to do this. This is just how mine was done.
Then I soldered the new military spec wires to the wires of the new socket used heat shrink tubing on the splice. Drilled out the rubber grommet a little so the two wires would fit and exit out the back of the blackout light. you can see the order in which I assembled the parts. the clear lens was used to help keep the amber lens in place.
next I fabricated a bracket so I could mount this light under my fender out of view but visible when energized in the turn signal mode or service/running light mode. the bracket was bolted to the fender using the existing center bolt which bolts the fender to the grill. The tire will not hit the blackout light while turning or flexing up when bumps in the road are encountered.
I hope this helped some of you or at least helped with some ideas of you own. Pictures are in my photo gallery.
Chris
Posted: Fri Oct 31, 2014 8:09 am
by wesk
They look very good. One correction the bulb would have been the 28 V 1662 not the 12V 1157..

#1662 Miniature Bulb Bay15d Base 28VDC Candle Power 6 low & 32 high.
From a safety and visibility standpoint I believe the M151 lens would have been a better choice.
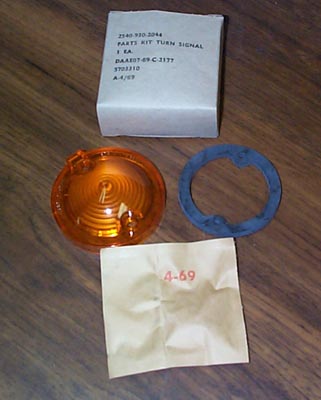
Saturn sells the lens kit for $8.50.
Posted: Fri Oct 31, 2014 9:38 pm
by kilroy583
Wes,
Do you have a web page address for Saturn?
Posted: Fri Oct 31, 2014 9:54 pm
by Bretto